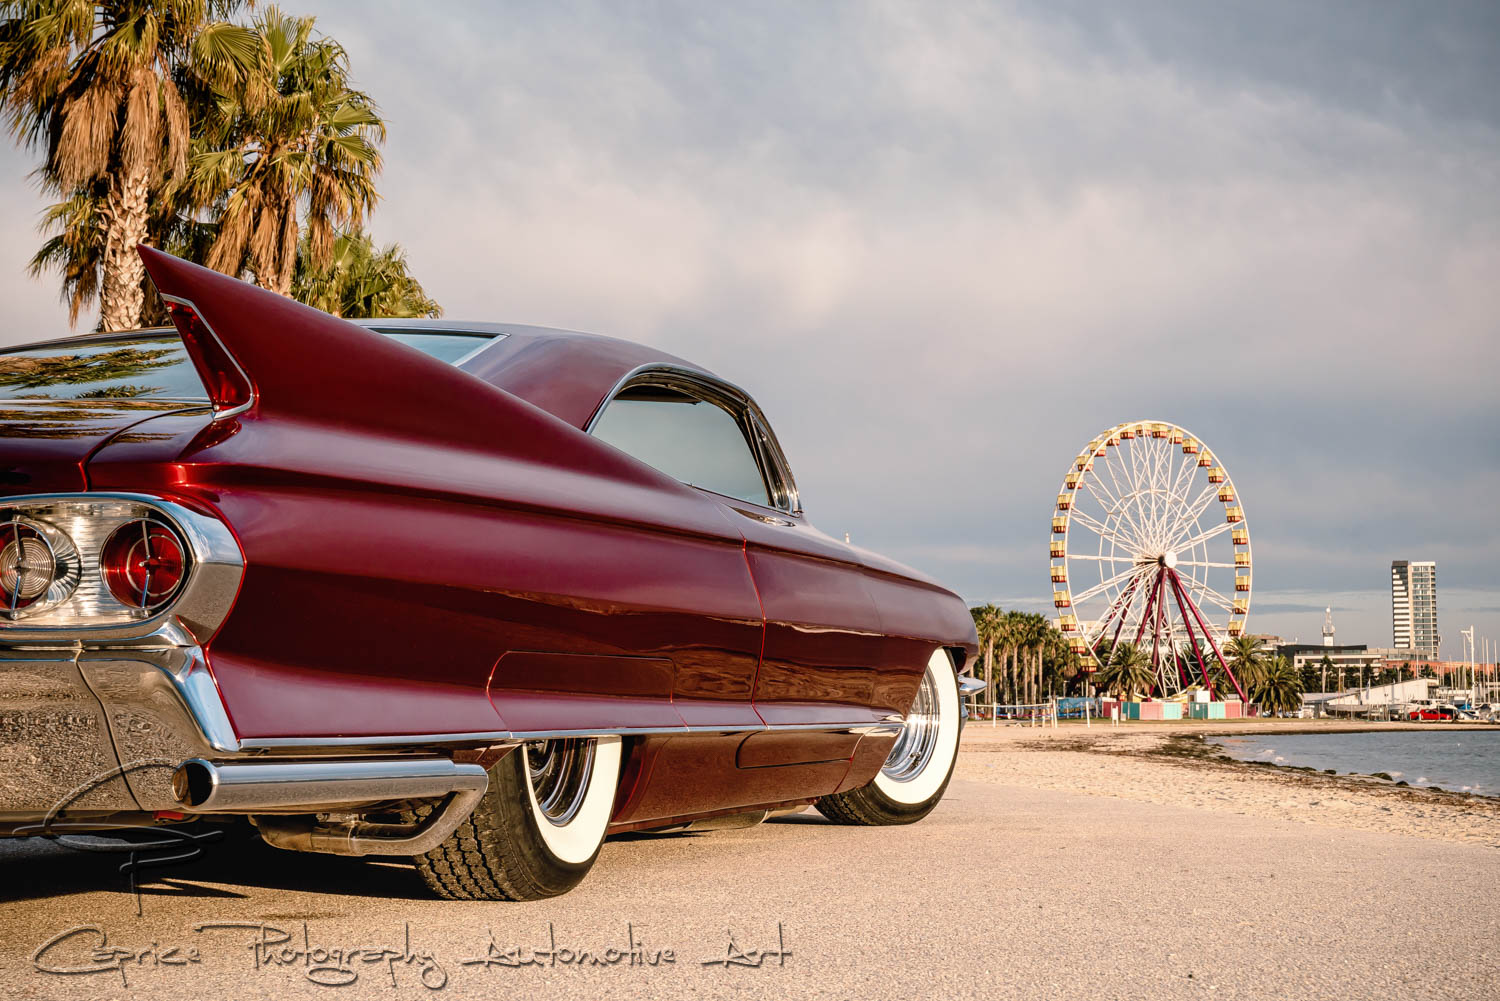
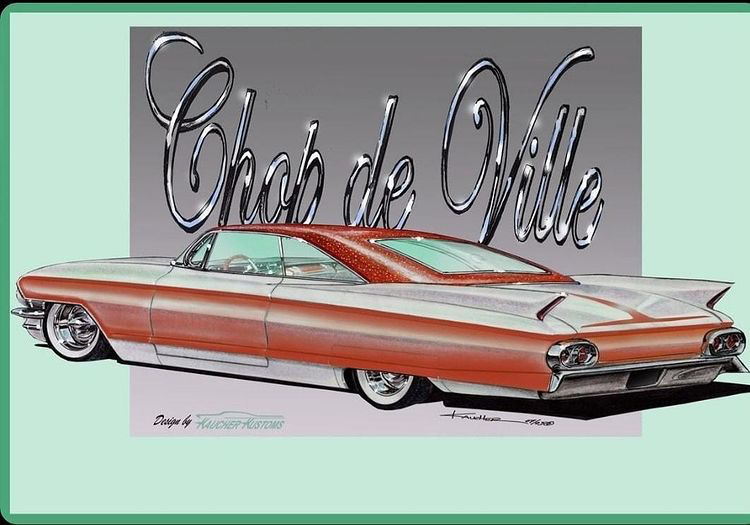
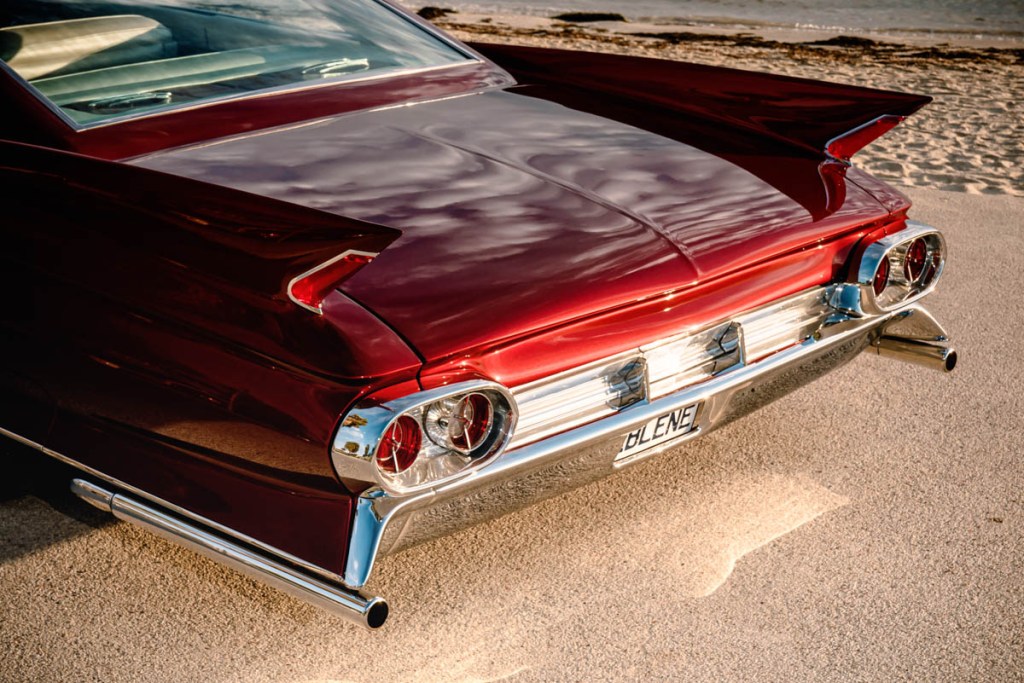
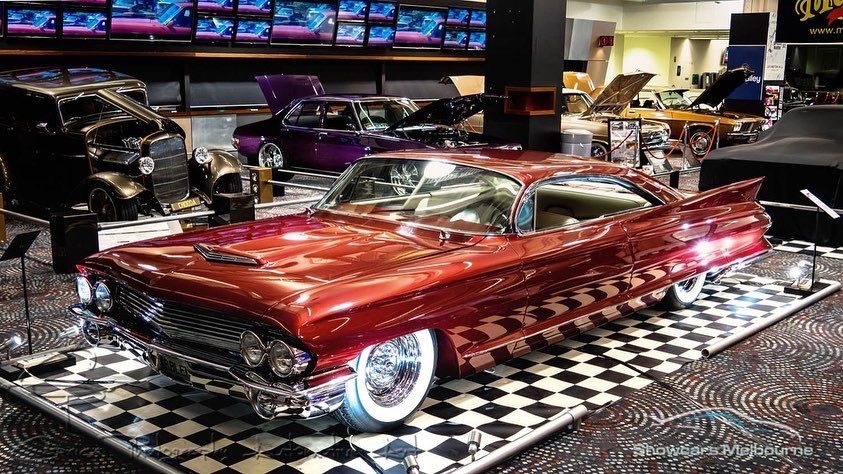
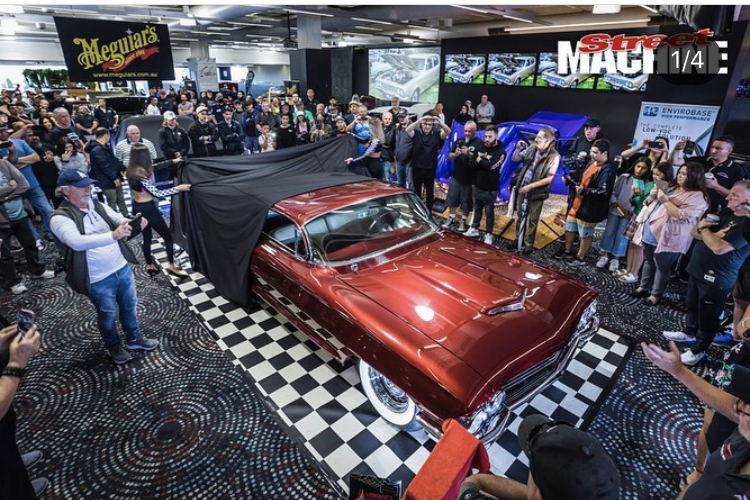
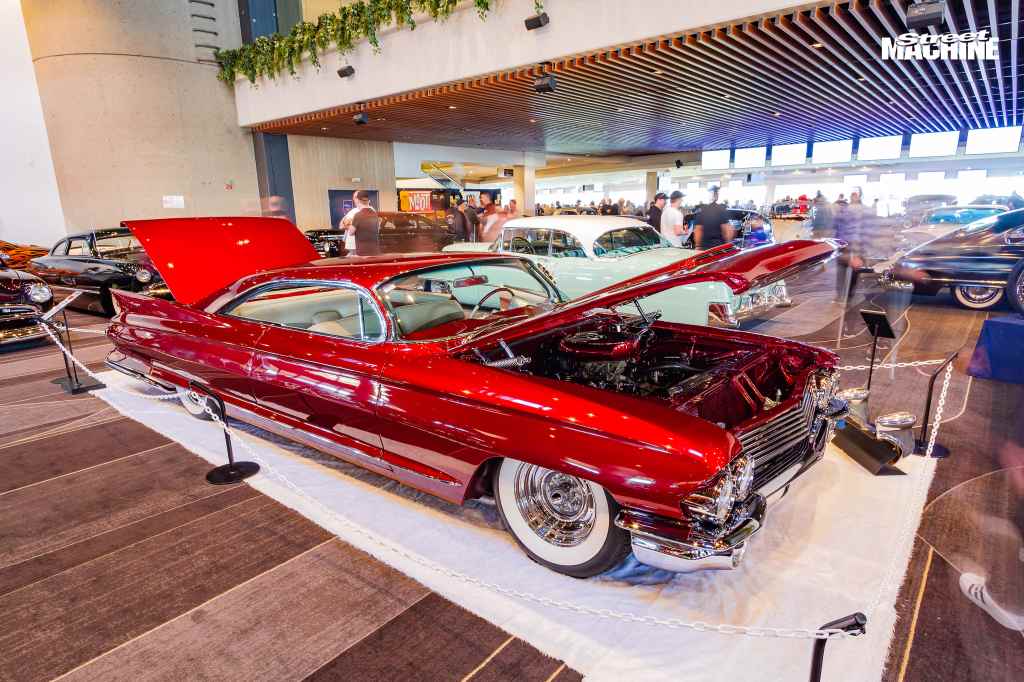
 A 60s kustom ticking all the right boxes!
The Journey of Rebelene: From Dream to Reality
Introduction
Join us on an exciting journey as we delve into the creation of Rebelene, a unique automotive project that combines passion, craftsmanship, and the thrill of turning dreams into reality. From our adventures in America to the painstaking process of building this remarkable car, this article offers a glimpse into the world of transport enthusiasts and their pursuit of automotive excellence.


Part 1: Exploring LA and Detroit
In our pursuit of automotive inspiration, a group of us embarked on a thrilling adventure across America, visiting iconic cities such as Los Angeles and Detroit. Our mission was simple: soak in the excitement of auto shows, explore museums, and immerse ourselves in the vibrant car culture that defined these cities. With limited time on our hands, we were determined to make the most of every moment.

Part 2: Discovering Hollywood Hotrods
While in LA, we stumbled upon a hidden gem called Hollywood Hotrods in Burbank, California. Intrigued by their reputation for crafting extraordinary rides, we eagerly added it to our itinerary. However, fate had a different plan, as we arrived on a Monday only to find the place closed. Fortunately, next door, we stumbled upon Old Crow Speed Shop, a fascinating establishment filled with classic cars in various stages of restoration.

Part 3: Unveiling Hollywood Hotrods
Undeterred by our initial setback, we returned to Hollywood Hotrods the following day, and Troy and Jim graciously welcomed us into their world. Stepping into their workshop, we were enveloped in the symphony of grinding, banging, and welding, as skilled craftsmen breathed life into custom classics and retro rods. The intoxicating scent of hot metal and vintage cars filled the air as we marveled at the meticulous attention to detail and the array of modifications being performed.
Part 4: A Chance Encounter with a Chopped Classic
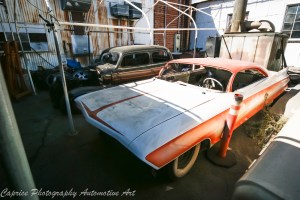
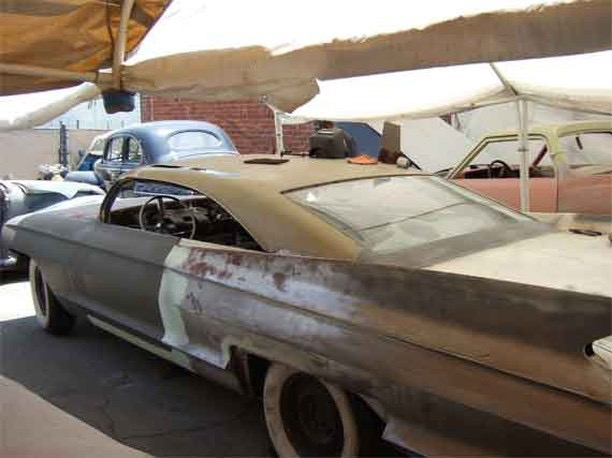
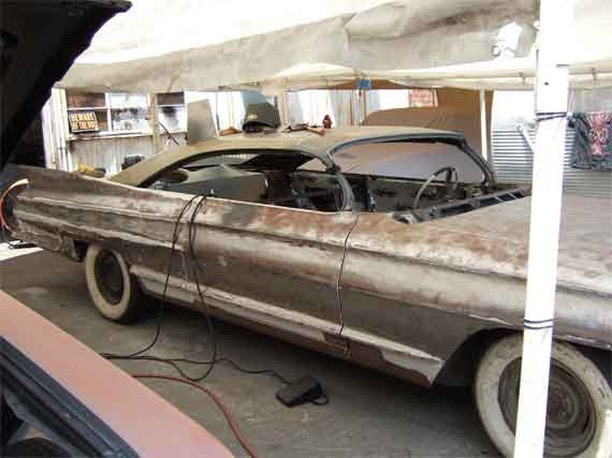
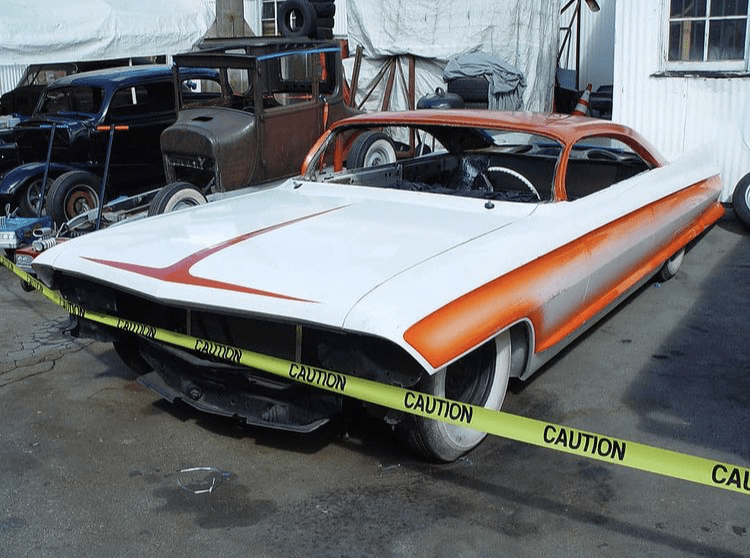
As we explored the workshop, I ventured out to the back, always in search of hidden treasures. And there, amidst the unfinished projects, a striking sixties classic caught my eye. The meticulously chopped roof and vibrant orange and white paint job instantly captivated me. Little did I know that a casual remark to my friend Daryl would plant the seed of possibility in my mind. He suggested that I should be the one to bring this beauty to completion, and suddenly, my imagination soared.
Part 5: Sealing the Deal
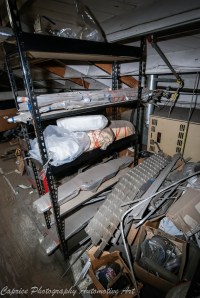
Intrigued by the unfinished project’s potential, I returned to examine it more closely. The foundation was there: a cool sixties car, a chopped roof from a later Bonneville, and a stroked small-block Chevy engine that promised power. Troy informed us that all the necessary chrome work, trim, and interior parts were conveniently stored upstairs. Inspired by the possibilities, we struck a deal with Troy and Jim — if they could arrange a demonstration of the car’s running engine, we would commit to the purchase.
Part 6: The Moment of Decision
After our return from Detroit, we eagerly headed to Troy’s workshop, where they fired up the engine, filling the air with a fierce growl. The deal was sealed. Excitement filled our hearts as we embarked on the next phase of this extraordinary project. Back home, I began acquiring the required parts and arranging for a custom windshield to complement the chopped design. With the invaluable assistance of Jim and Troy, various boxes of parts were carefully packed and prepared for shipping.
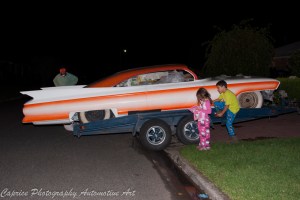
Part 7: Unveiling Rebelene
Months later, in February, the moment of truth arrived. The long-awaited shipment from America landed on our shores, and we wasted no time unloading the treasure. Maneuvering the large, low-slung car onto the trailer was no easy feat, requiring creative leveling techniques and the aid of a forklift. Nevertheless, we succeeded, and as we towed Rebelene into the shed, anticipation filled the air.


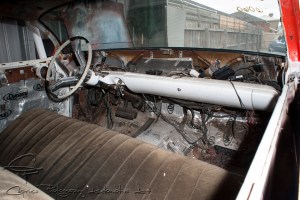
Part 8: A Dream Becomes Reality
In the dimly lit confines of the shed, we unpacked the boxes and meticulously inspected each component. The 1960 Impala dash that I had chosen to install, the chrome parts, the tubes, and all the other carefully curated elements were there, just as the team at Hollywood Hotrods had promised. The excitement surged through me as I realized that what I had envisioned was finally taking shape. Now, the real work would begin: building and completing Rebelene.
Conclusion
As the story of Rebelene unfolds, we invite you to join us on this remarkable journey. Through regular updates and blog posts, we will document the progress, challenges, and triumphs of this unique automotive project. Stay tuned and become part of the adventure as we transform a dream into a magnificent reality. After all, bringing back this extraordinary souvenir from our holiday was just the beginning of an unforgettable chapter in the life of Rebelene.
Keep on cruisin’
Cheers,
Greg
UPDATE 25TH OF AUGUST, 2014
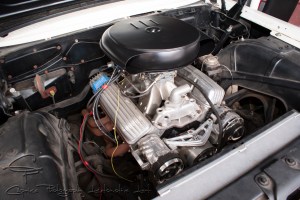
With the chassis cleaned, repaired, and freshly painted, it was time to move on to the next phase of the project. I focused my attention on the engine bay, as I wanted to create a clean and polished look to match the sleekness of the car.
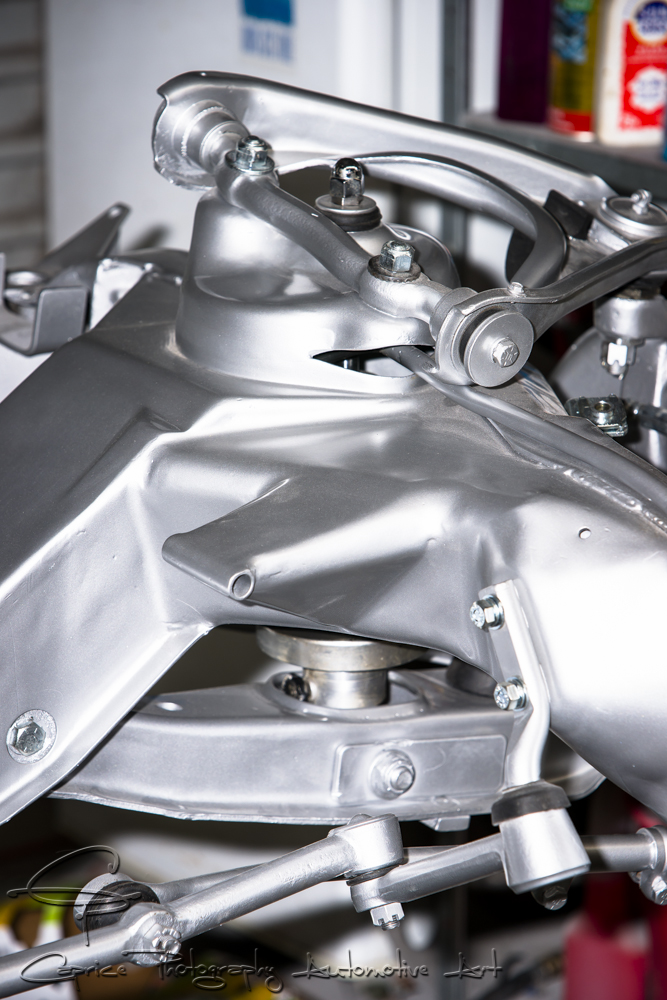
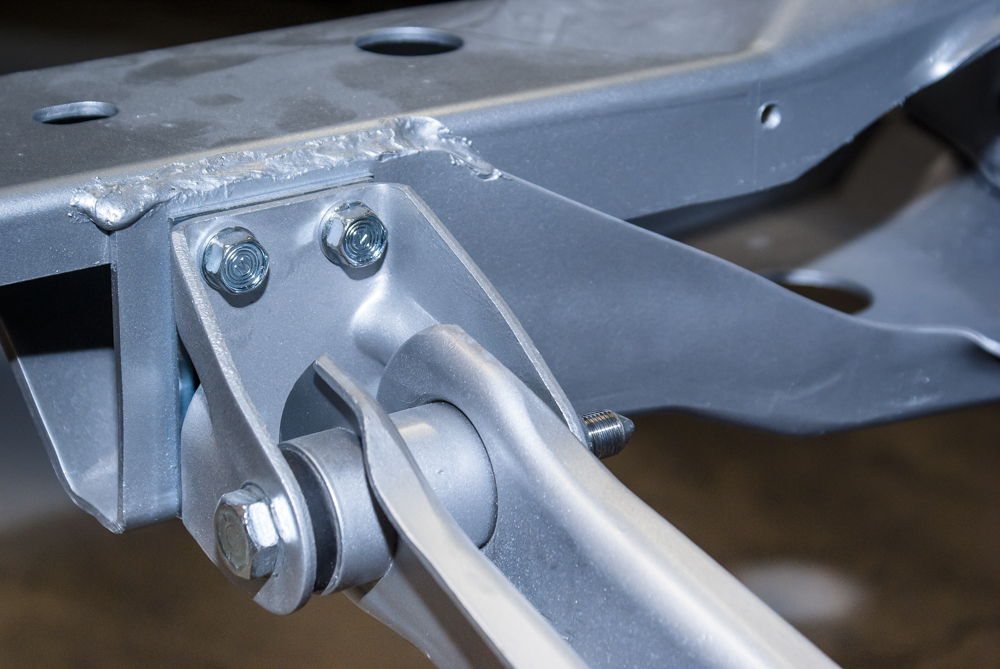
Since I decided to go with a small block Chevy engine instead of the original Cadillac motor, I had to make extensive modifications to the engine mounts. Thankfully, these modifications had been done in America before I purchased the car, but I wanted to refine them further. I boxed the mounts to blend them seamlessly into the chassis, giving the engine bay a smoother appearance. I also took the opportunity to smooth out any visible welds and box up additional braces for both aesthetics and ease of cleaning.
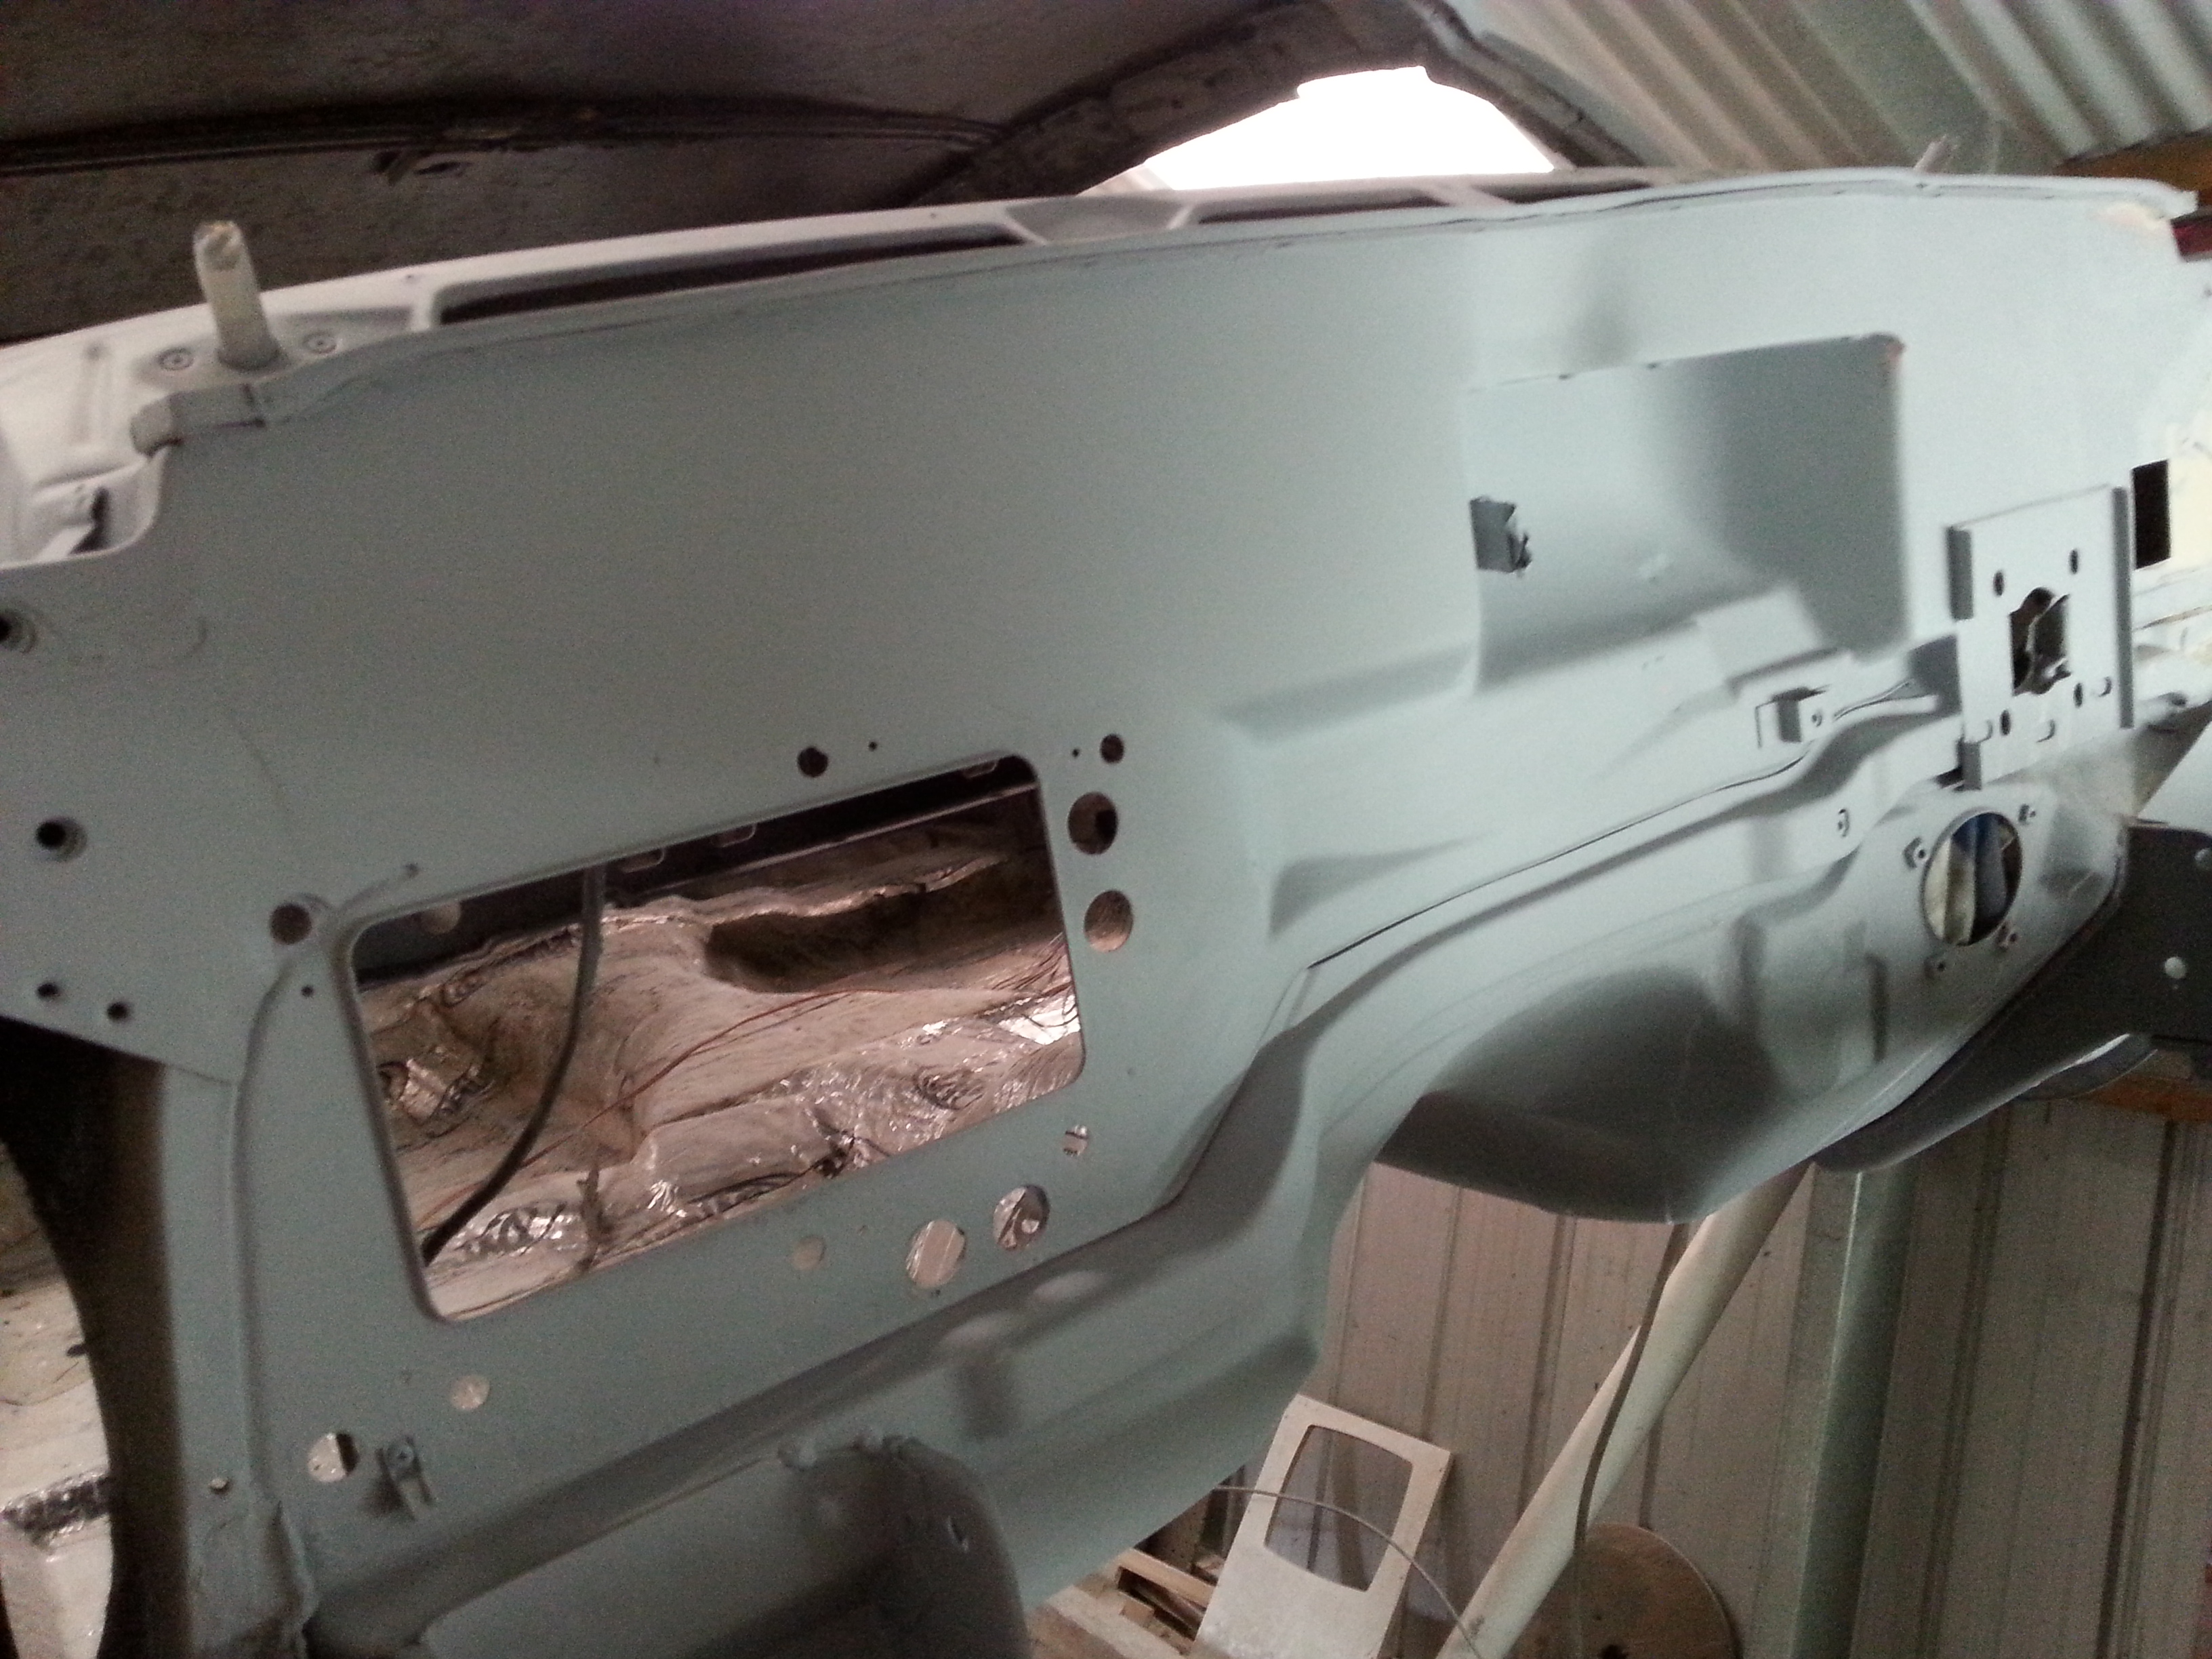
Moving on to the firewall, I wanted to achieve a seamless and tidy look. I filled in the various access panels and removed the overhanging lip above the wiper motor cavity. The heater box also needed attention, as it had a strangely placed temperature controller on the outside. I relocated it to the inside and replaced the vacuum-operated heater flap with an actuator, allowing me to eliminate the vacuum server. To further enhance the firewall’s appearance, I filled in the seam running across it.
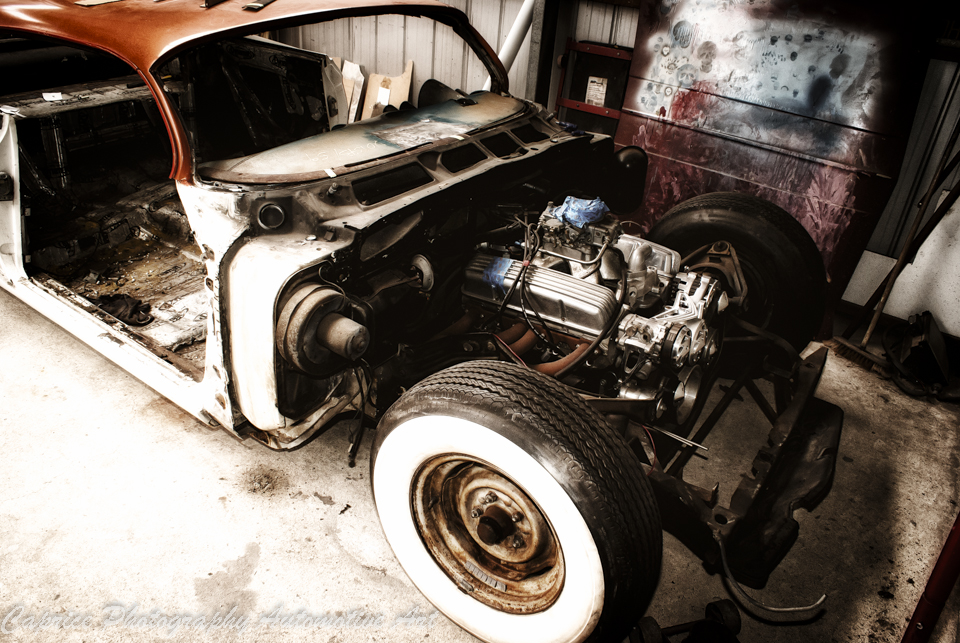
December 2015
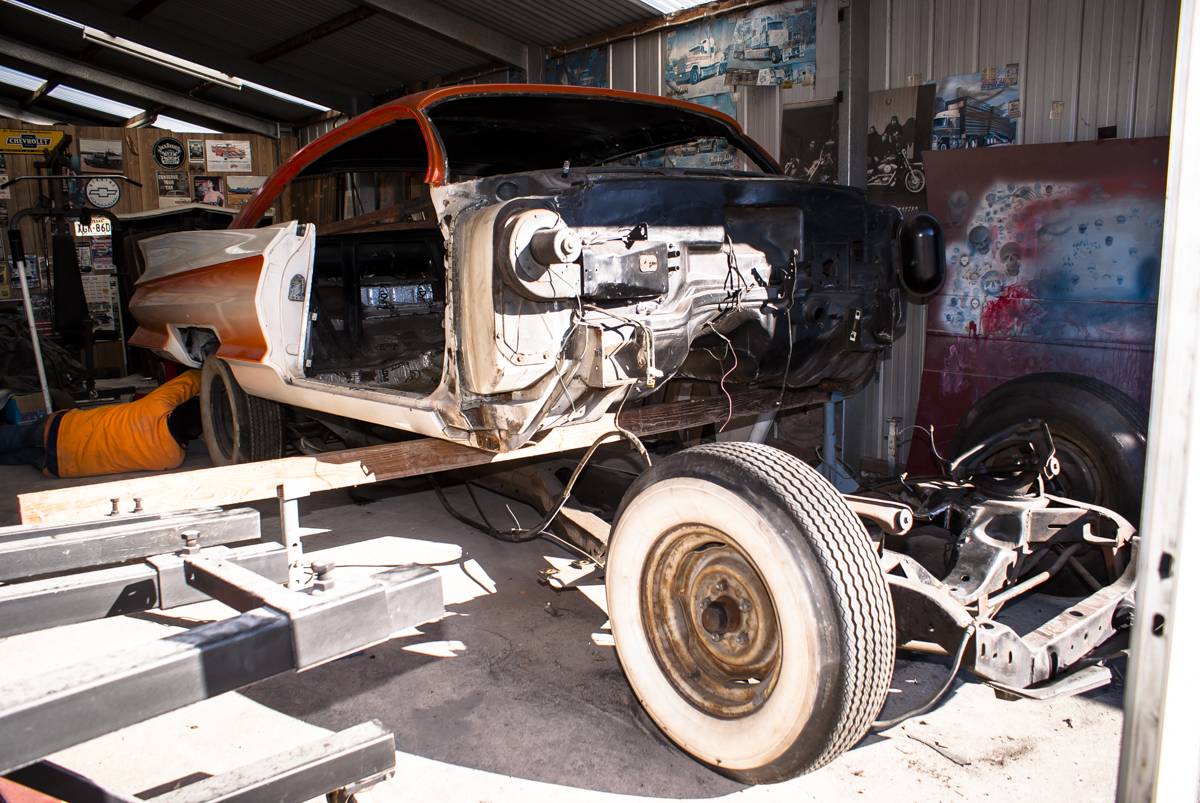
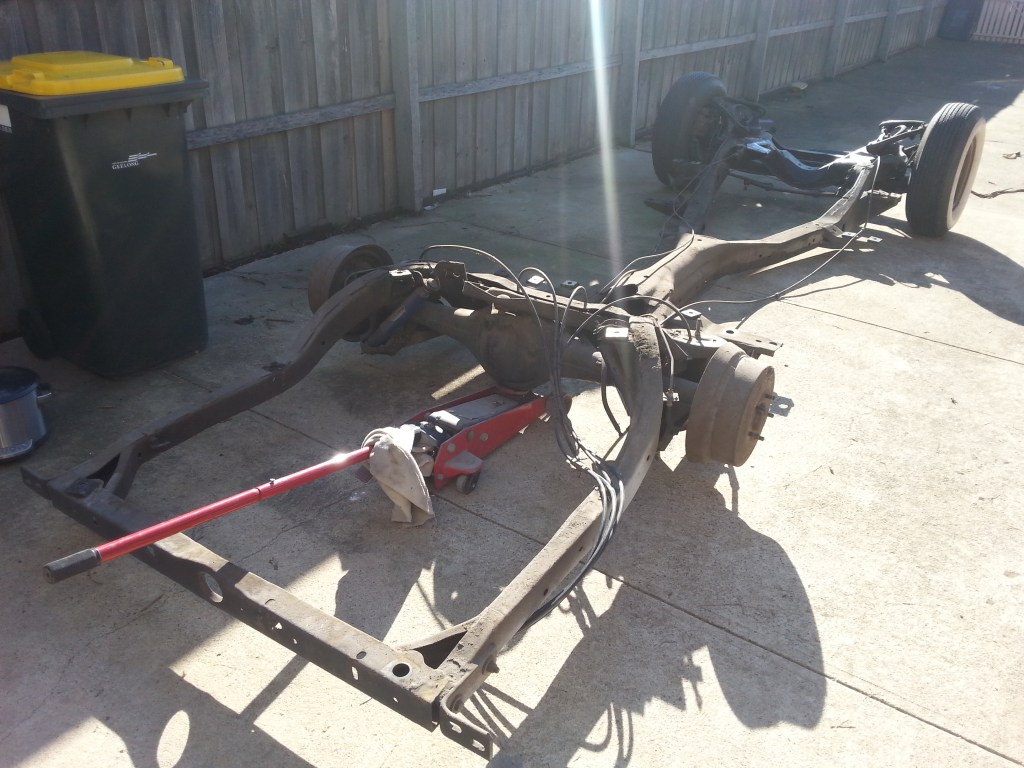
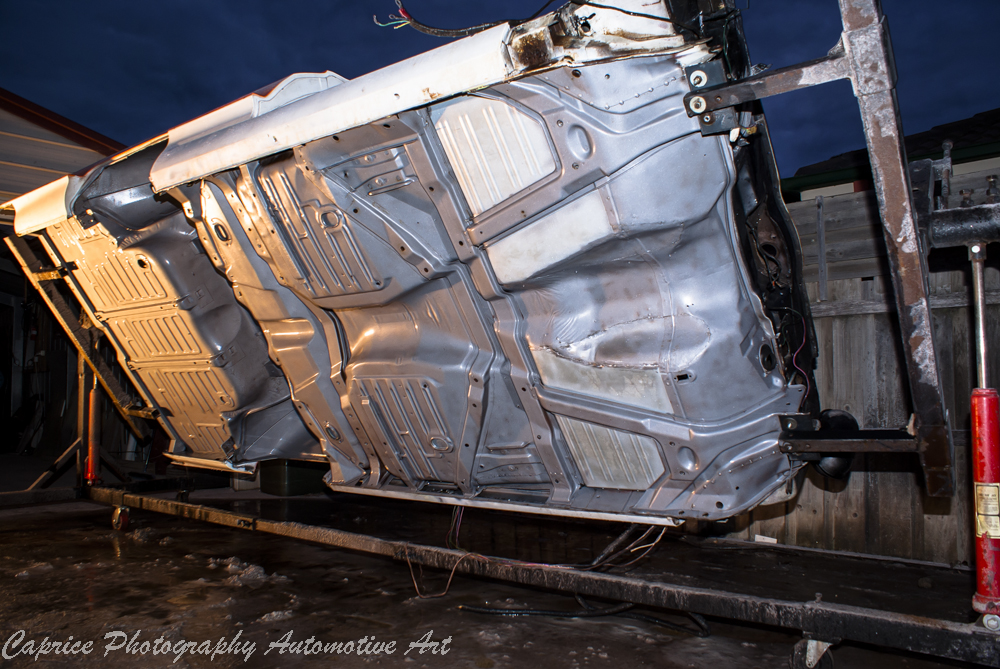
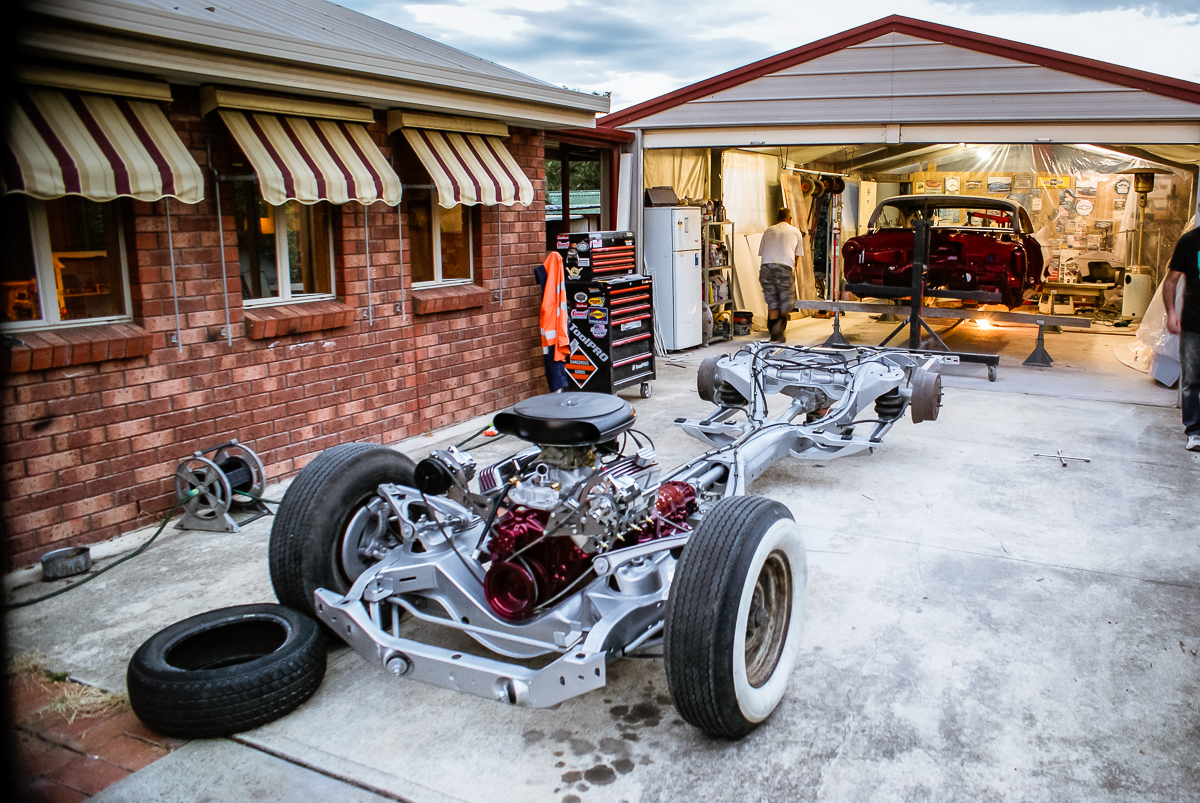
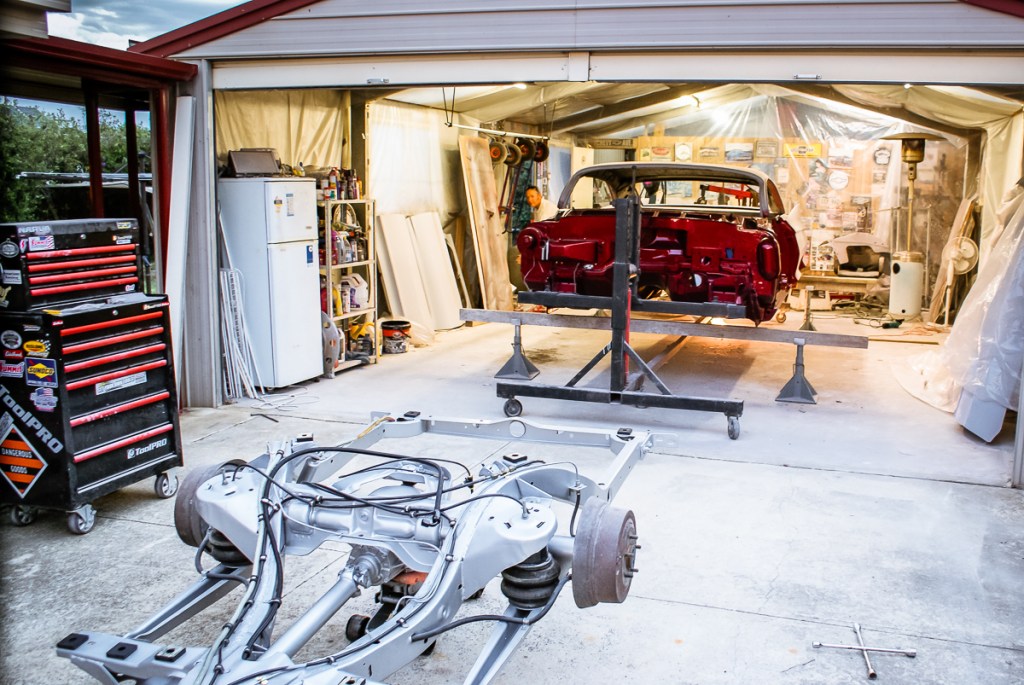
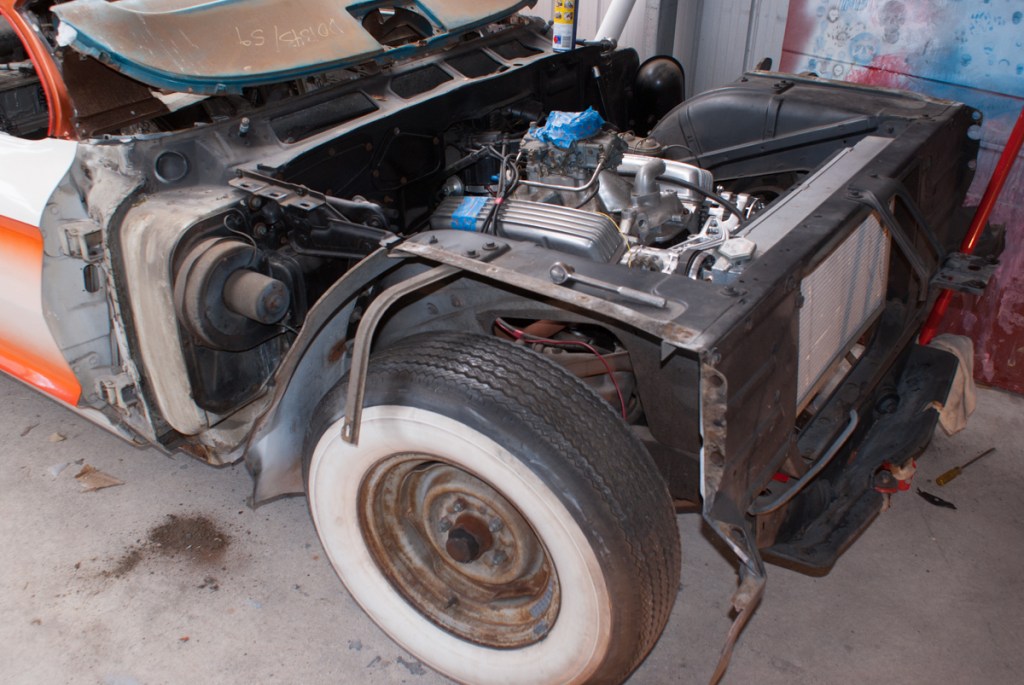
With the engine bay work completed, it was time to tackle the separation of the body from the chassis. With the help of my mates, we managed to accomplish this in just one day and placed the body on a rotisserie for easier refurbishment. As the chassis saw the daylight for the first time in 53 years, covered in layers of dirt and grime, I couldn’t help but wonder if I had bitten off more than I could chew. But there was no turning back now.

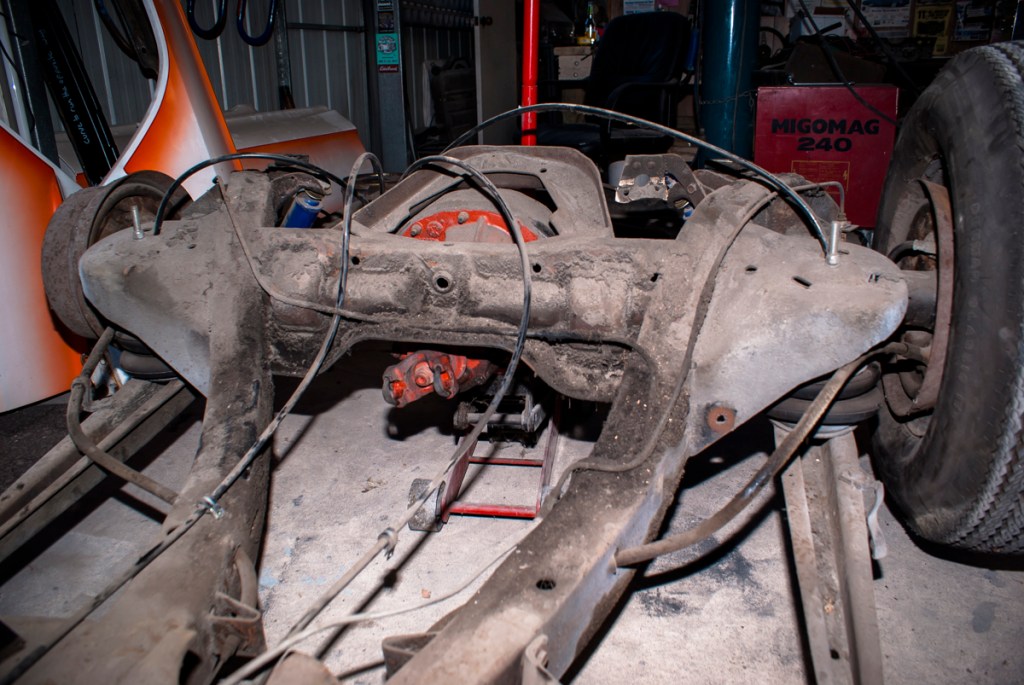
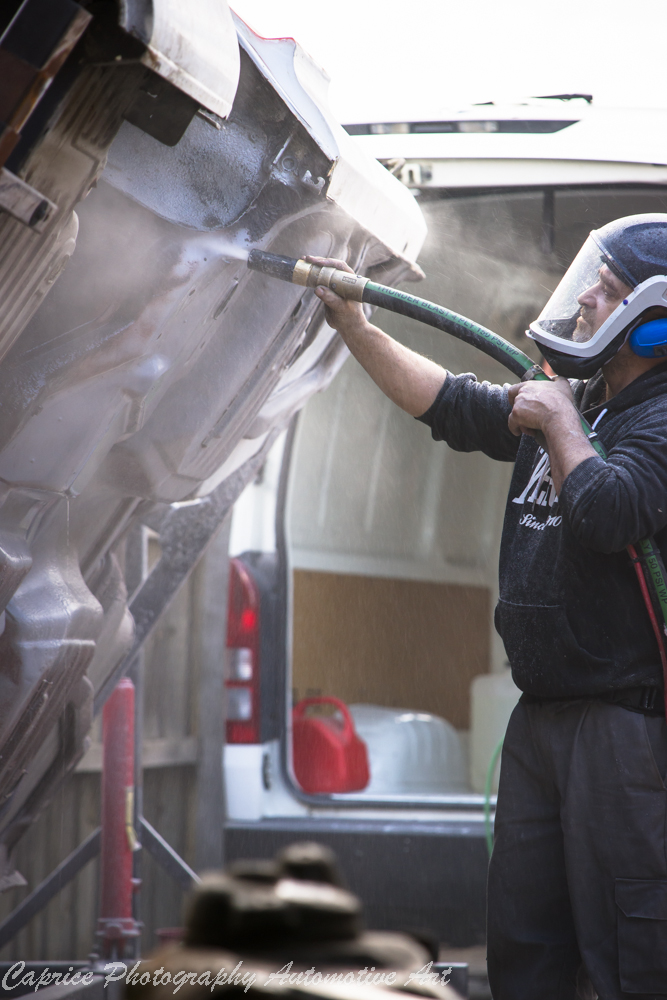
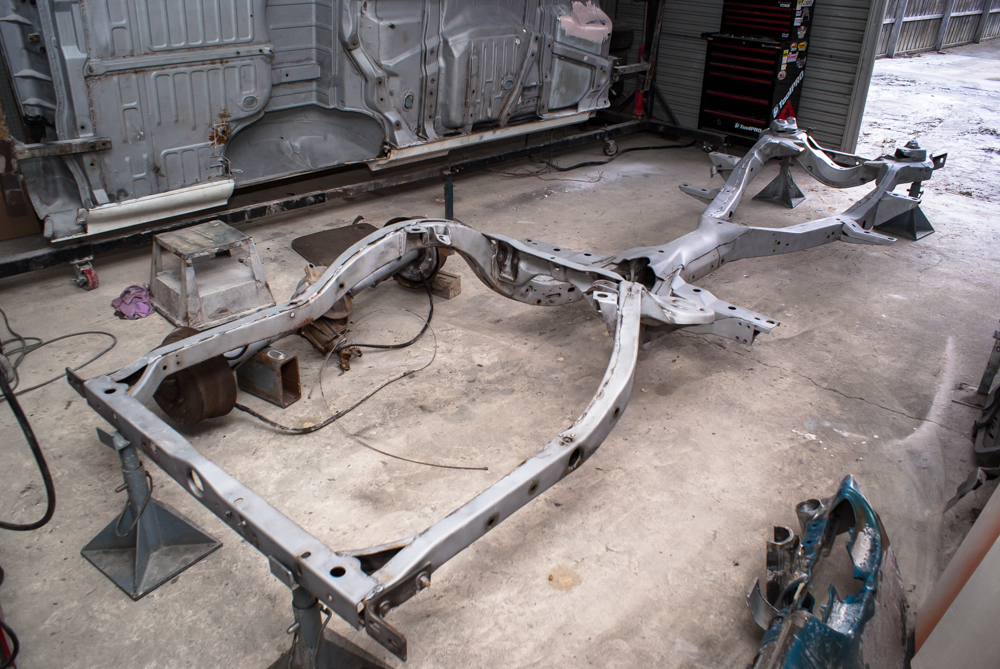
To clean up the chassis, I started by stripping down the front end one night and finished the rear end the next day. This left me with a pile of dirty parts and an incredibly filthy chassis. It was clear that a thorough cleaning was necessary, so I enlisted the help of John from Dustless Blasting. He came to my house and spent several days blasting away the accumulated dirt and grime, revealing a bare metal surface that was ready for repairs and a fresh coat of paint. John also took care of cleaning numerous other parts and panels, saving me a tremendous amount of time and effort.
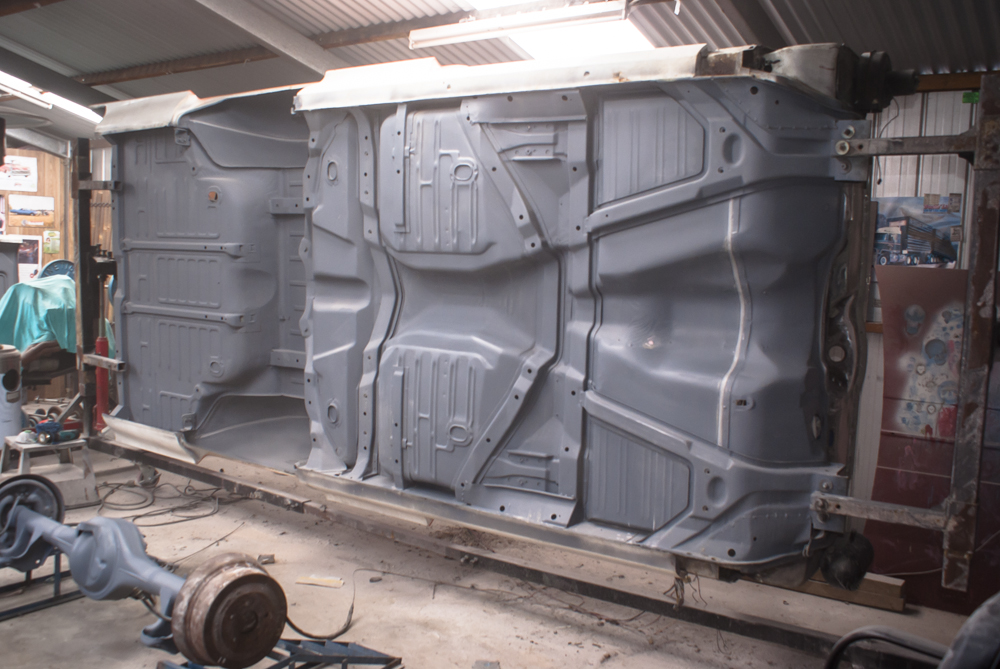
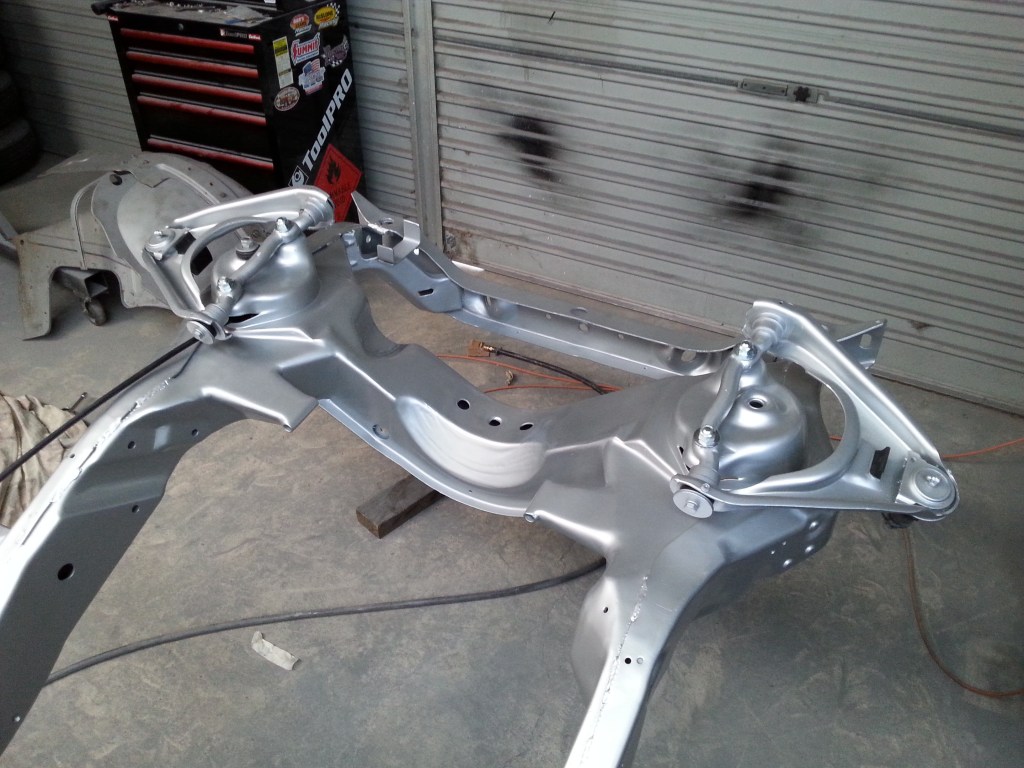
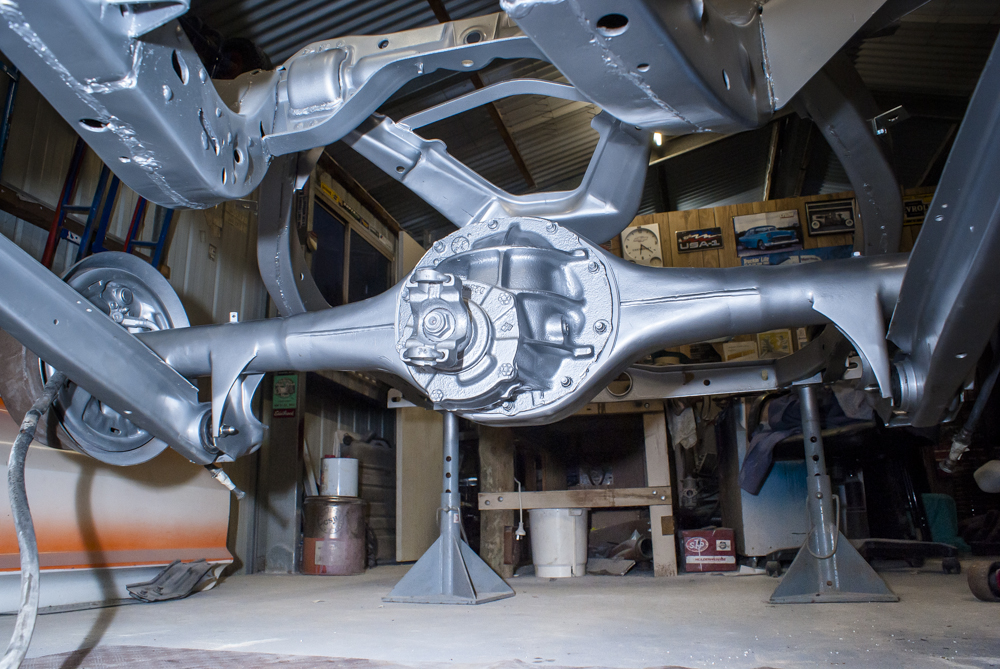
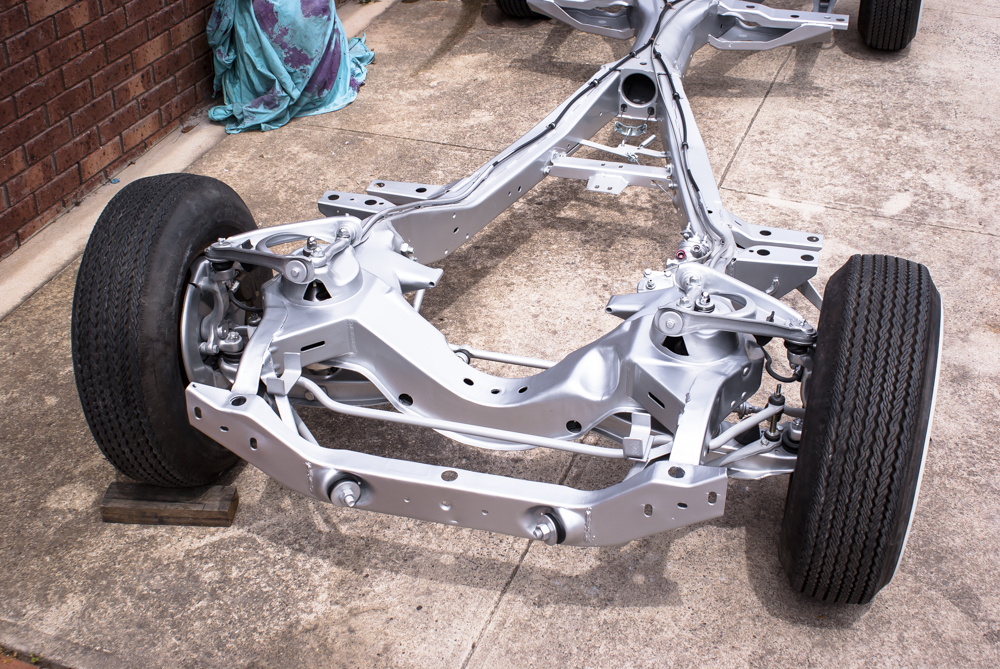
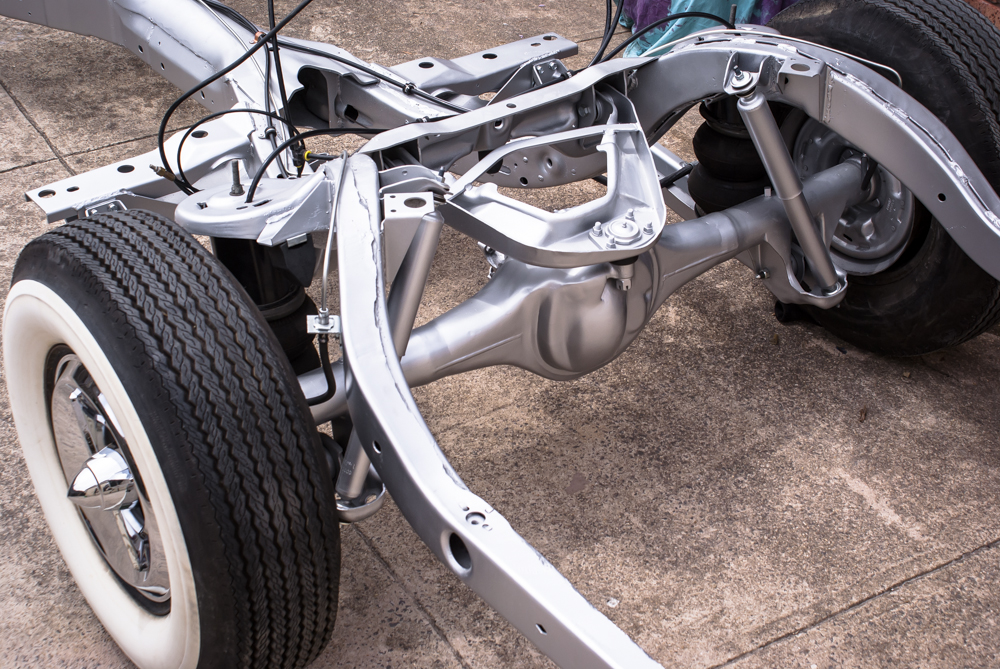
While the underside of the body and chassis had minimal rust for a car of this age, there were still dents from rocks and imperfections from the factory. It was a meticulous process of going over the entire floor, front to back, addressing each flaw and preparing it for primer and paint. Once the underside was ready, I turned my attention to the chassis, giving it a thorough clean-up and addressing any necessary repairs. I smoothed out various sections on the chassis and suspension parts to enhance the visual appeal when viewed from underneath, while still ensuring ease of cleaning. The chassis received a silver finish, complemented by zinc-coated nuts and bolts. Certain steering parts were powder coated in a matching silver color for added durability.
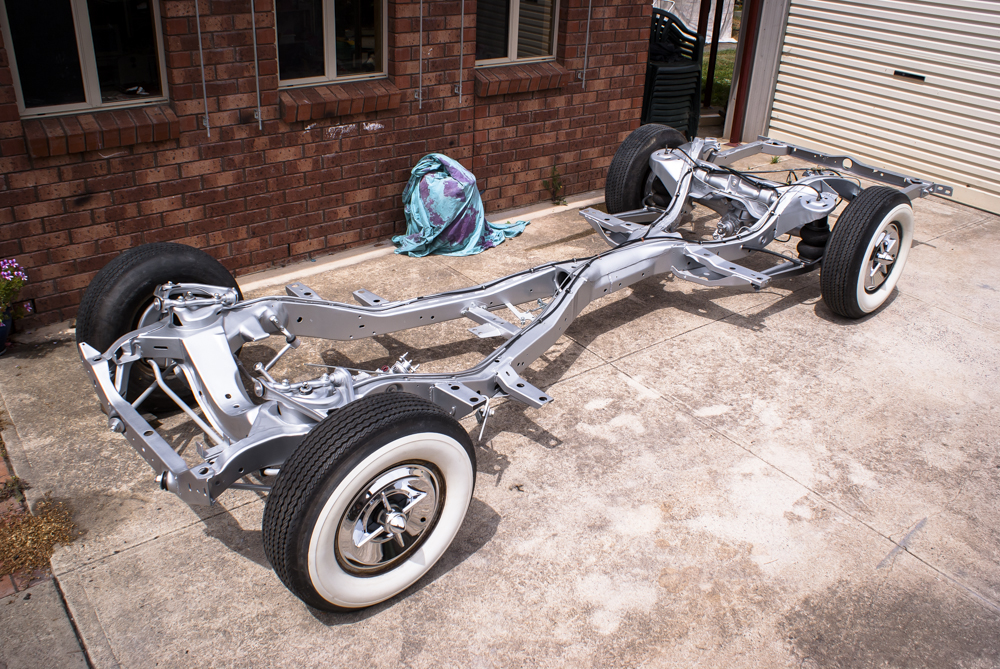
Reassembling the chassis was a time-consuming task, as each piece had to be cleaned to a like-new condition if it hadn’t been painted. I also had to be careful when fitting the various suspension parts with their new bushes to avoid scratching the freshly painted surface. It was a delicate balancing act, but seeing the wheels on and having a rolling chassis again was a significant milestone. Being able to roll the car outside and free up some garage space during the day was a gratifying experience, and it added a sense of progress to the project.

I’m pleased with the results so far, but I know there is still a long way to go. However, every step brings me closer to realizing my vision of Rebelene, and I’m excited to continue this journey.
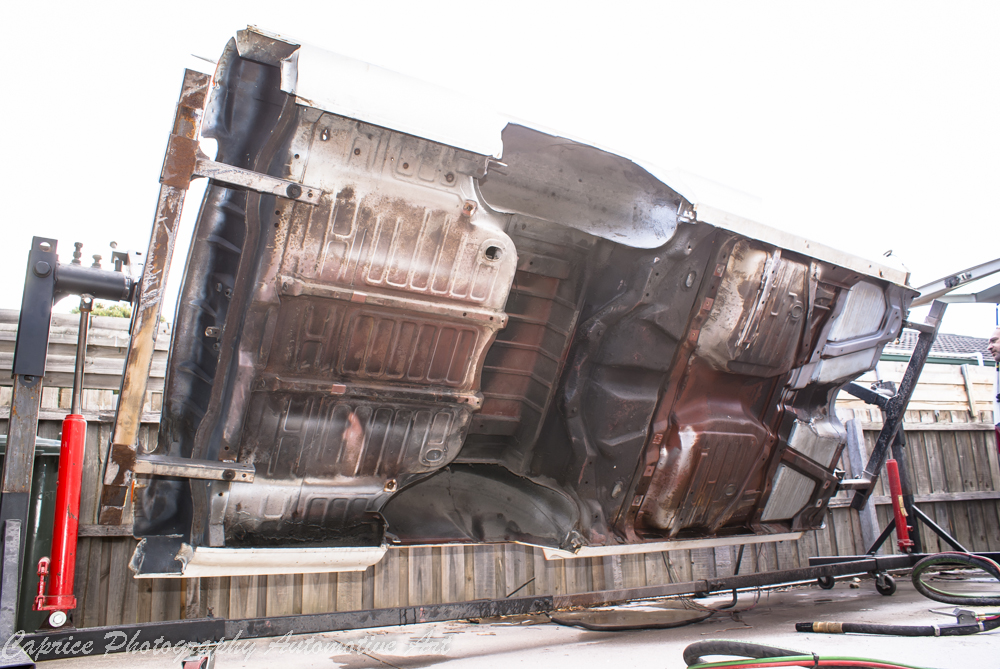


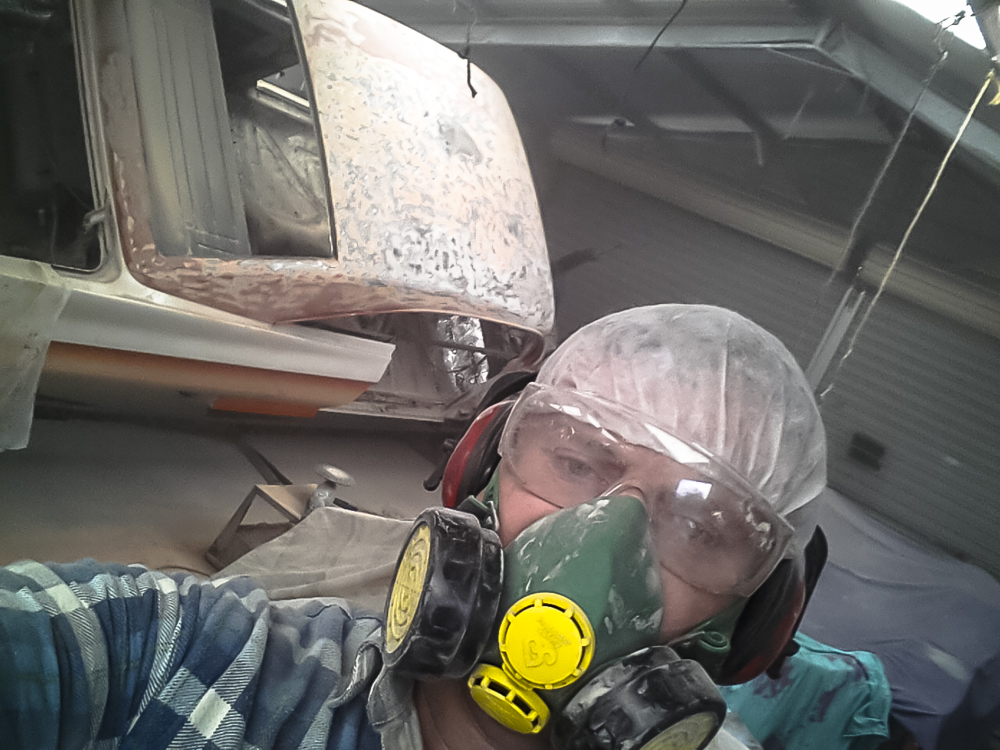
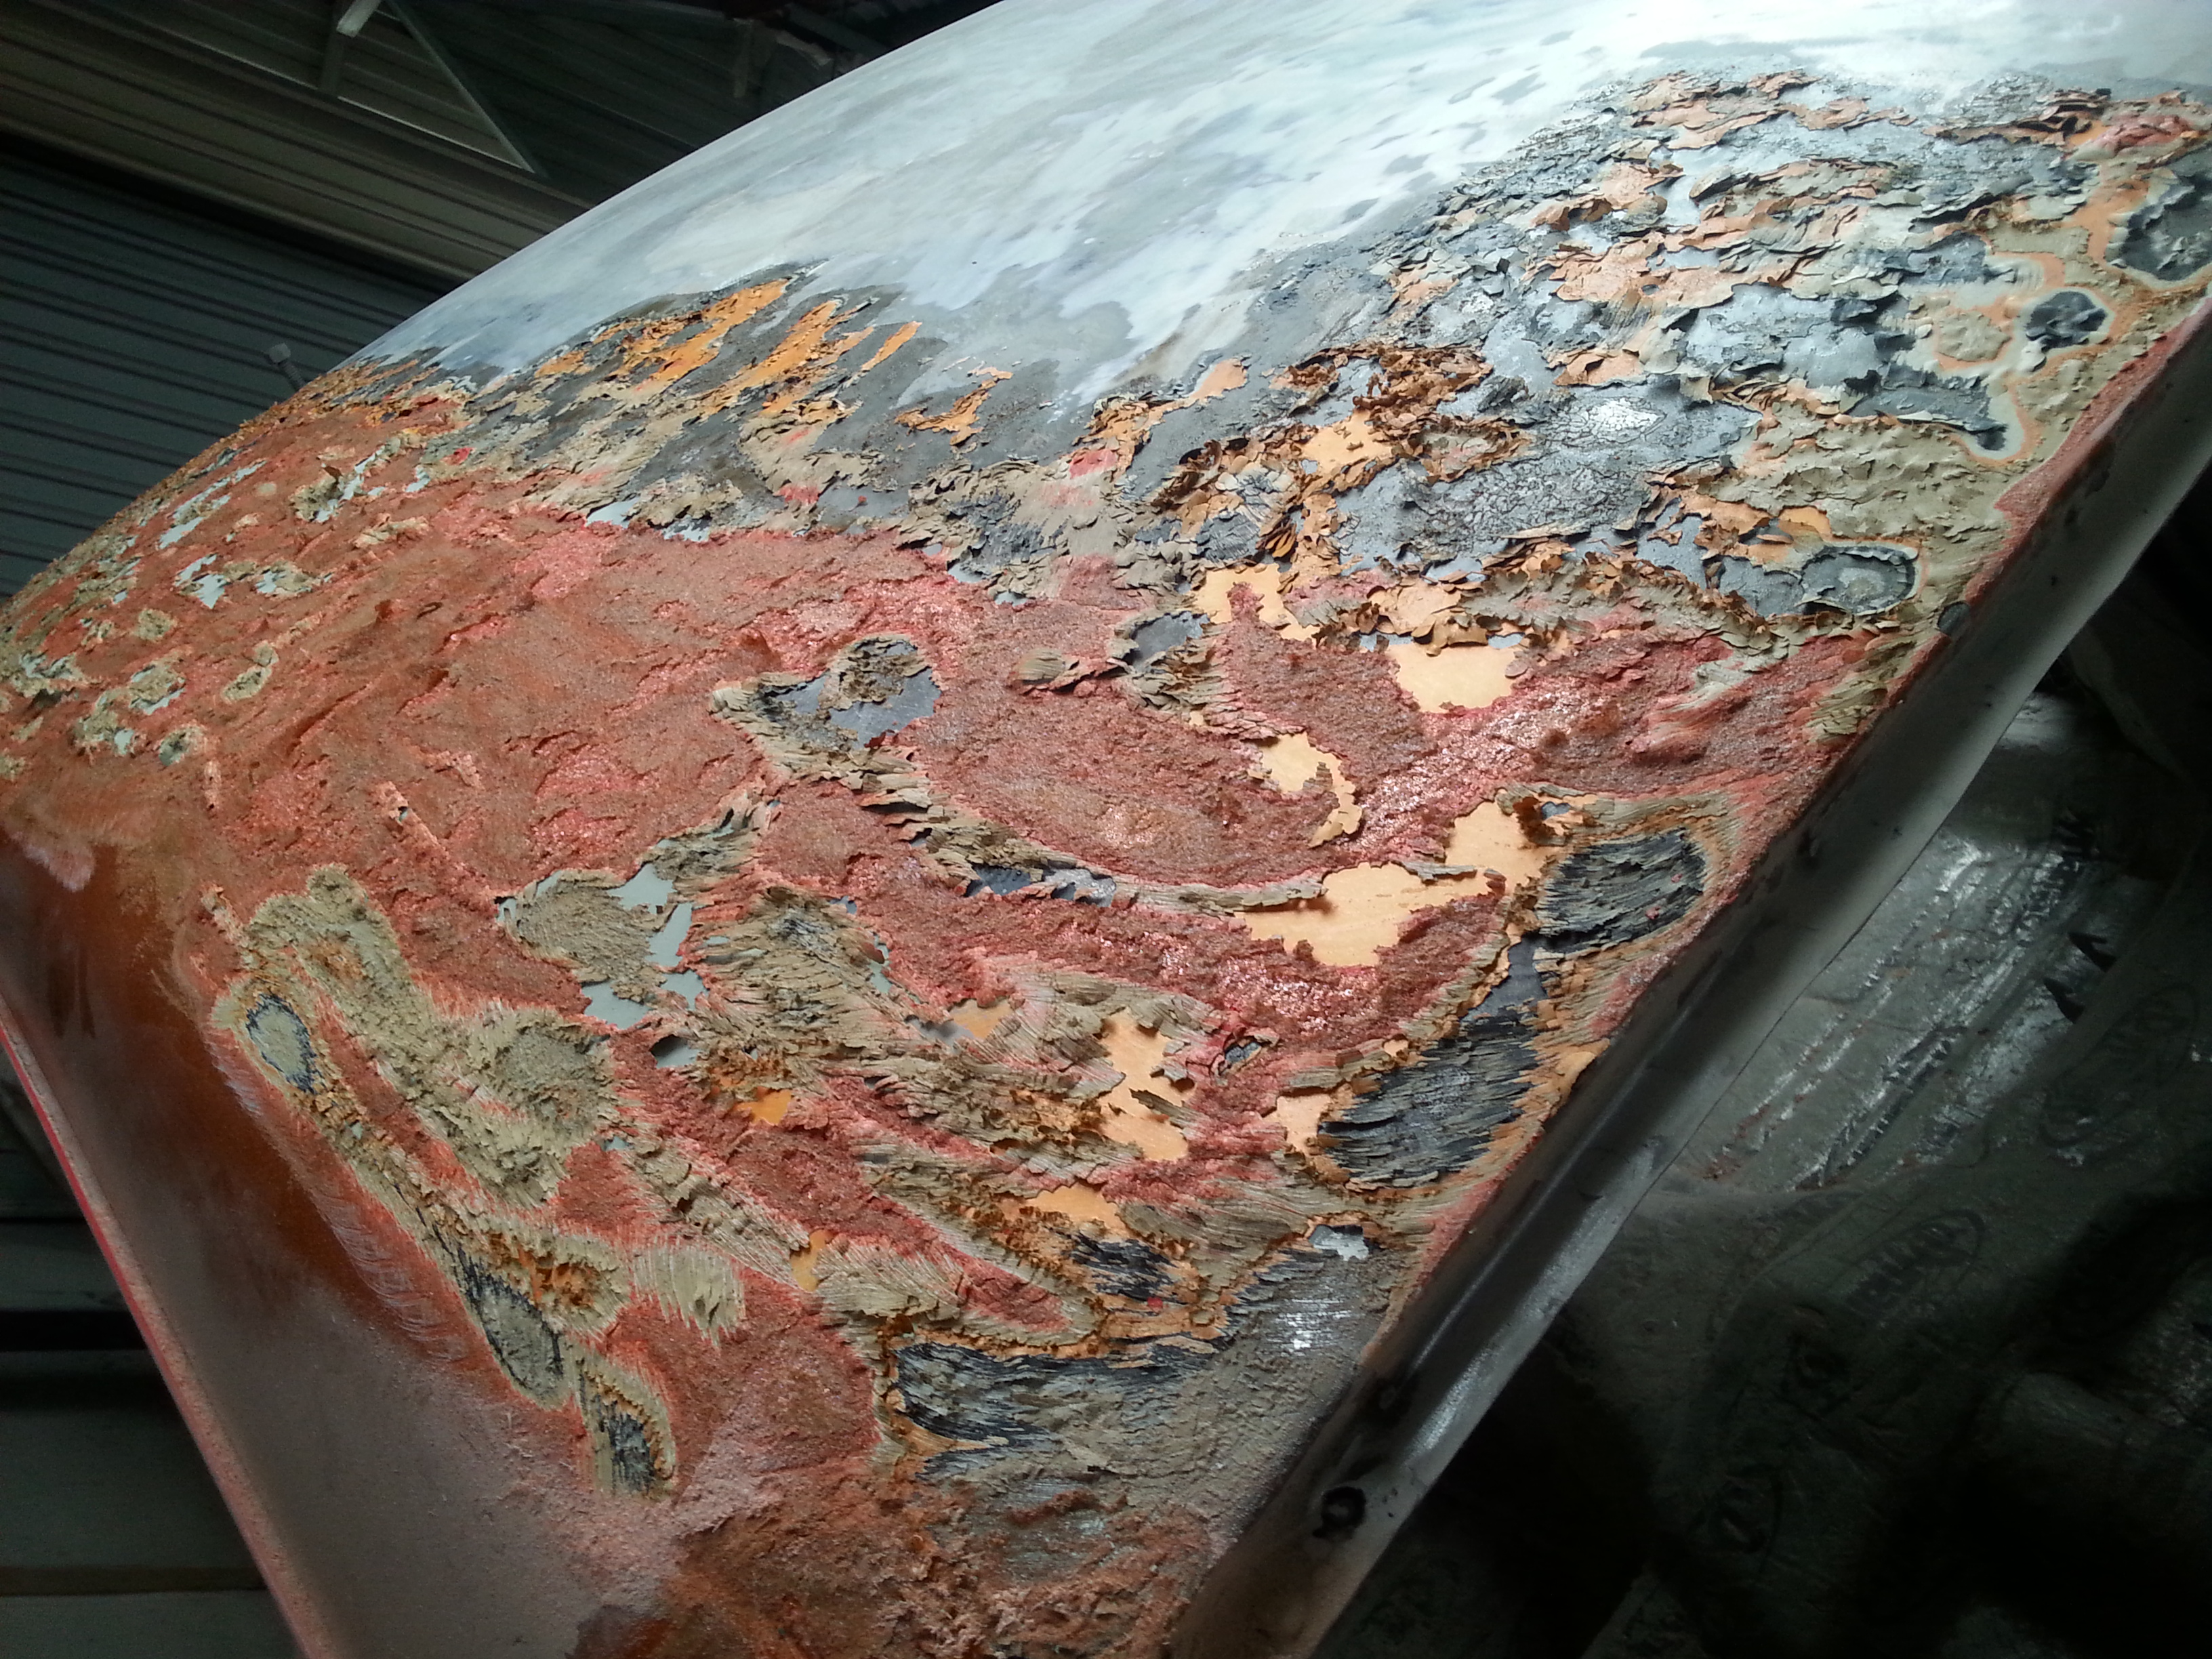
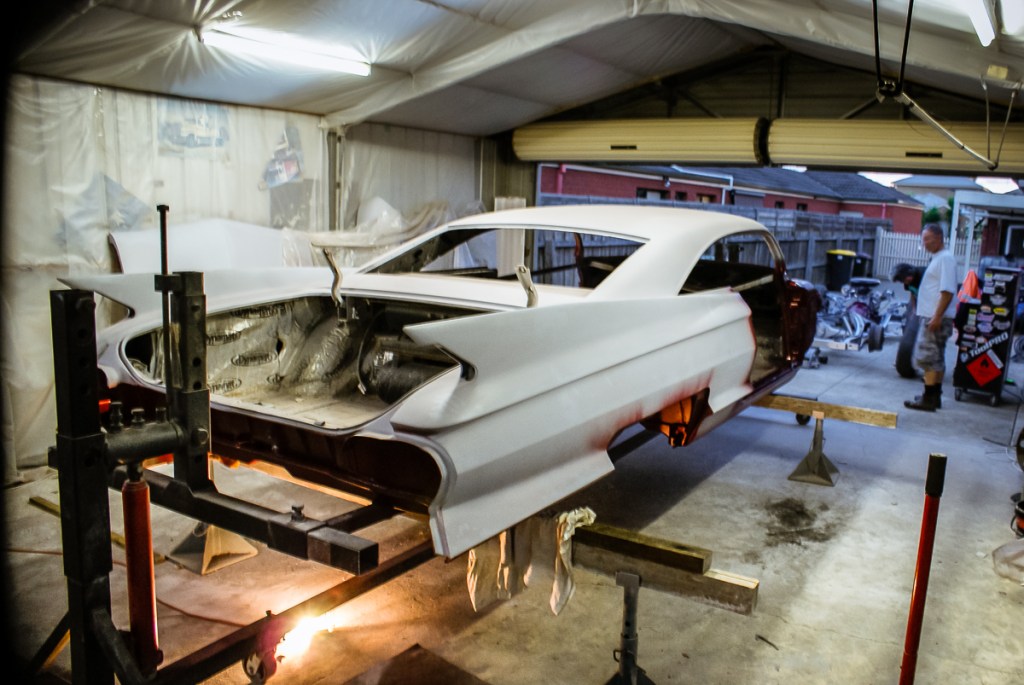
Stripping back the roof was a task I had been dreading, but it was a necessary one. Although the car had been previously painted, a significant portion of the high-flek paint on the center of the roof was missing. It seemed to have lifted during the car’s idle period before I bought it. Additionally, there were cracks in the paint, revealing the filler underneath. It was clear that the roof needed to be stripped back.
Luckily, the rotisserie proved invaluable for this job. I positioned the body on its side so that I could work on the roof directly. Using a combination of paint stripper and stripping pads on the grinder, I began the laborious process of removing the layers of paint and filler, going all the way back to bare metal. As I stripped it down, I could see how the roof was originally fitted to the body through various welded sections. Once stripped, it was time to apply fresh filler along both flanks of the roof and the rear section. I can’t even begin to count the number of full days I spent on this task, but eventually, I achieved a smooth finish and prepared the roof for the top coat.

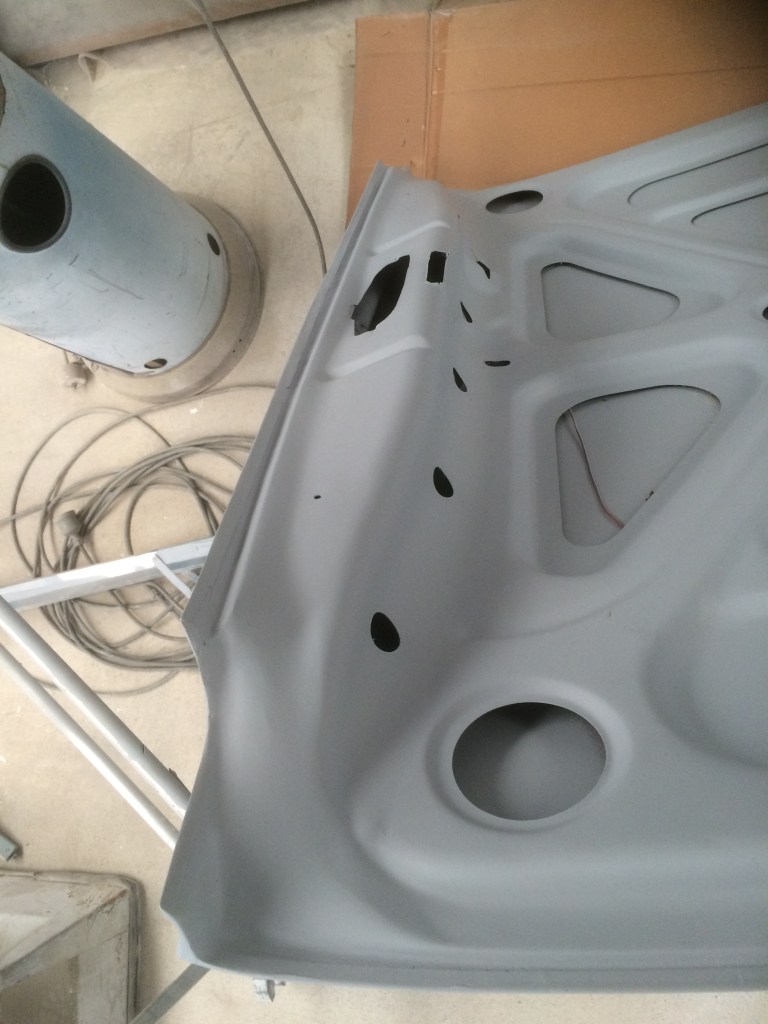
In addition to the roof, I continued working on various other parts of the car. I focused on welding and smoothing unwanted areas that would be visible when the car is on display. The radiator support panel, which consisted of six separate sections bolted together, puzzled me. I decided to weld all the sections together and box off the lower brace to create a cleaner and smoother appearance that would also be easier to clean. I also addressed the inner guards by filling in unused holes and stamping marks, giving them a cleaner look.
I’m nearly ready to start applying color to the many finished parts, and I’m also preparing to reinstall the engine and transmission back into the chassis. It will be a rewarding sight to see the major components of the puzzle fitting back into place.
Here’s to a successful year ahead in 2016 as I continue making progress on my project car!
April 2017
While 2016 may not have been as proactive on the Caddy as I would have liked, I am determined to find the time in 2017 to get the project rolling again!
Throughout the process of building a custom car, one quickly realizes that each project is unique, leading us into uncharted territory. The challenge lies in combining different parts and making them fit seamlessly, as if they were meant to be together. It’s easy to get caught up in the details as we scour the internet and chat with fellow car enthusiasts for ideas. But hey, it’s always a good excuse to catch up over a beer and have a chat! though!
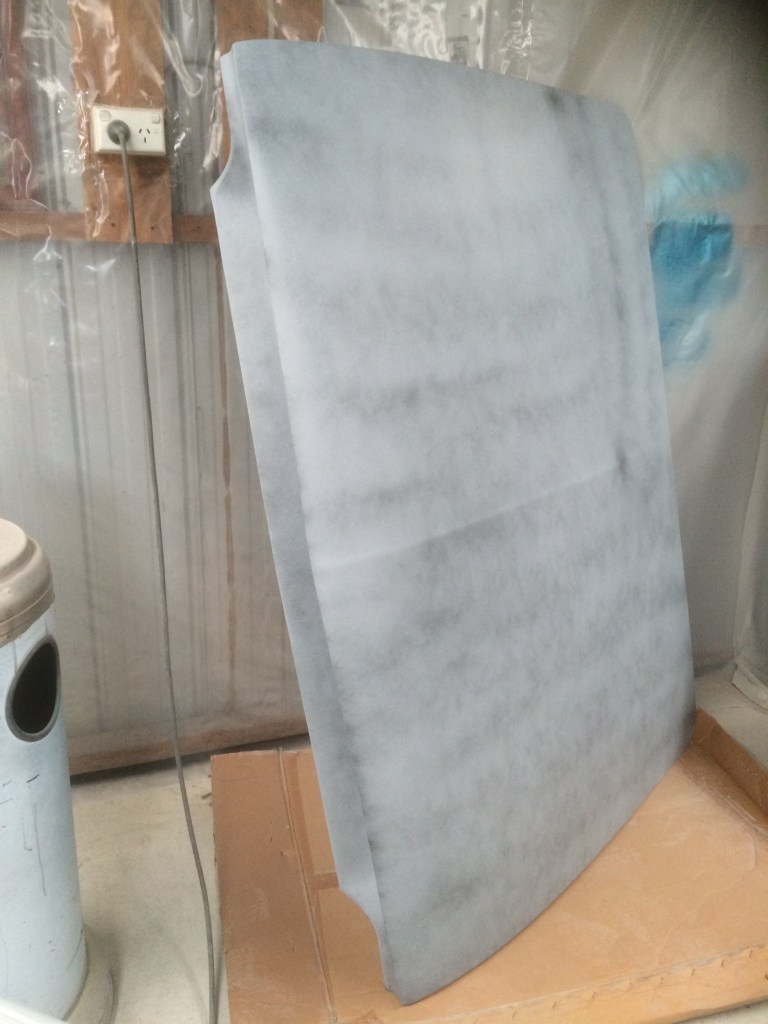
Despite the challenges, I managed to find time last year to work on the panels and bring them to the point where they are ready for paint. Let me tell you, this car is massive! I now have a newfound respect for those who bring these oversized machines to the high standard seen at car shows. The bonnet, although it appeared decent with its faded white paint, turned out to be far from straight. It required a significant amount of work to bring it back to an acceptable finish. Wet rubbing back all that high fill on the expansive surface felt like traversing the salt flats of Bonneville!
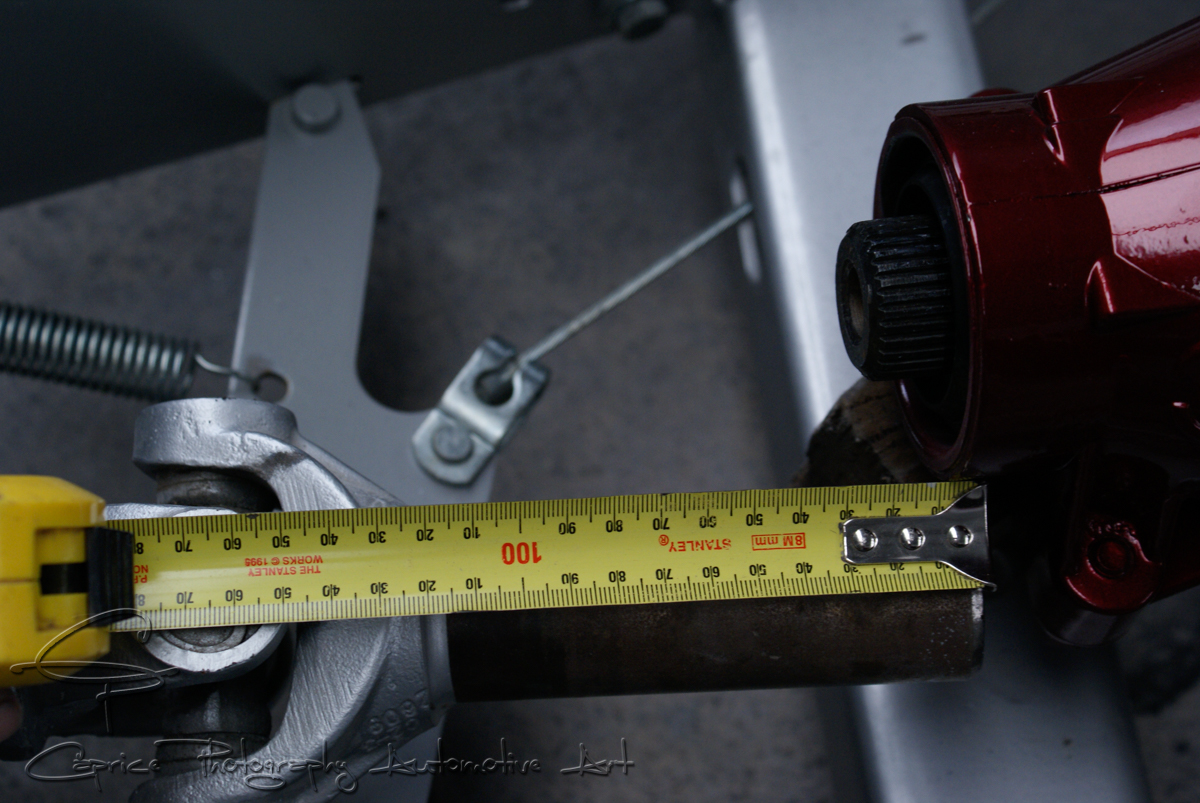
During this time, I also took a closer look at the engine and built a new transmission to match the performance of the Chevy engine and the ratio of the 9-inch rear end. I meticulously tidied up both mechanical components before mating them together and finally reinstalling the running gear back into the chassis. However, since I had swapped out the initial T700R transmission with a T400, I had to modify the transmission mount and tailshaft. It’s funny how changing one thing affects another! Fortunately, Pete from A1 Automotive in Geelong extended the tailshaft and provided the correct driveshaft.
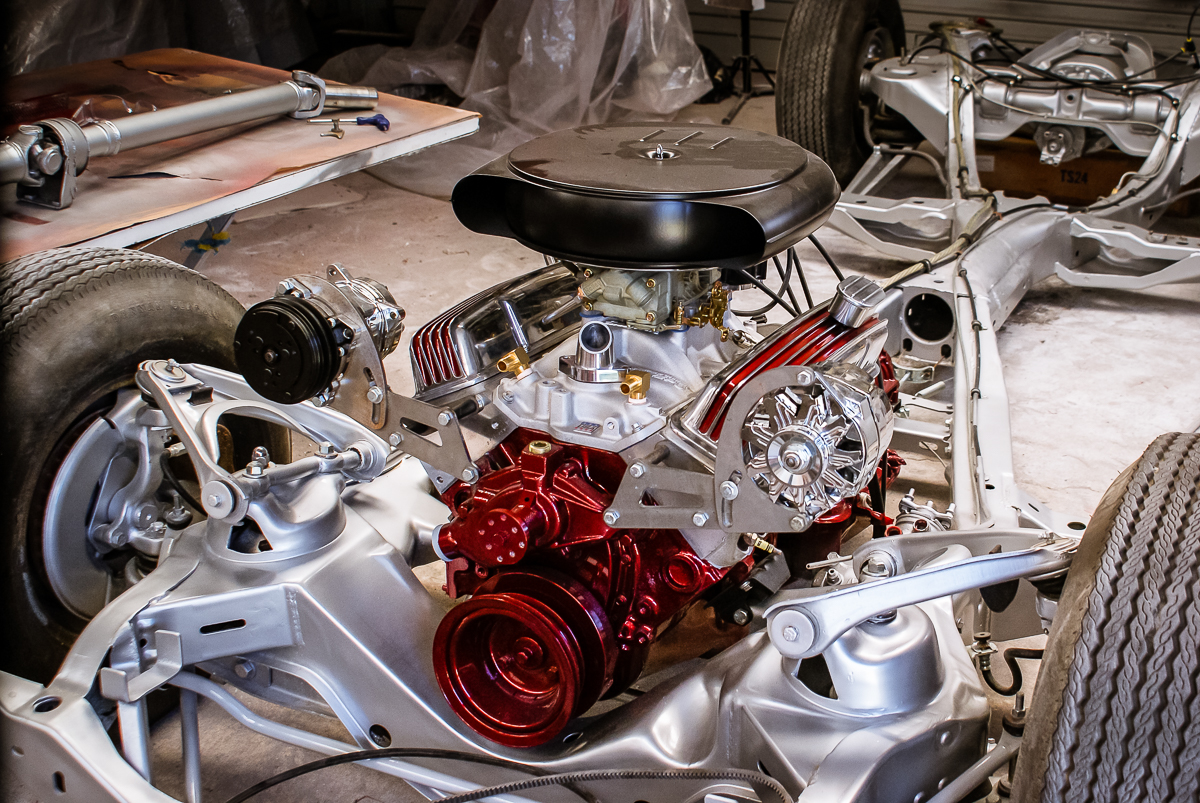
The motor originally came with a serpentine system, but it didn’t align with the final vision I had in mind. So, I sold off the complete system and started sourcing replacement parts for that classic, old-school look. I decided to go with a short water pump and enlisted the help of Rohan Hutson from Radiator Workshop in Mornington to supply me with steel brackets, a bolt kit for the alternator and air conditioning compressor, as well as an air conditioning compressor itself. Now, it was up to me to continue the installation process. Oh, and let’s not forget that when you buy a water pump, it doesn’t come with bolts! I’m also currently working on figuring out the right power steering unit that fits within the available space and is compatible with the steering box’s PSI.
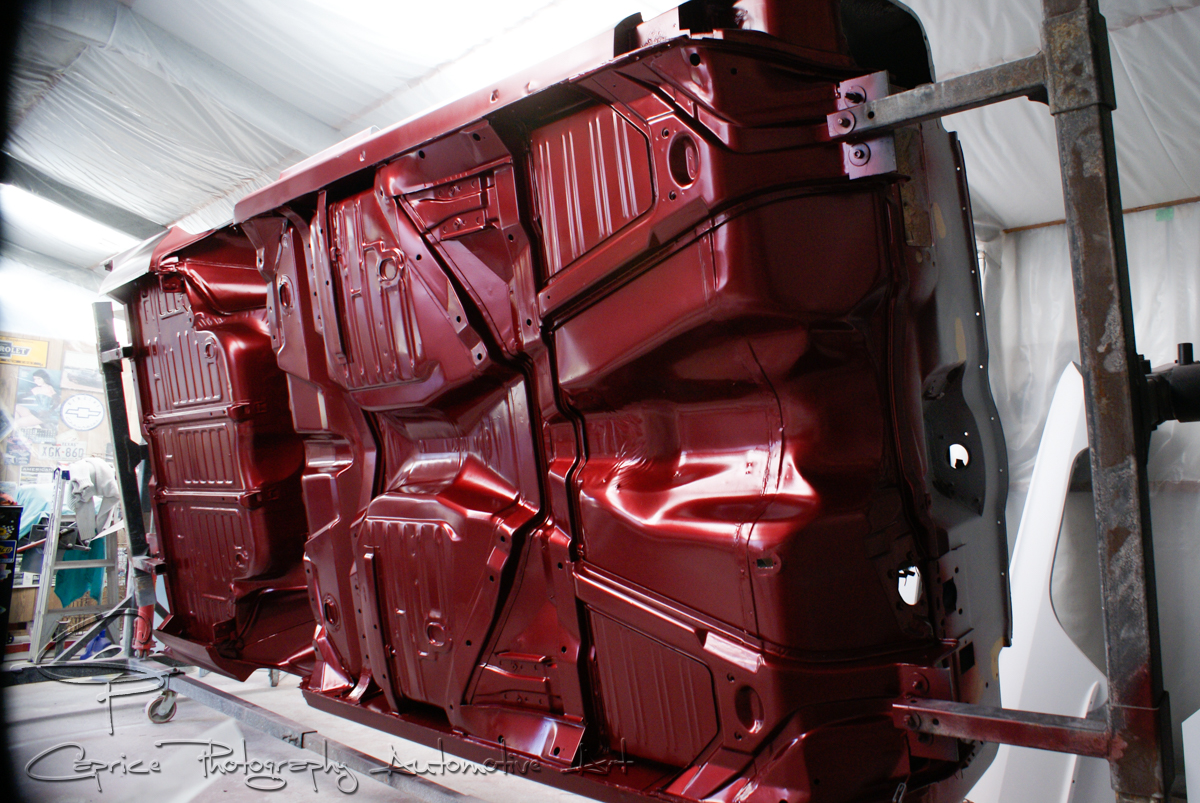
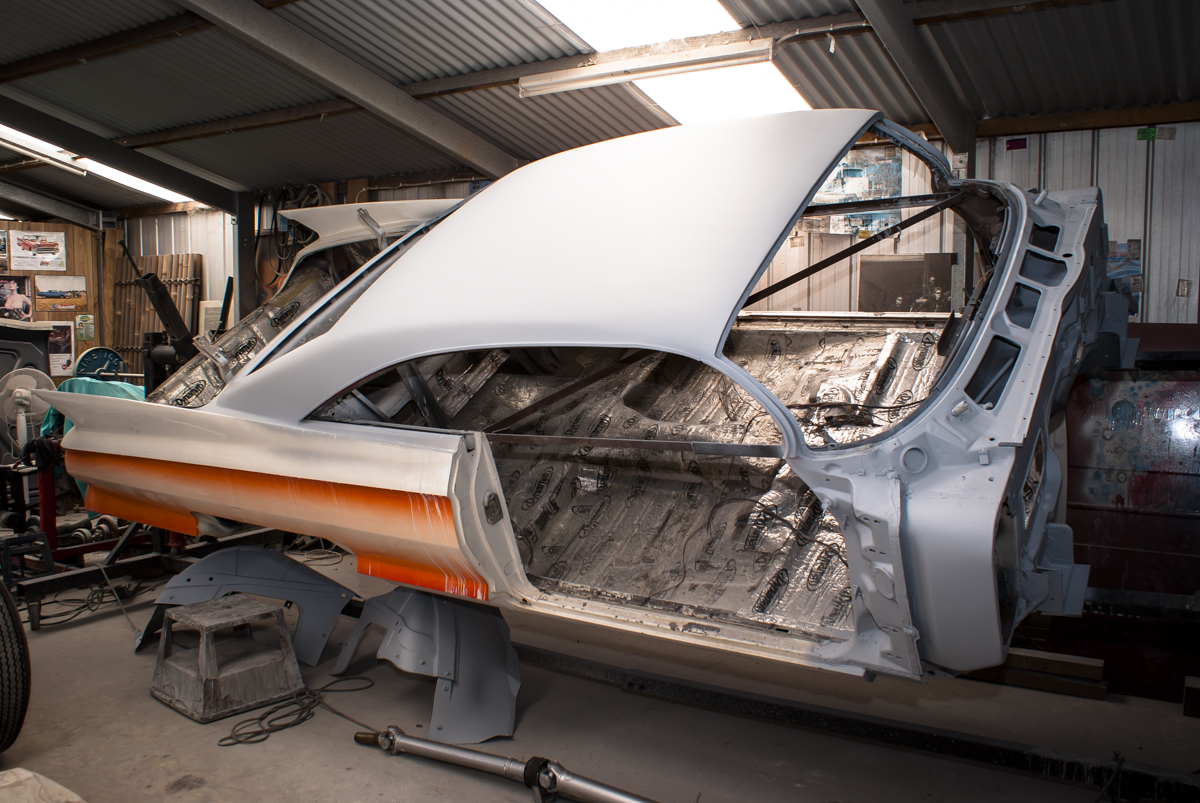
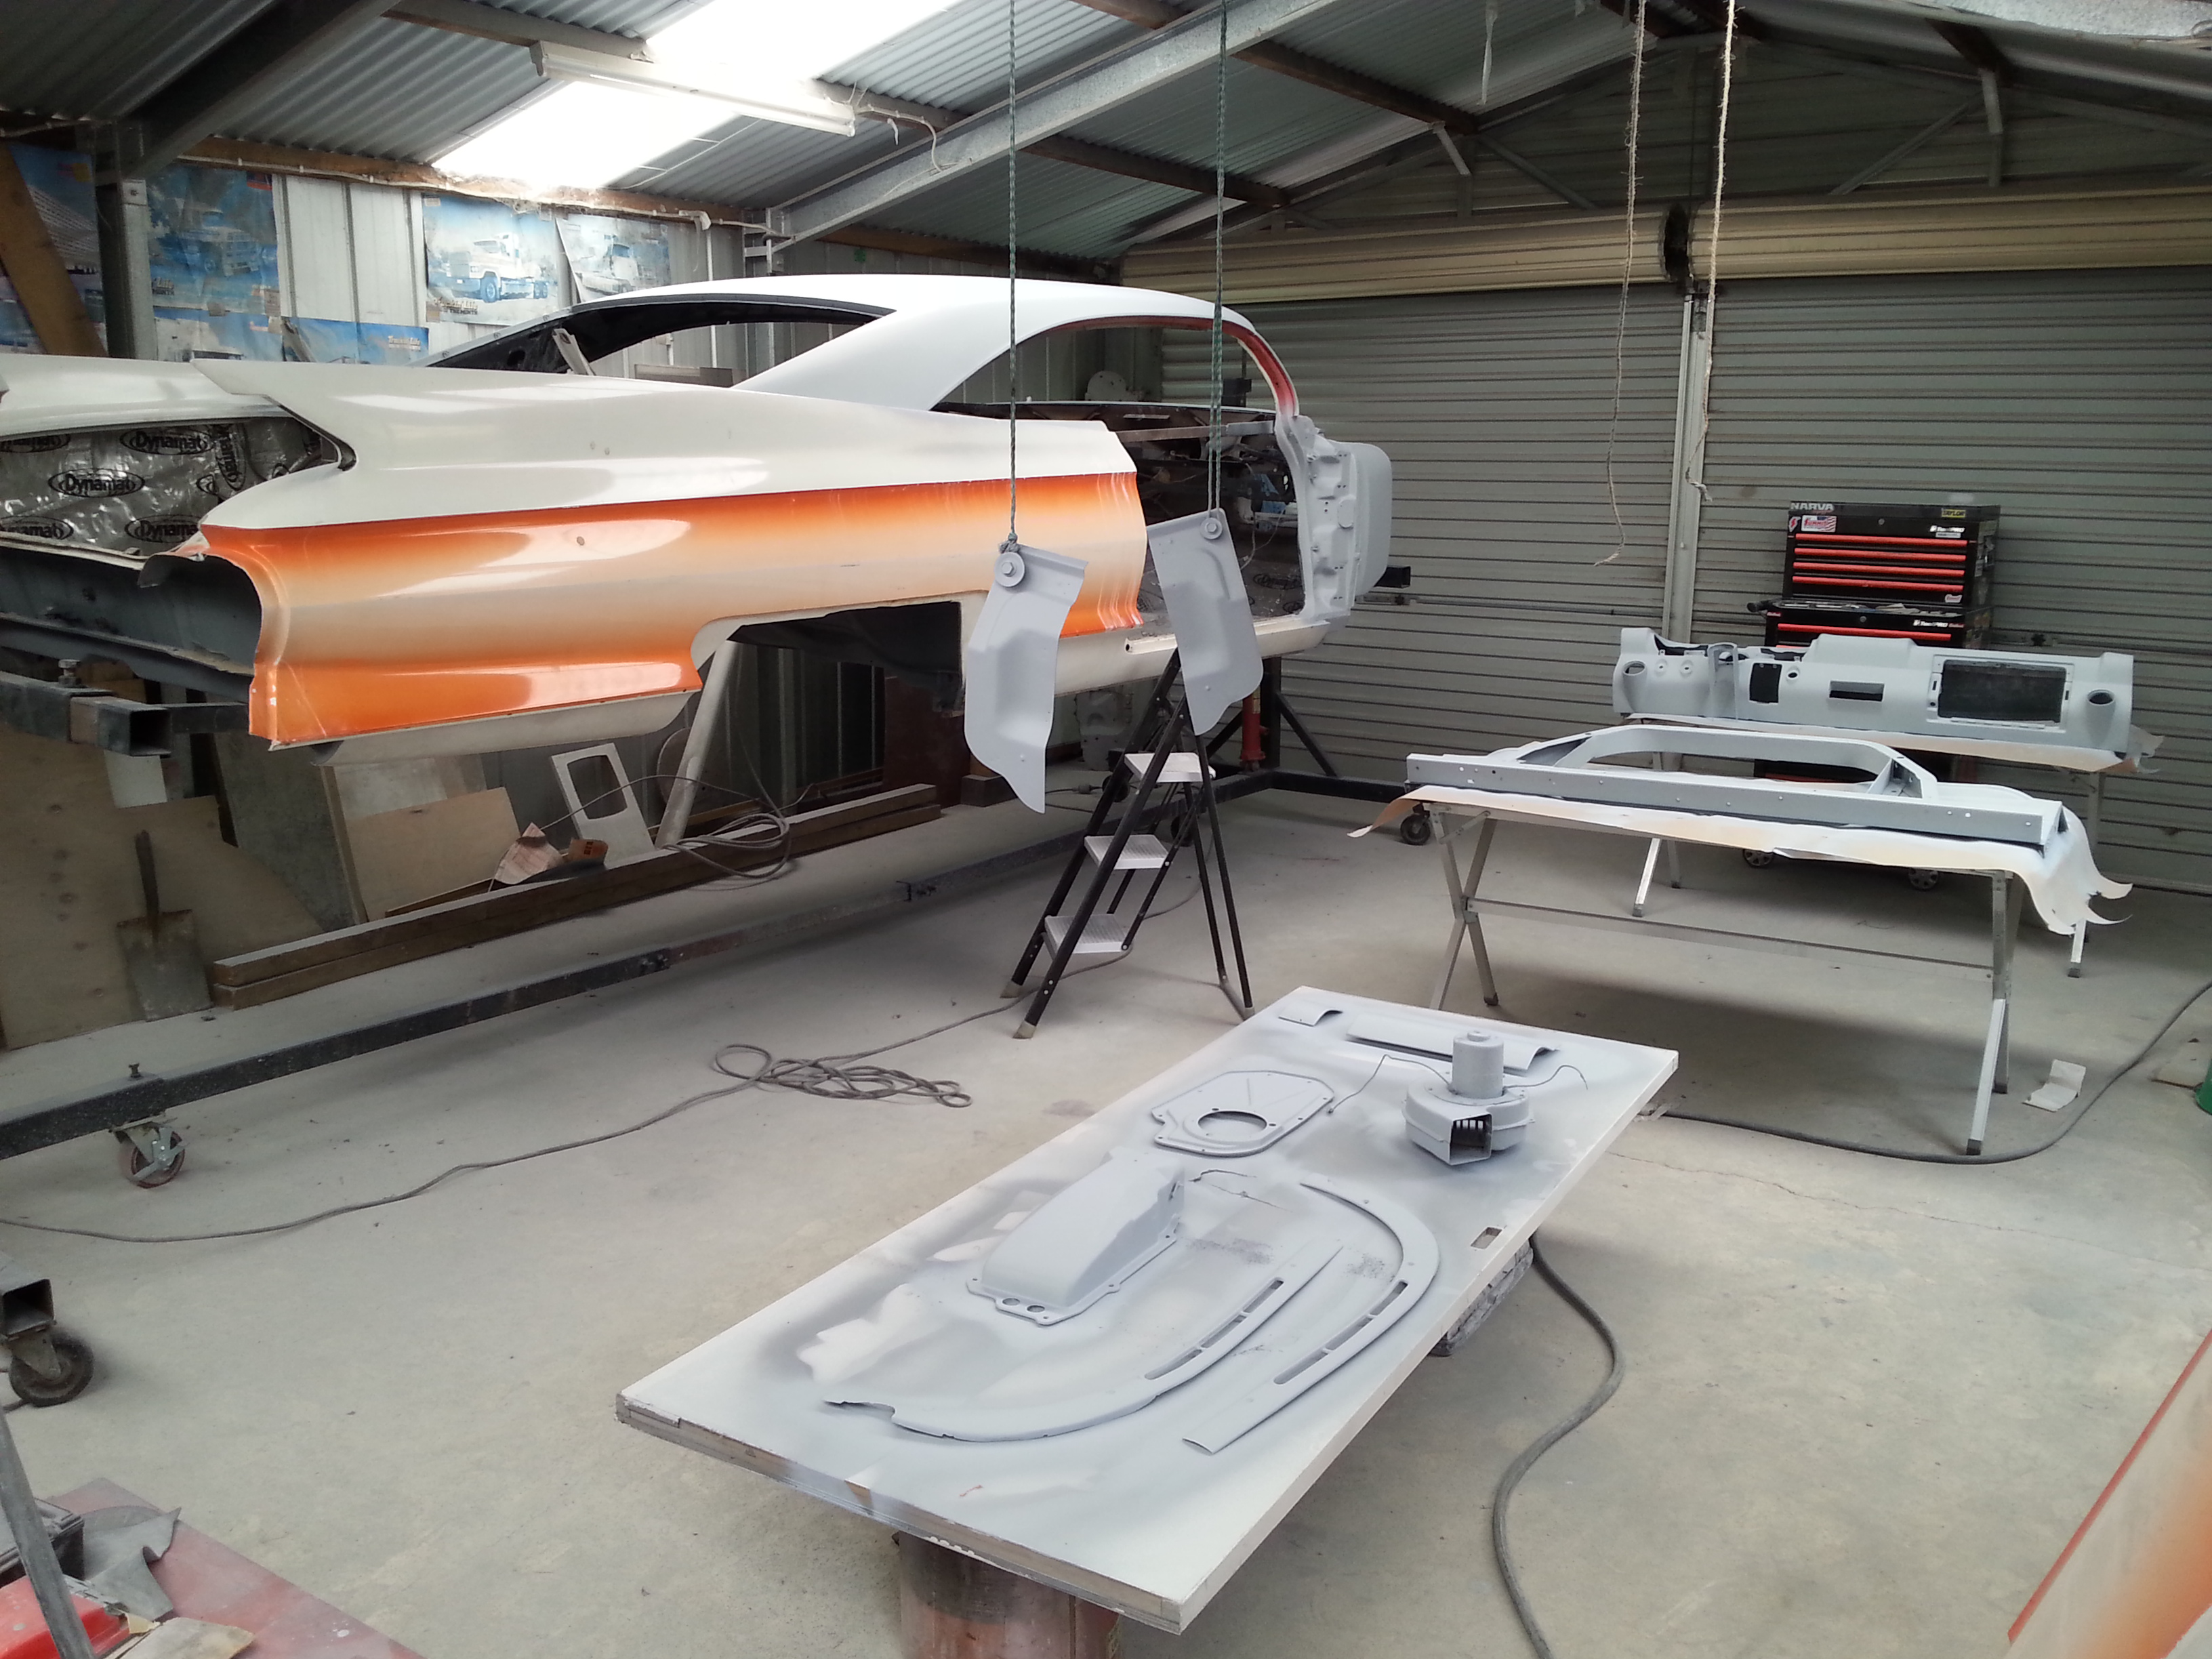
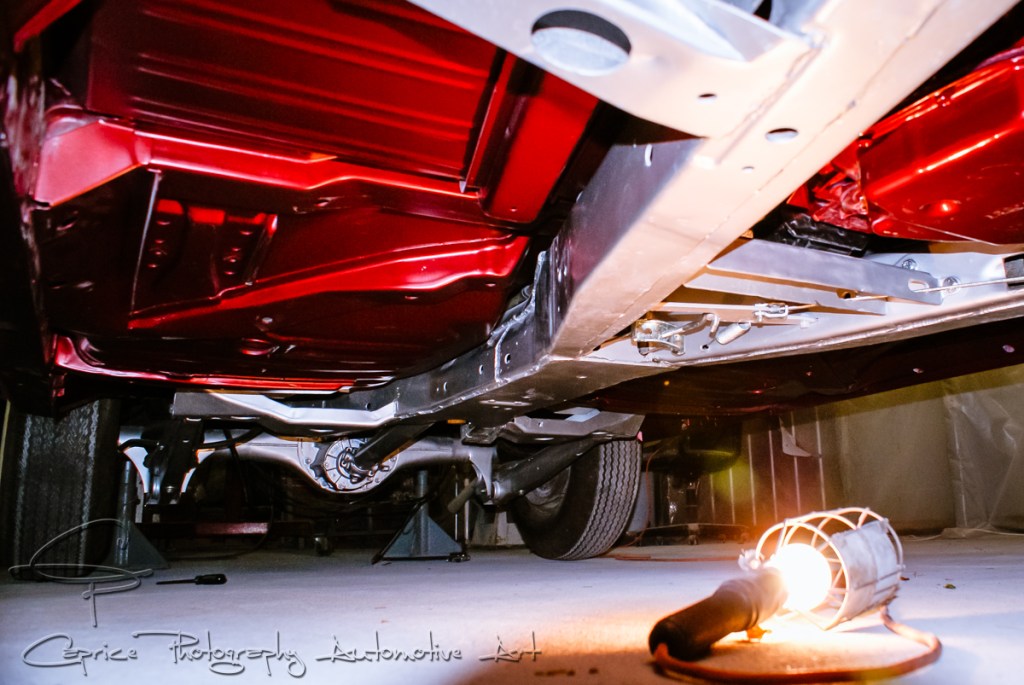
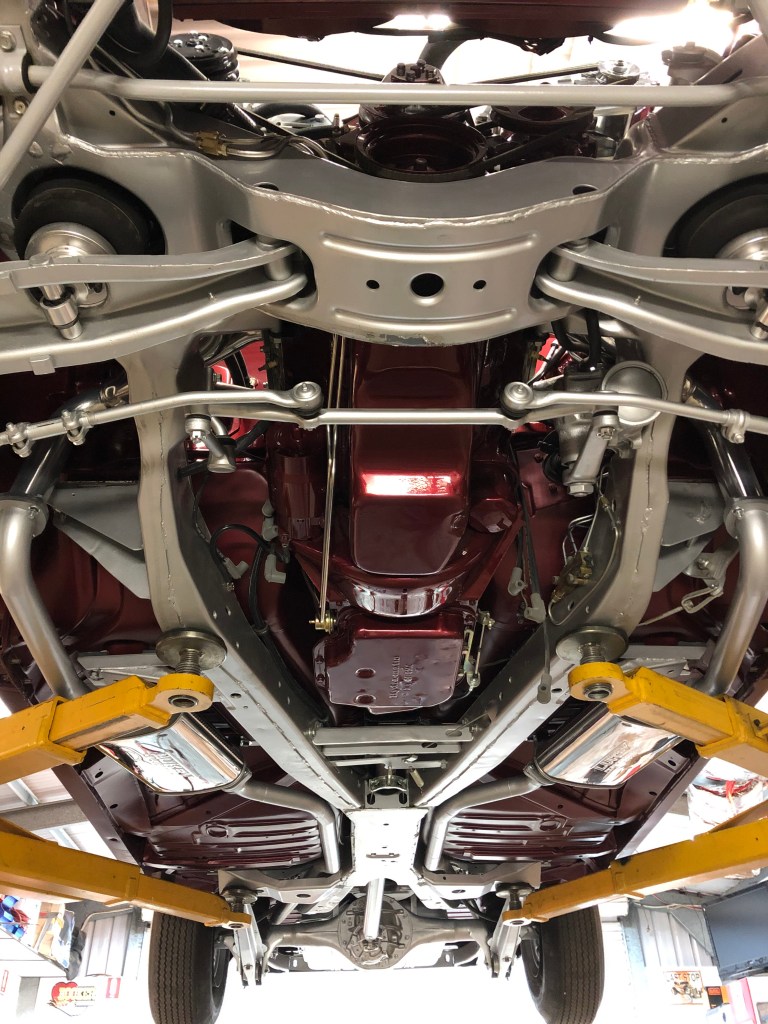
A job I had eagerly anticipated was finally applying the chosen color to the body. With the underside finished and prepared for painting, I took advantage of the rotisserie’s versatility to ensure full coverage in every corner and crevice. I opted for a satin finish on the underside to avoid making the floor appear too busy with a glossy shine. I must say, I’m quite pleased with the final look as it exudes a rich, old leather-like appearance. With coats of base, color, and clear, all applied while rotating the body from left to right, it made for a long day, but the results were undeniably rewarding.
Once the underside was completed and the chassis fully set up, it was time to carefully lower the body back into its rightful place, giving me something that finally resembled a car again! I enlisted the same crew of mates who helped me lift the body off back in 2015 to assist with this task. Daryl and Frankie were spot-on, and we managed to complete the job without any issues in just a few hours. It was a gratifying feeling to be able to remove the bracing inside the body and gain some much-needed space in the garage by bidding farewell to the rotisserie. With a good sweep of the garage floor, I could finally sit back with a beer in hand and admire the rolling body parked centrally in the garage. Another milestone successfully completed!
Cheers to progress and the next steps in this exciting journey!


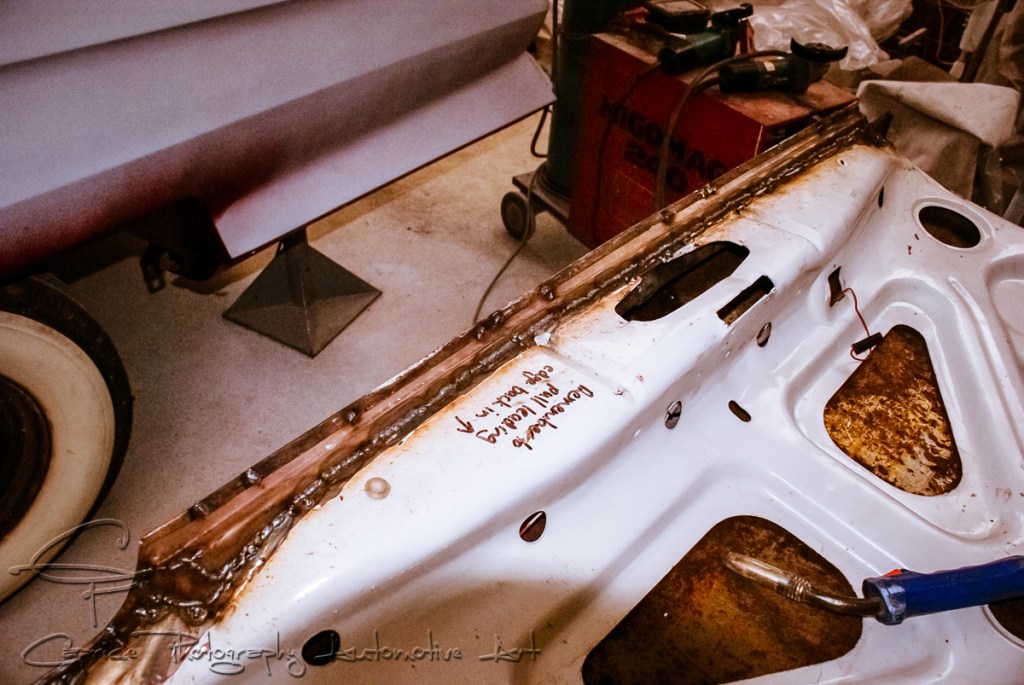
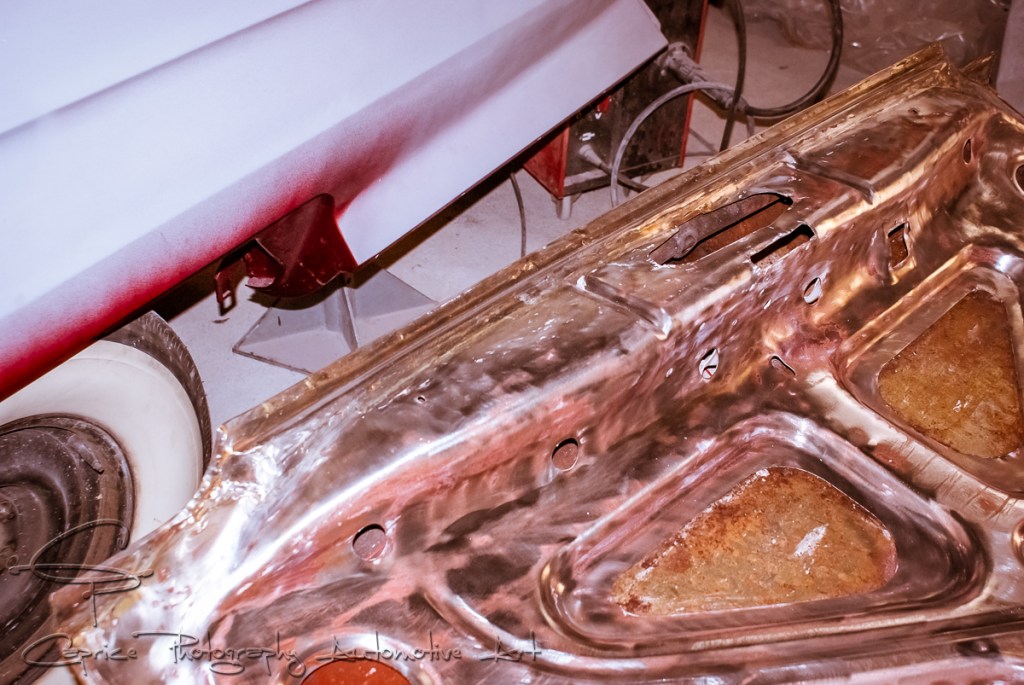
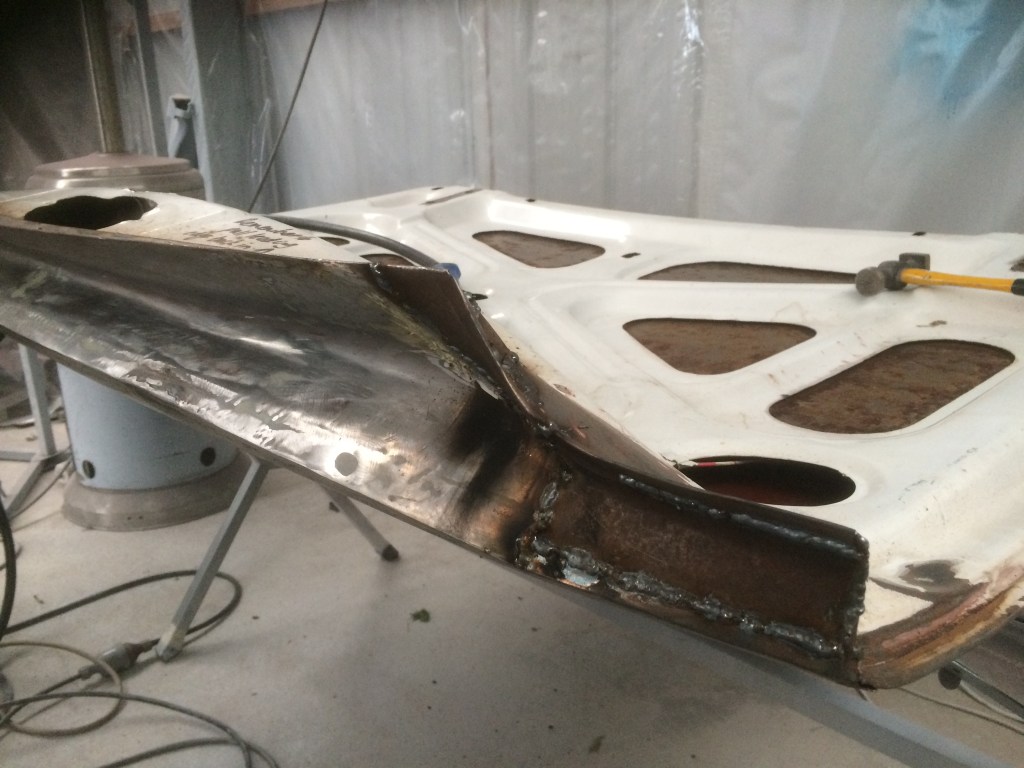
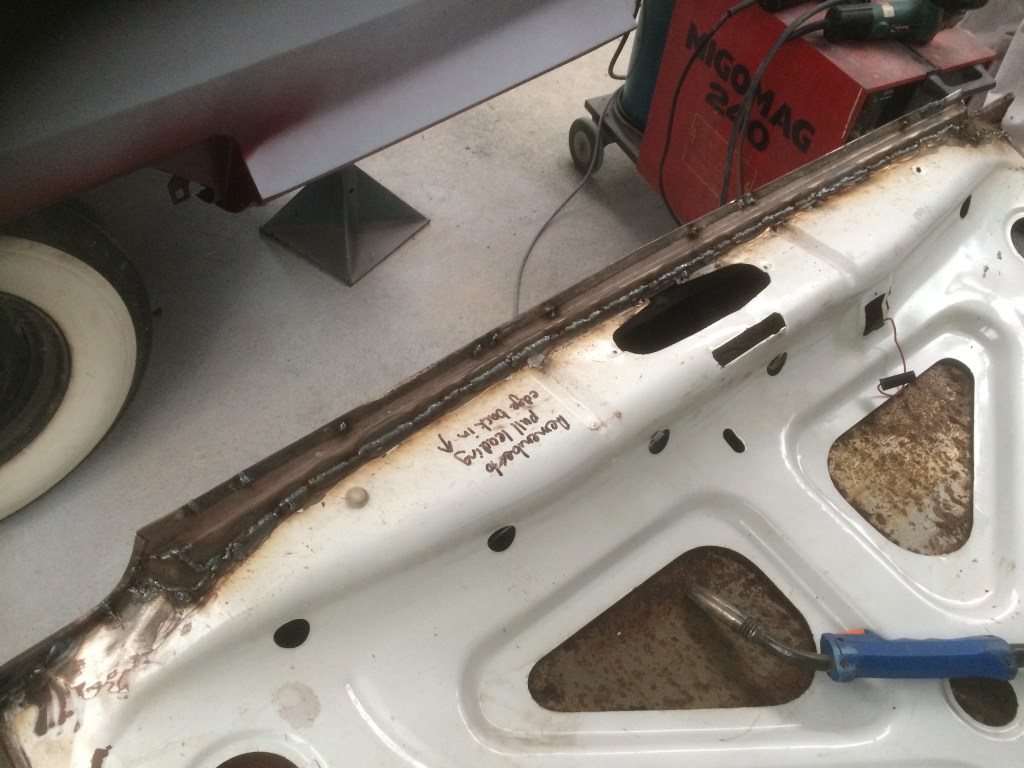
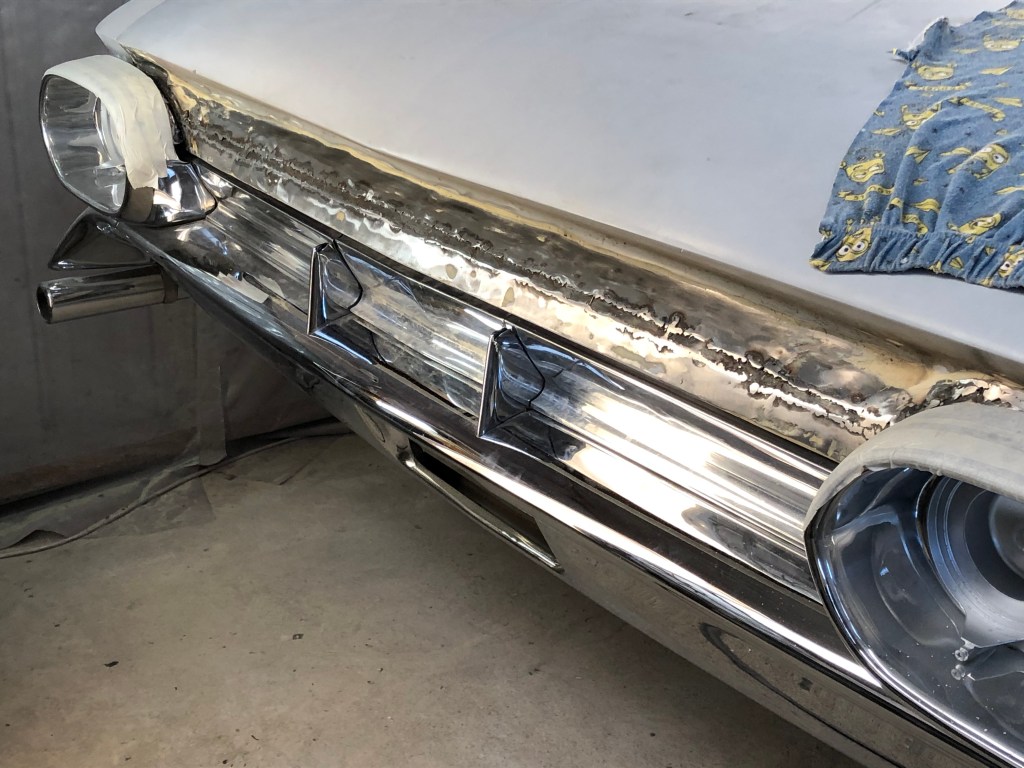
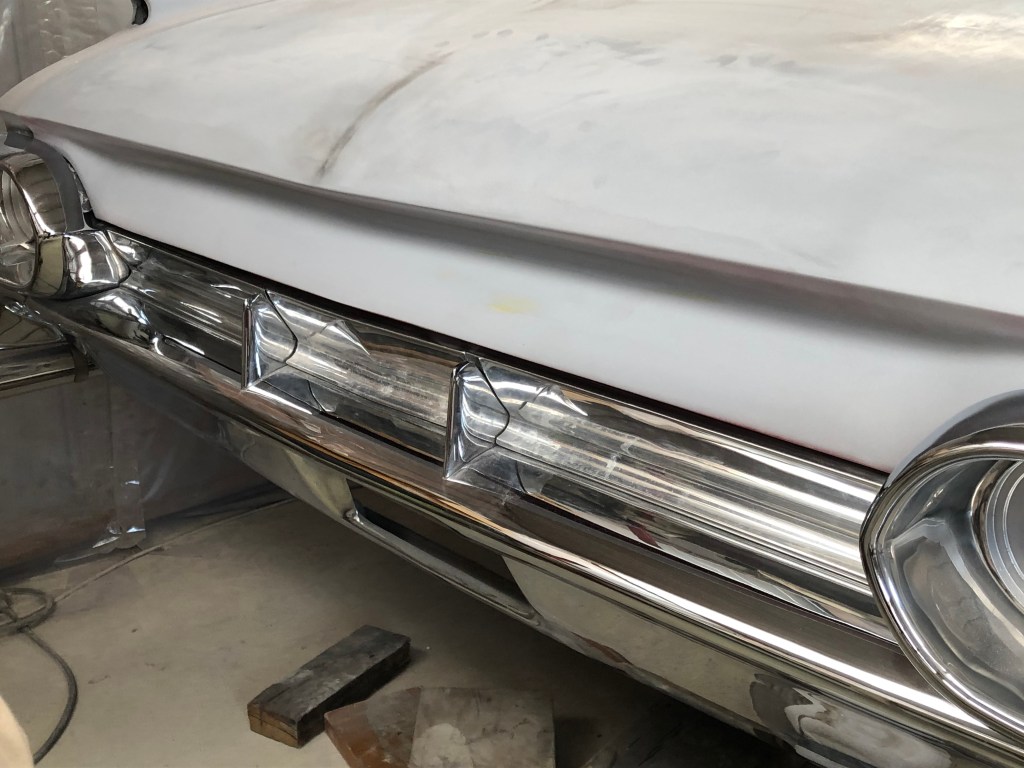
One panel I was not able to do while the body was on the rotisserie was the boot as it fouled with the frame when mounted on the car. Due to damage done in transit and rust issues, I had to cut out the back end of the boot on both the inner and outer panels before passing the rusted pieces off to another mate, Al to be used as templates for the new sections to be shaped in his folding and shrinking machines. I knew this was going to be a big job and time consuming. I didn’t want it to linger on so I attacked the panel in a marathon effort running over a four day break! With plenty of fitting, cutting, tacking, refitting, cursing, bending, hammer and dollying and realigning, I had the sections in to the point I could remove the boot from the car before welding and grinding up the repairs. I extended the lower lip down to sit closer to the alloy fill panels for a neater look. Some filler and high fill, and that’s the last panel done!

It’s booked in for the exhaust in a couple of weeks and I am running a number of jobs at the same time as I continue to merge various parts together while sourcing suitable bits and pieces. I’ll keep you posted!
The build continues
Exhaust

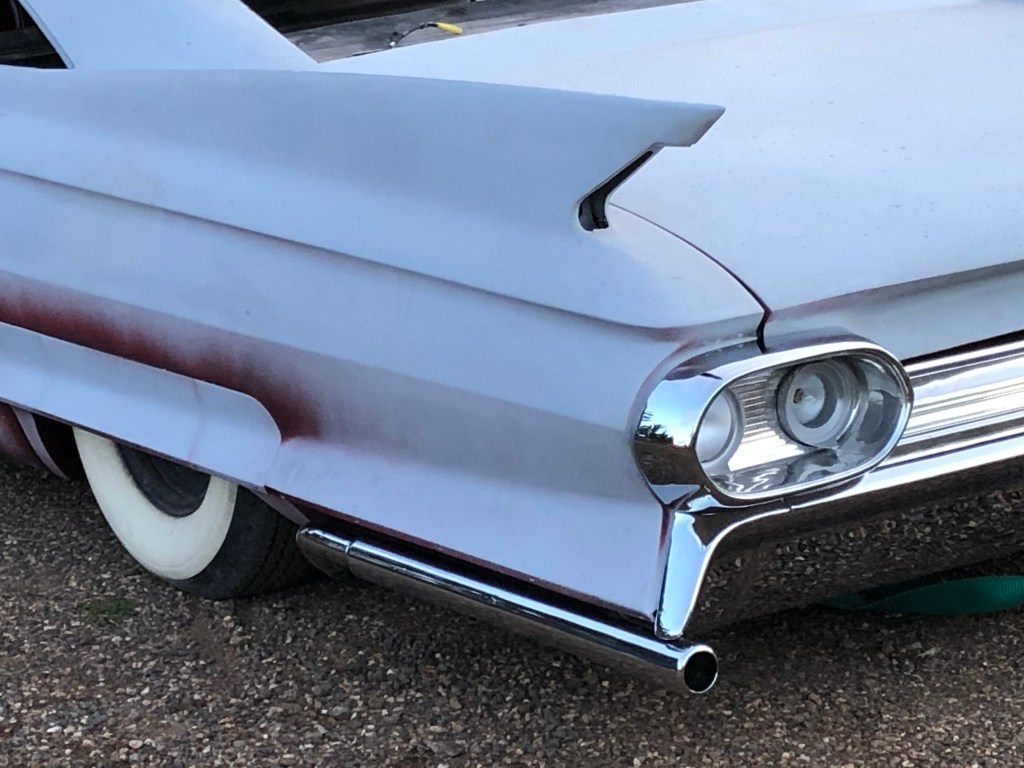
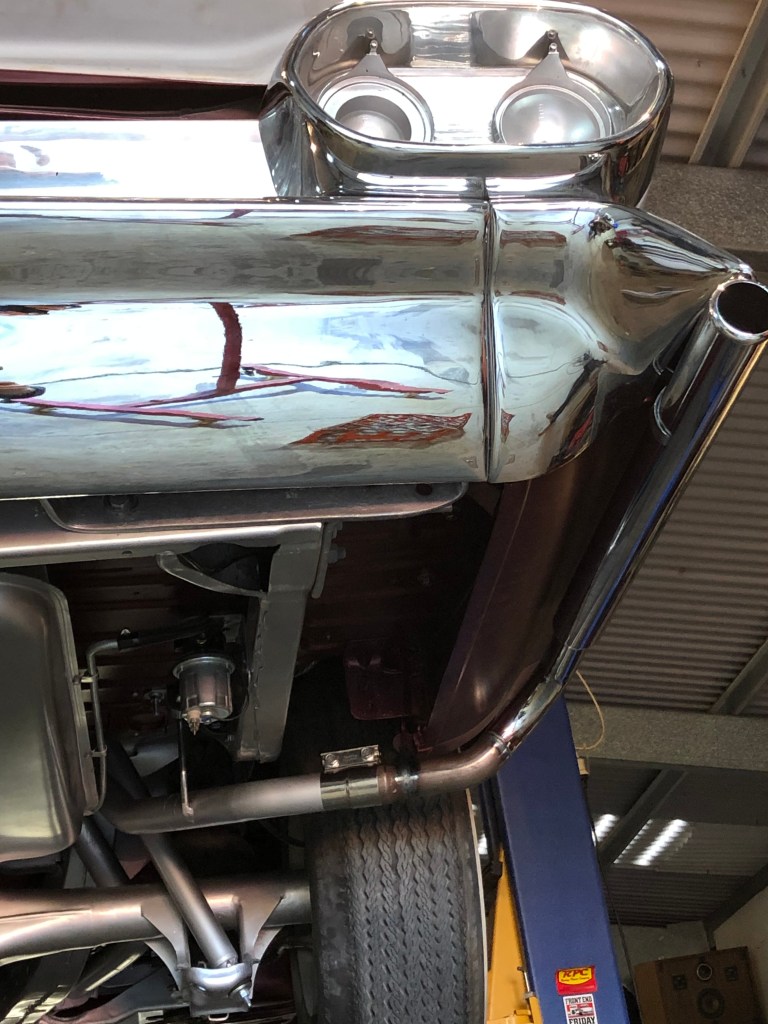
The next major plan in the project was creating the exhaust. I looked upon good mate, Shaun at Colliver Headers who was responsible for building the fenderwell headers earlier. He’s a gun!
The challenge with the exhaust on the Caddy is that it is airbagged so clearance had to be taken into consideration as well as the factory X-chassis so no crossovers. I assisted with the construction and we utilised the original exhaust opening through parts of the chassis. We went from 3 inch primaries down to the 1 7/8th size pipes for the ends of the Bellflower tips.
The Bellflower tips in themselves posed a challenge as there were no mounts nor did they extend far enough out of sight under the car. We strategically welded a mount near the end of the pipe as well as extended the start of the Bellflowers before linishing and rechroming the pipes for a clean look.

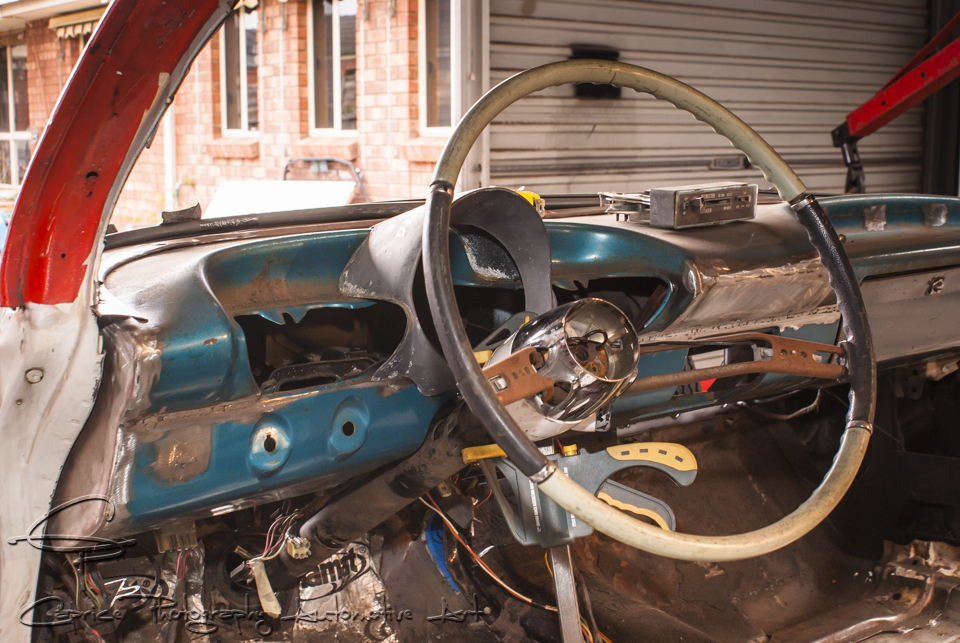
Interior
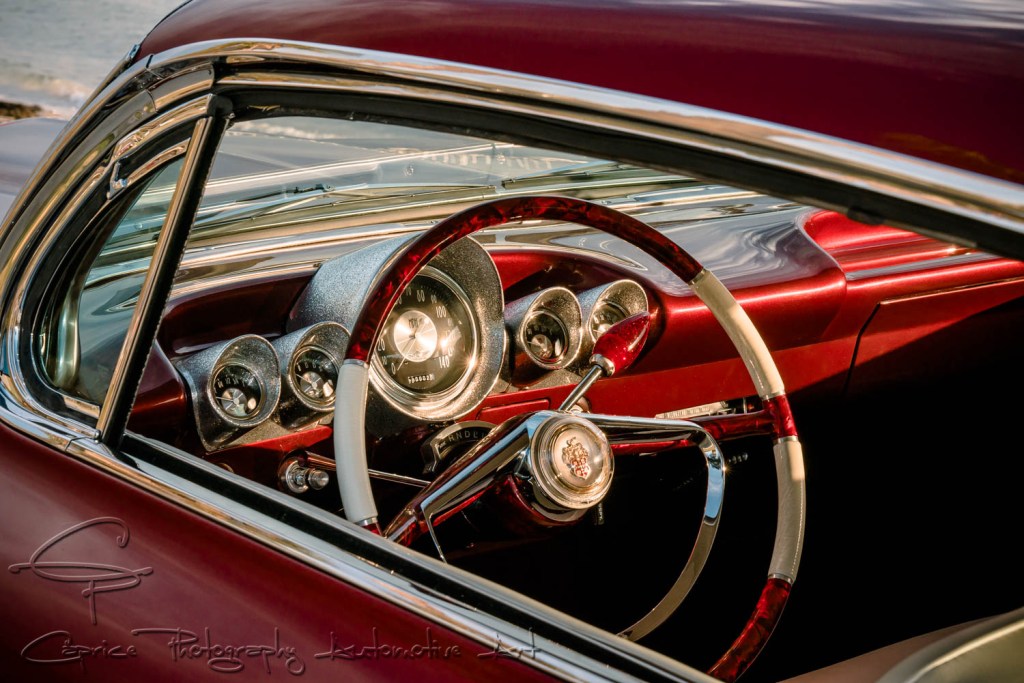
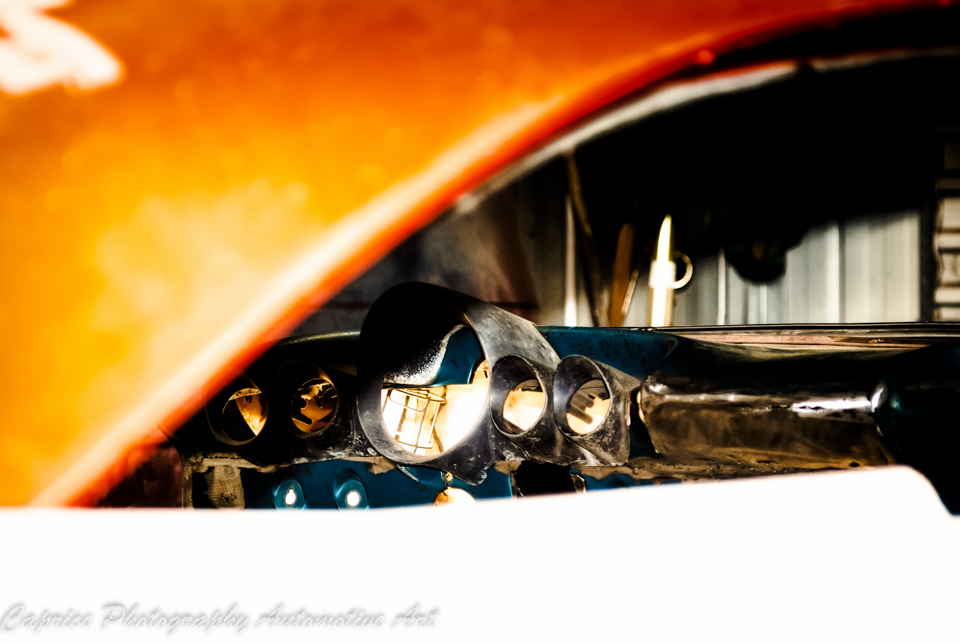
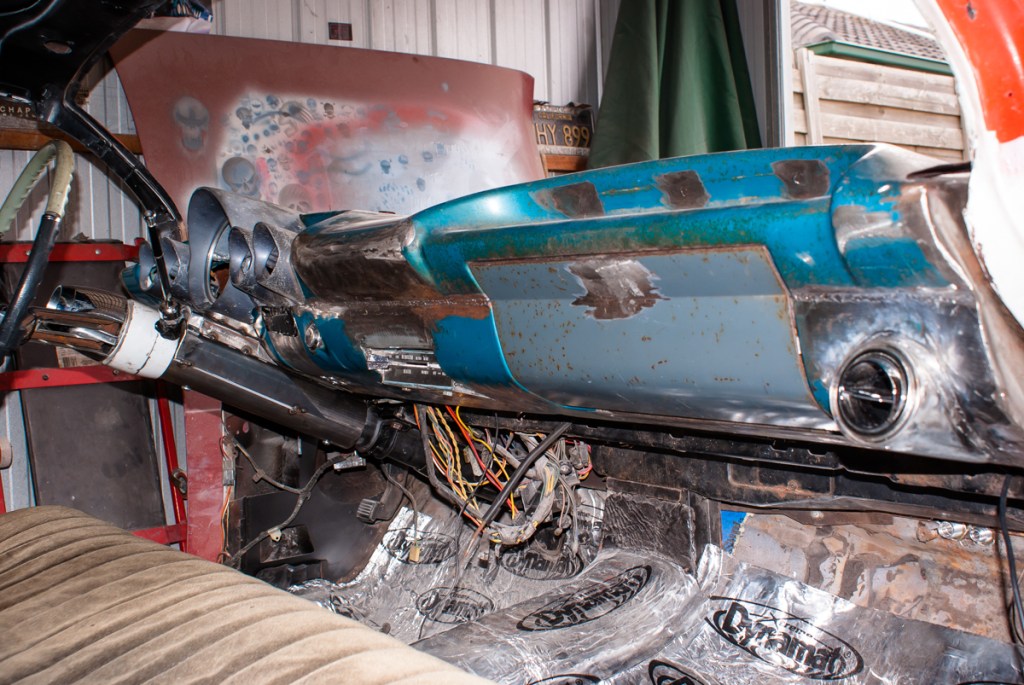
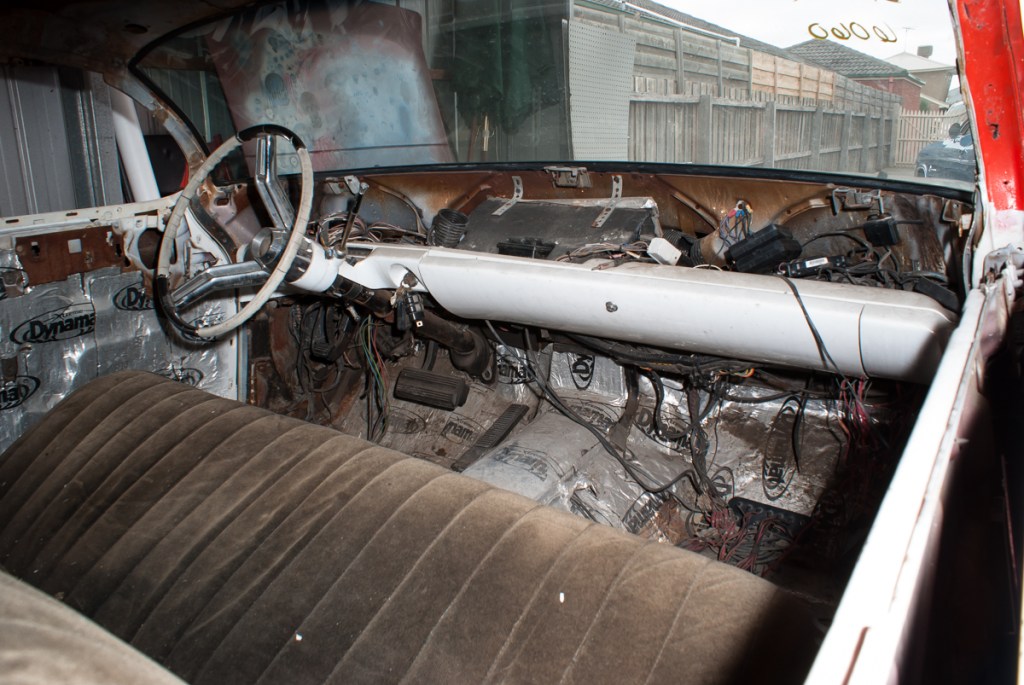
When it came time to sort out the interior, I decided that, after removing the remnants of the previous owner’s ideas and, since most of the original dash was missing, I would look for something different to use. Keeping with the sixties vibe and a dash I have always liked the look of, I chose to go down the path of the 59-60 Impala look. While I know it’s a popular choice amongst rodders and kustomisers alike, the round gauges compliment to roundness of this particular model Caddy and also allowed me to use more modern units while still retaining a traditional look.

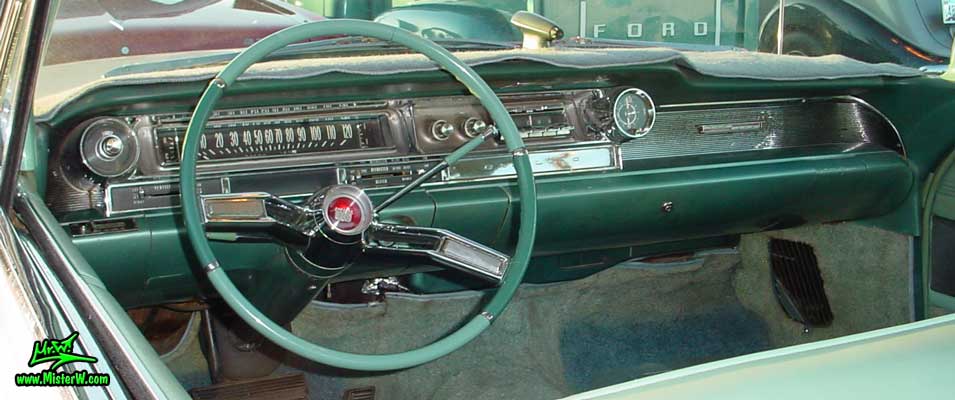

The dash itself wasn’t too far off the mark when it came to fitting. I only needed to reshape the back to sit smooth with the Caddy. The dash itself is a much deeper unit compared to the original Cadillac item. This in turn meant I now needed to modify the steering column, wheel and set up the indicator and shifter to fit ergonomically with the wheel.


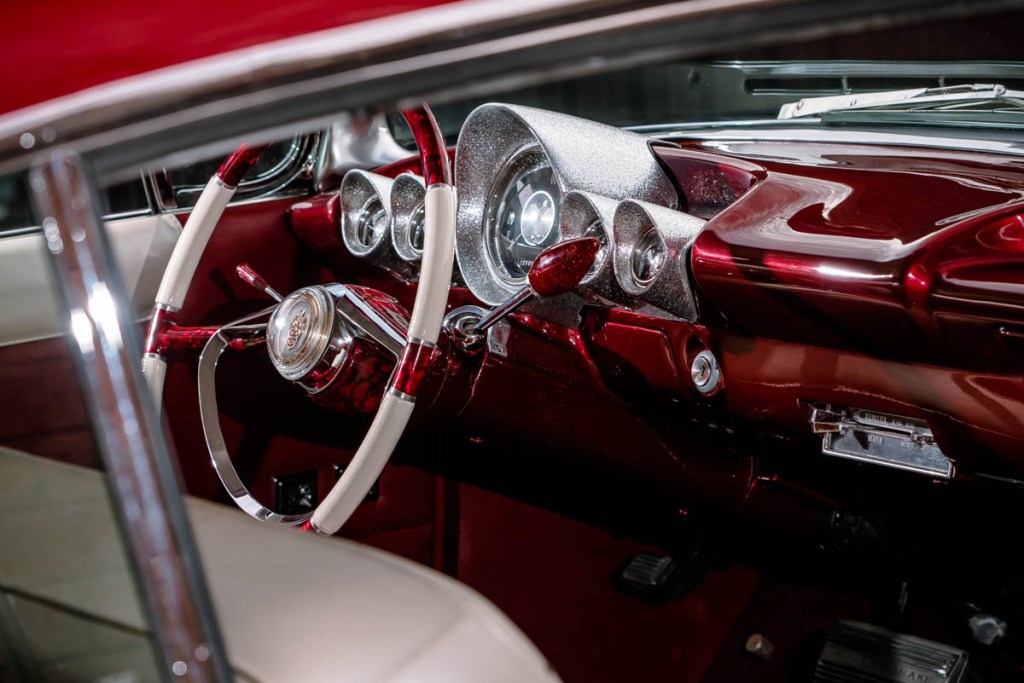
The steering wheel is an item I like for the fact that it is different and hard to identify. I came across the wheel when photographing a friend’s hot rod. While chatting about the progress of the car, I mentioned about the issues I was having with the dash setup. Doug, the owner of the rod, disappeared and returned shortly after holding a tired looking wheel and said “what about this?” I asked him what it was off and he said he had no idea, he purchased it at a swap-meet.
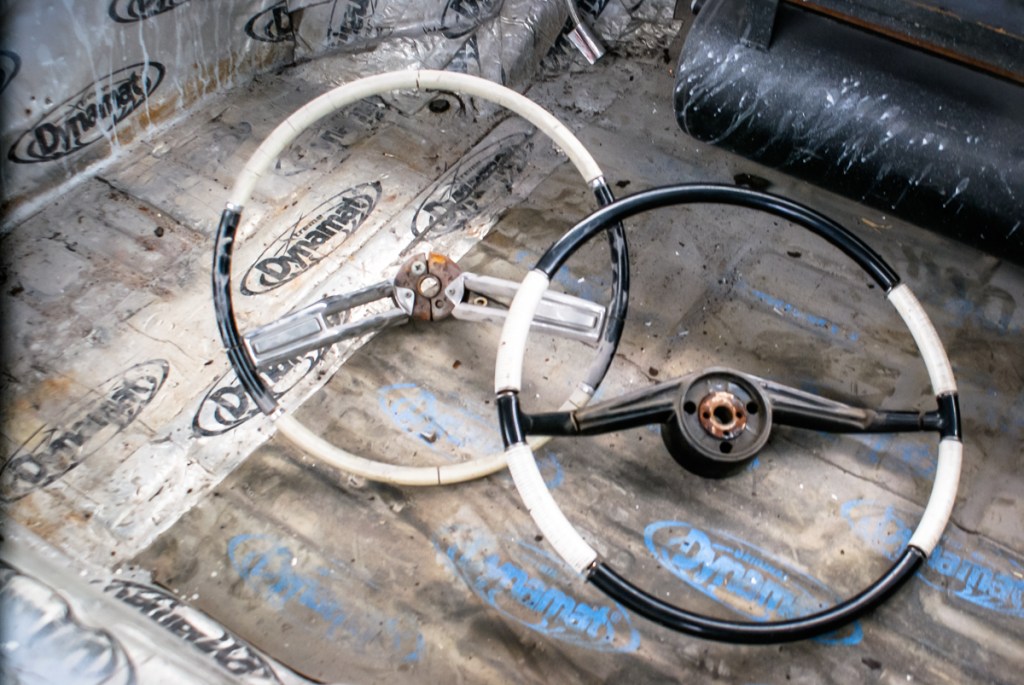
I thought it looked cool and also liked the fact it had an impressive crest in the center of the horn ring. After some research, I was excited to discover the wheel came from a 1956 Packard. Another marque added to the list of brands making up Rebelene’s DNA. I had Pat from Pearlcraft bring the wheel up to scratch with his stunning handywork.
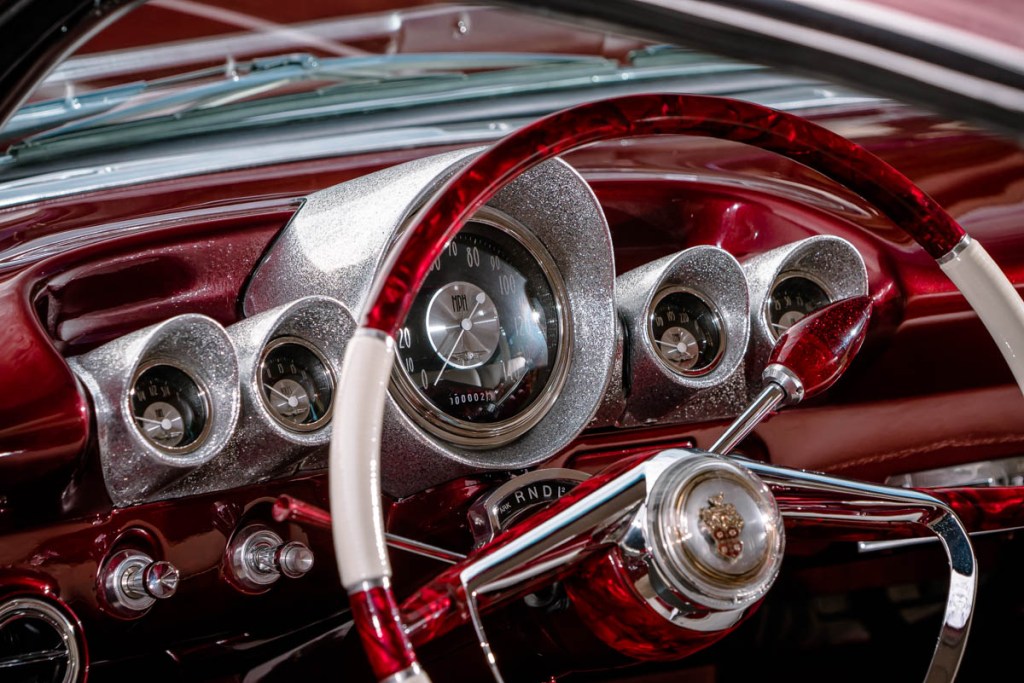
The Packard wheel is a much shallower wheel compared to the original Cadillac item so the two storks now fouled with the new wheel. For the selector, I simply flipped it over and finished it off with a Mooneyes shift knob. The indicator stork proved to be a bigger challenge. I machined and welded various nuts together to re-angle the arm. I needed to be sure the arm would still function ok under use while also able to be removed if required.
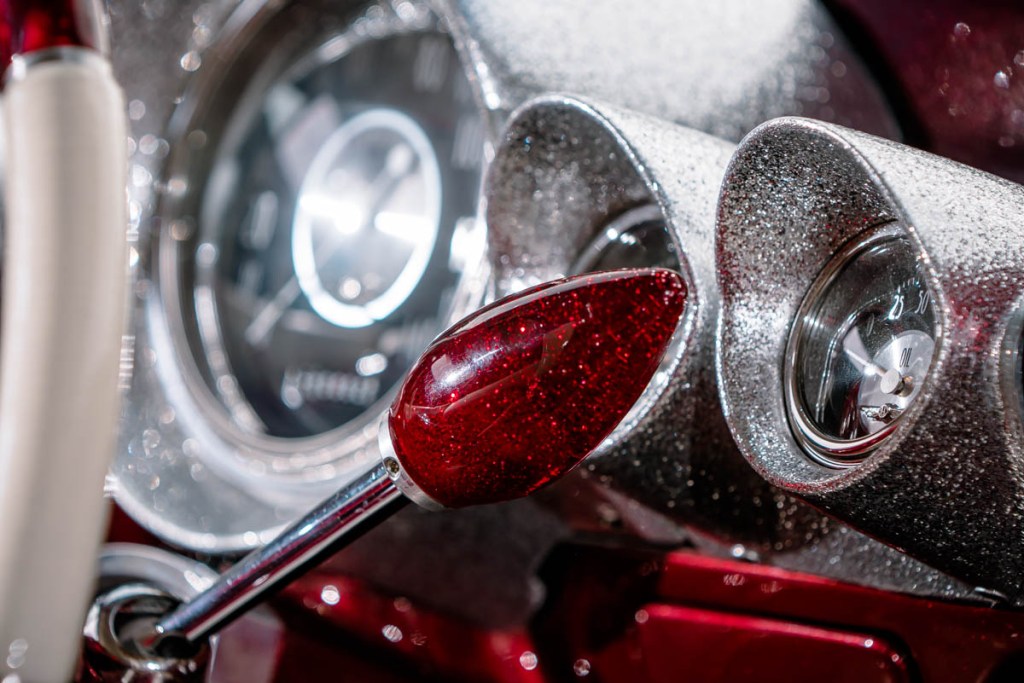
To meld the column to the dash, I fashioned my own fill panel which also houses the universal trans selector glass. With a Turbo 400 in the car, none of the original items would suit. The gauges themselves are from the Classic Instruments range designed specifically for the 59-60 Impalas. My only beef with them is that the indicator and high beam lights that are located in the original speedo are not in the aftermarket unit. So therefore, I was left to find a suitable location for these three lights. I have strategically placed them below the speedo in the fill panel but blacked them out so as to not draw attention when not in use. The gauge pods themselves have been finished in a high flek silver for full kustom effect thanks to Luke from Lukeydidit

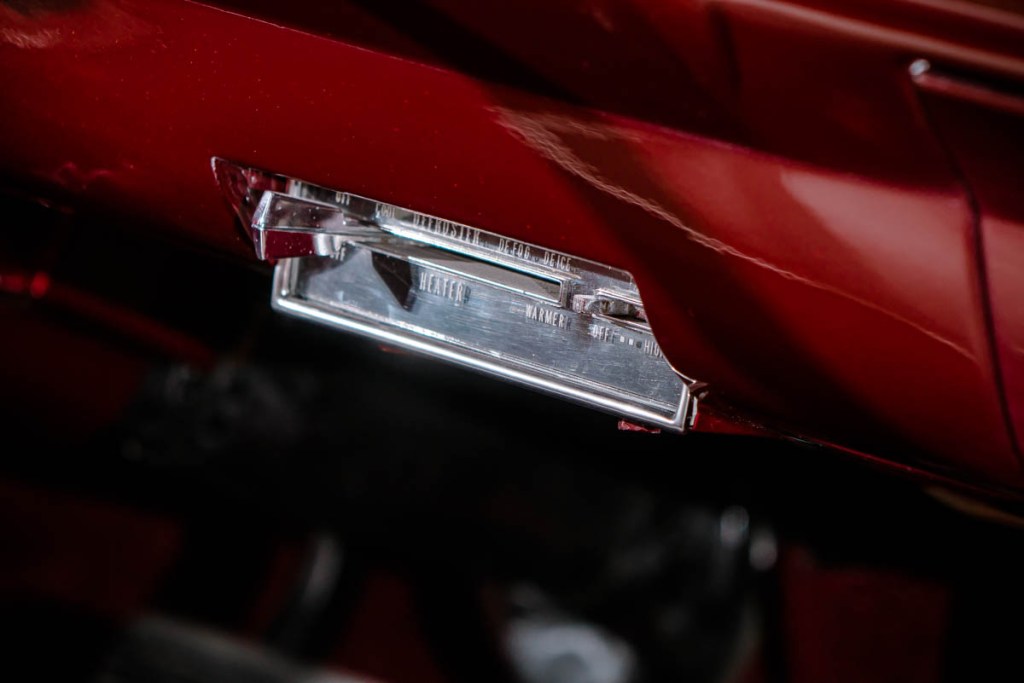
I deleted any “Chevrolet” branding from the rest of the dash. I filled in the original speaker grill as well as the radio location. I utilised the Cadillac heater controls and mounted them in the old ashtray location.
Where the Impala heater controls were, I used this area to hide all the modern convenience controls such as the electric window switches, boot release, air con controls and the glove box switch. I created a panel to cover the switch panel which is released via a hidden button.
I smoothed the glove box by deleting the release button and lock. The lid now opens via an actuator which is controlled by the aforementioned switch in the hidden switch panel.
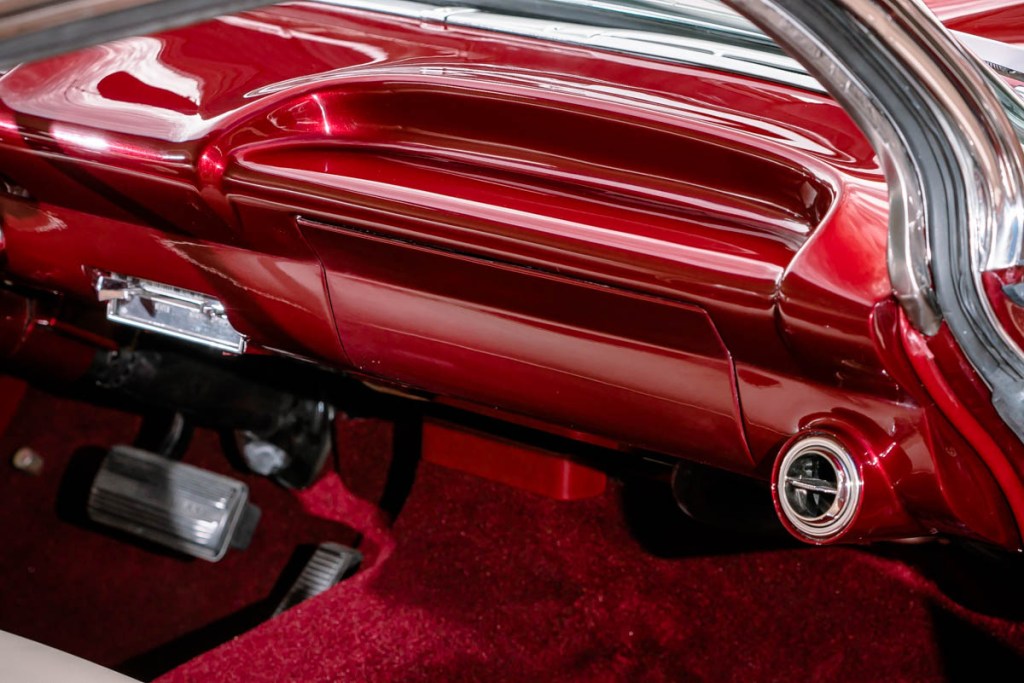
The air con vents are custom made from water pipe cut and machined to fit smoothly with the curvature of the dash. Universal eye ball vents complete the old school look. All six windows are electric with the four main windows operated from the switches inside the hidden panel.

While the Impala dash is deep, it finishes short underneath. Due to the under dash air con unit, heater and air con ducting and wiring, all this was visible so I had a good friend fold up some sheet metal panels to extend the underside of the dash and hide these utilities.
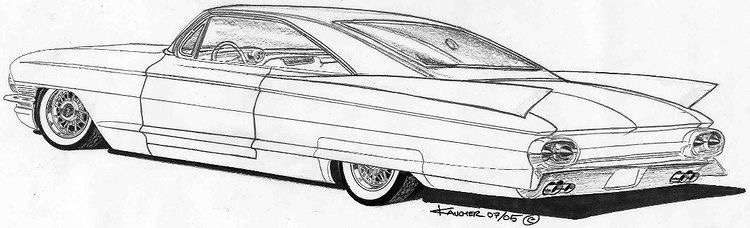
When it came to designing the rest of the interior, I sat down with a handful of blank sketches of a stock 61 Cadillac interior. Using pens and coloured pencils, I played around with ideas until I came up with a design that I liked. I wanted the interior to not look like a Cadillac interior yet still encapsulate the luxury of the big finned car while also paying homage to the kustom stylings of the era.
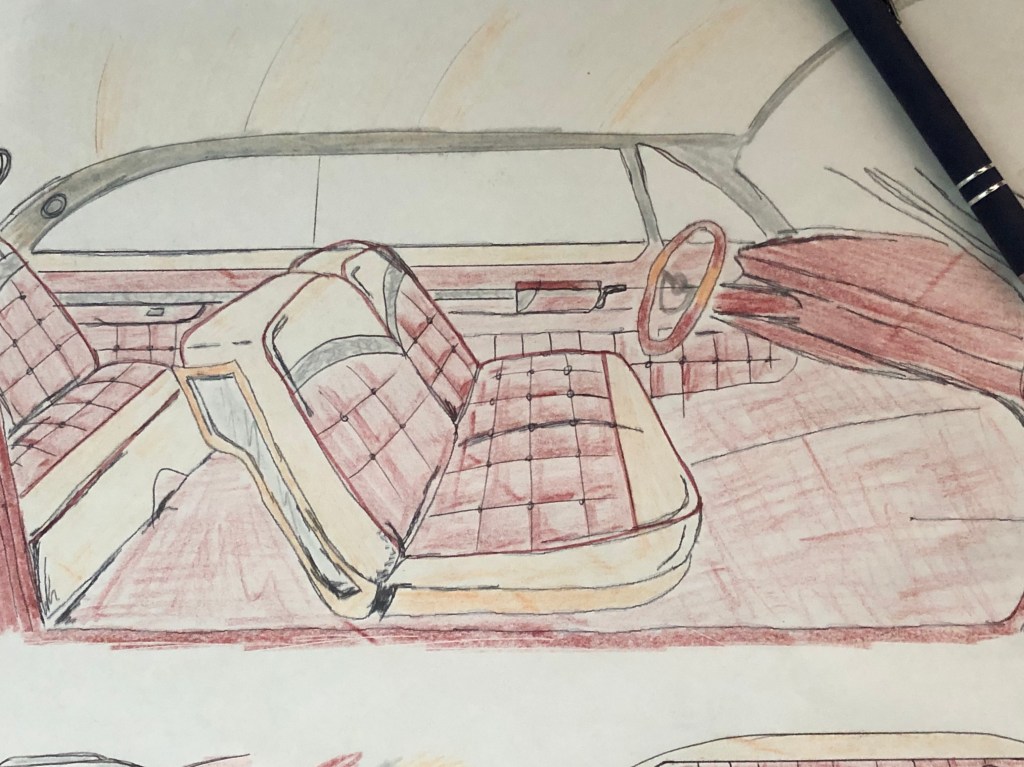

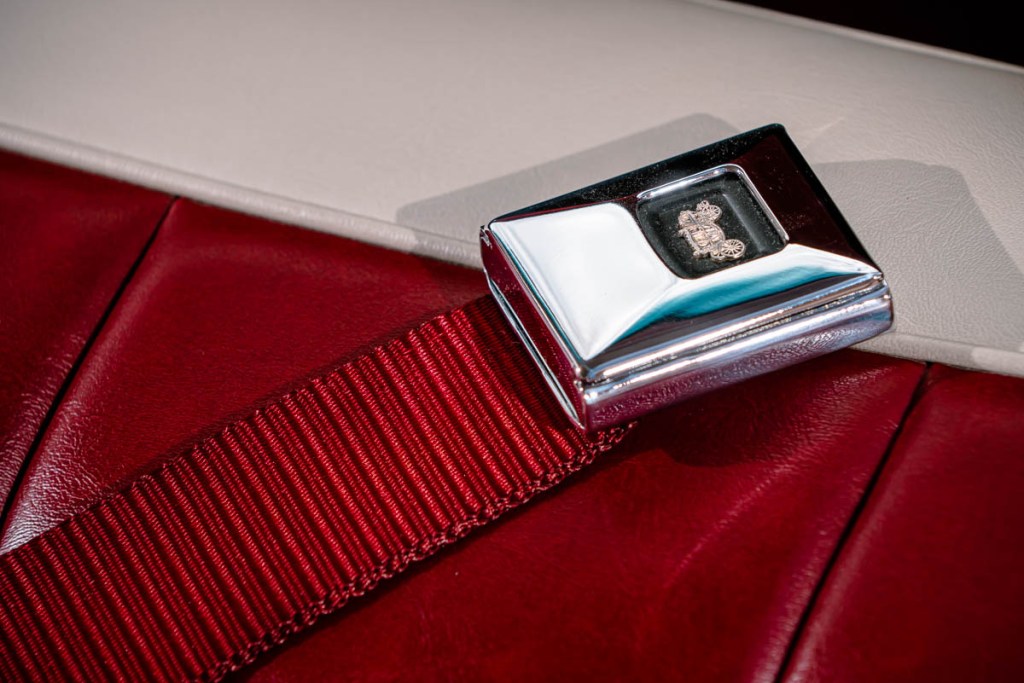
I sourced out an unholsterer who was confident enough to take on the massive task of completing such a one off interior. Mark Griff from Griff’s Trim Shop in Ballarat was the guy for the job. Mark, along with his workers, Aaron and Jarrod who both indulge in the traditional car scene set about bringing my crude renderings to life. They installed the 1961 Cadillac Fleetwood curtesy lights in the sail panels and the custom made center light I created from two different swap meet items. The seatbelts are from a GM vehicle of the 60s but I’m not sure what.
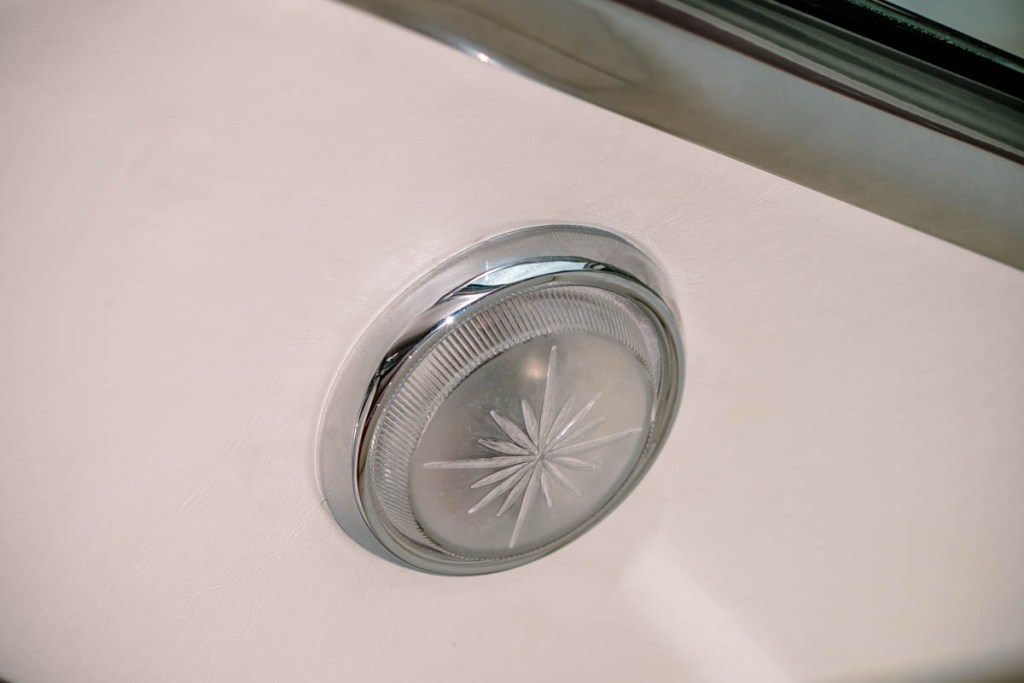

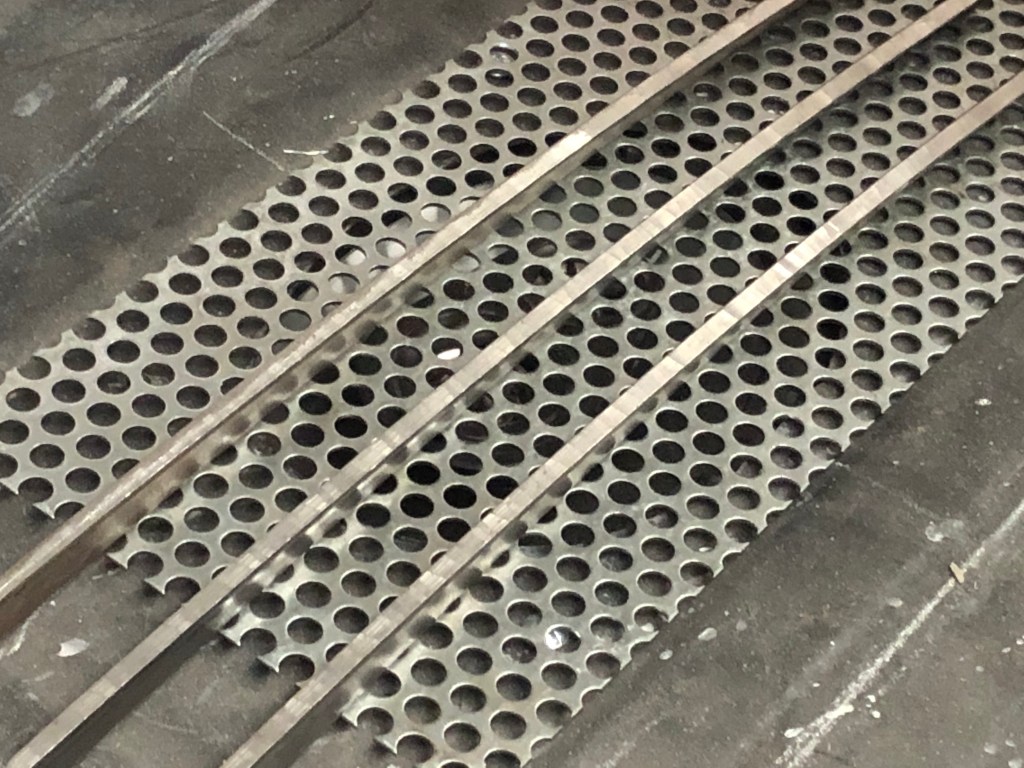
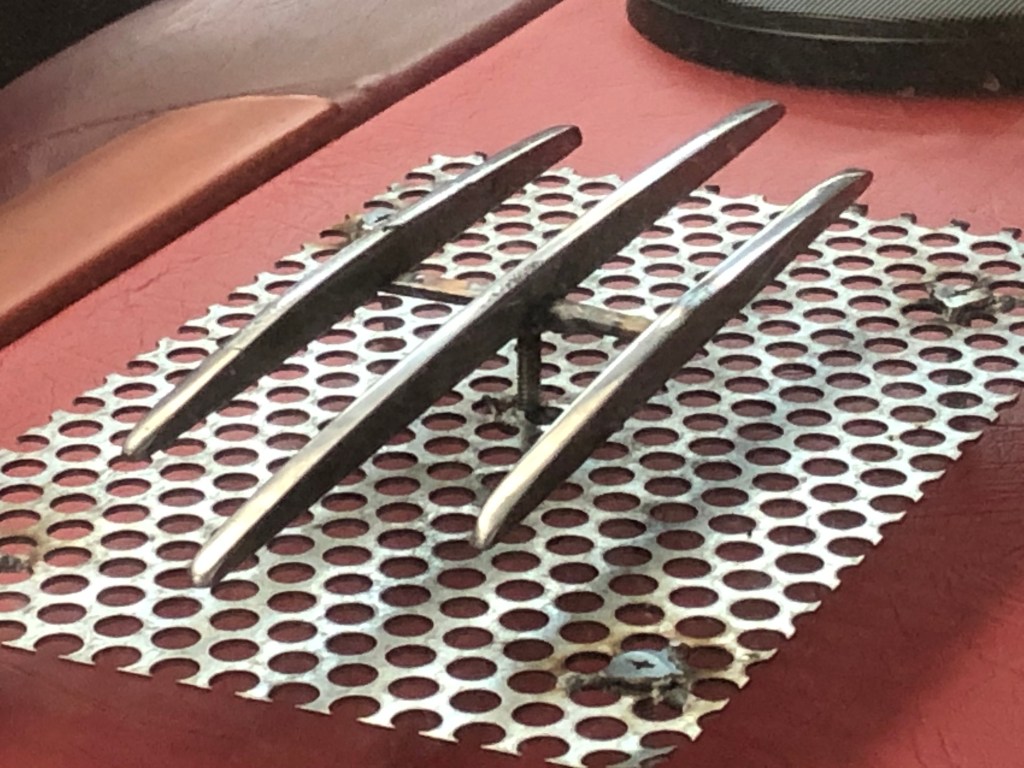
The audio in Rebelene is there mainly to be heard and not seen. A hidden bluetooth audio unit is mounted under the dash. Having said that, you can’t hide speakers easily so the front pair are in the kick panels while the rear pair in the parcel shelf have kustom one speaker grills. I created these floating bar style speaker grills to compliment the floating bar grill.
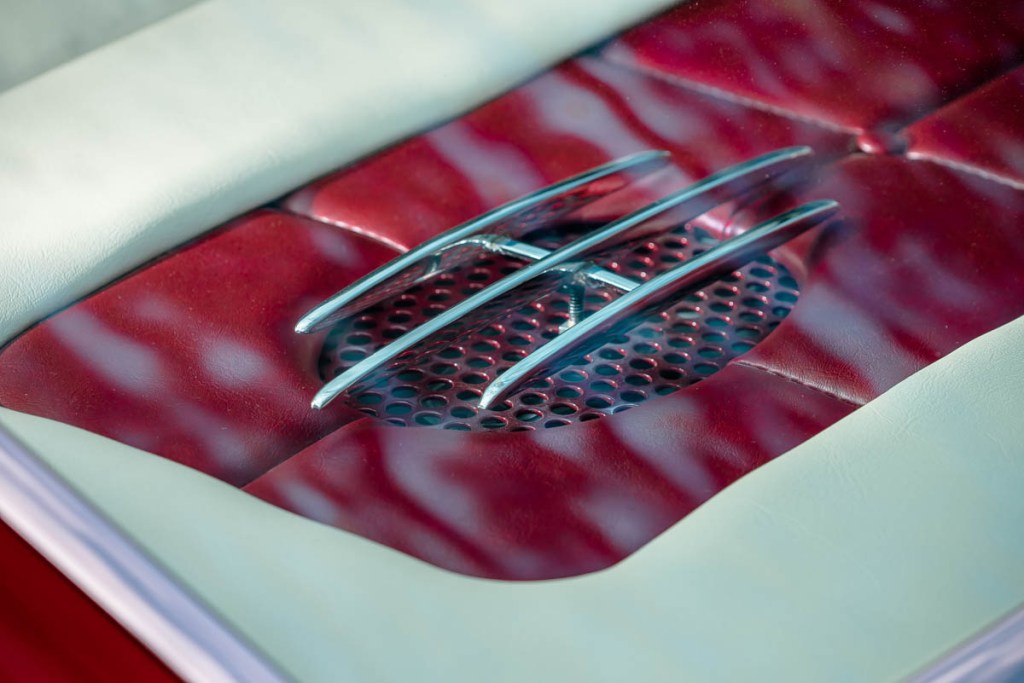
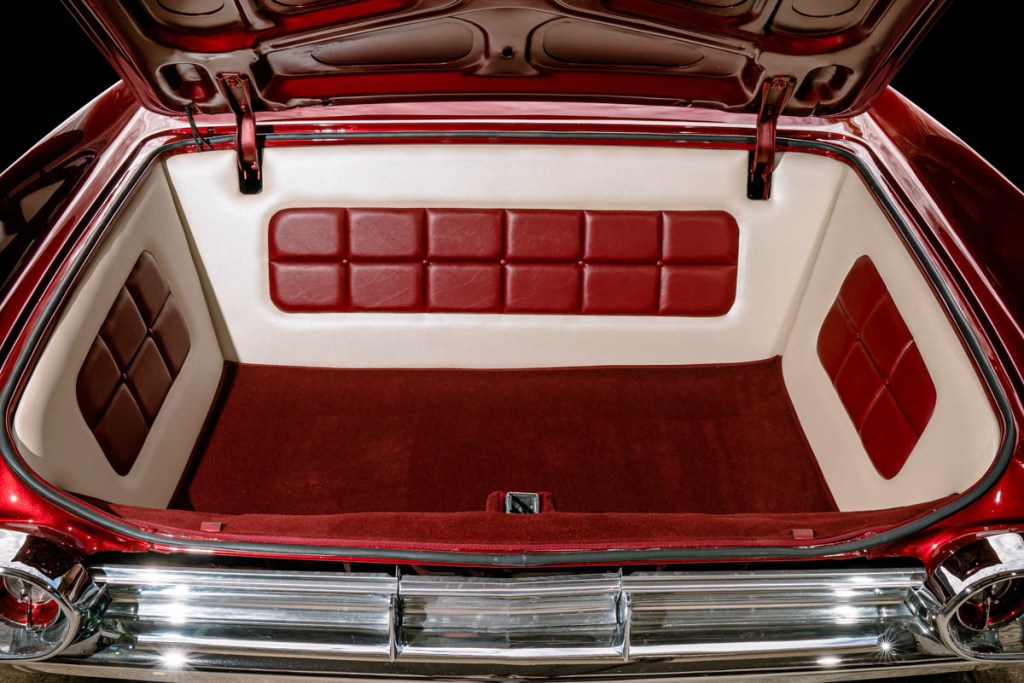
A similar treatment was also completed in the boot.
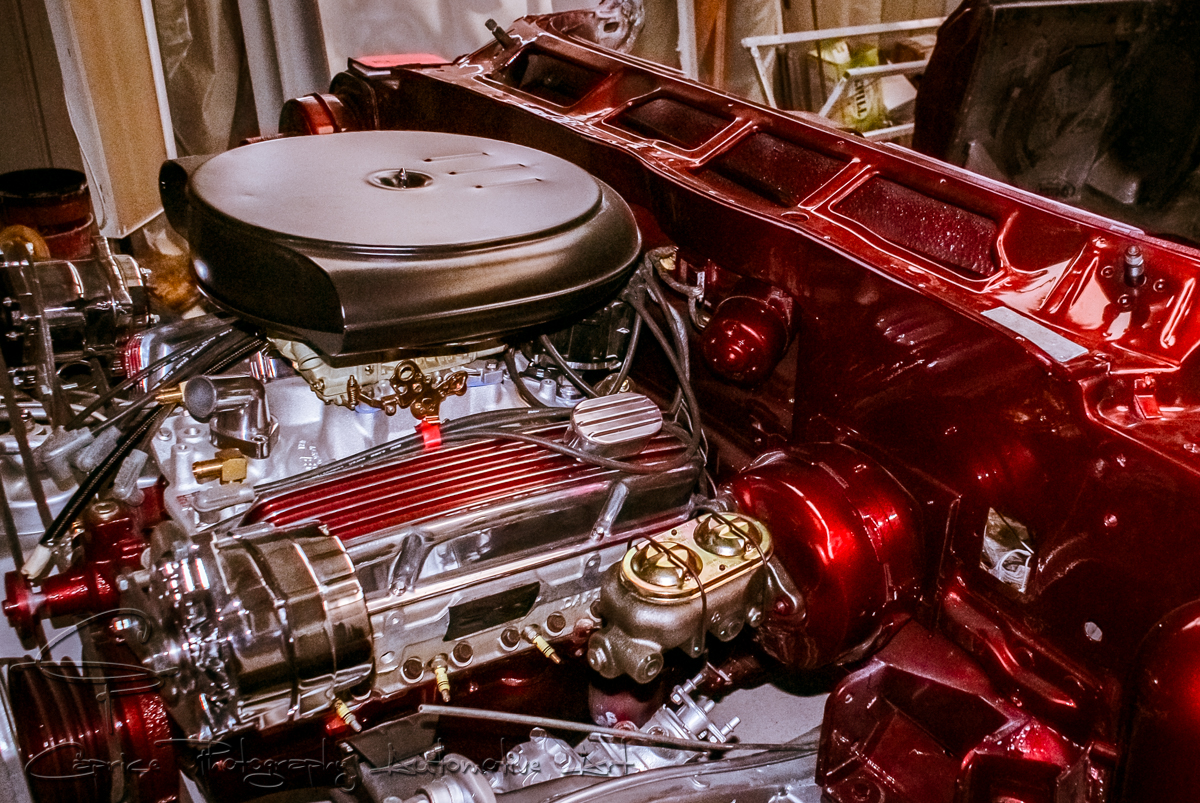
Engine Bay
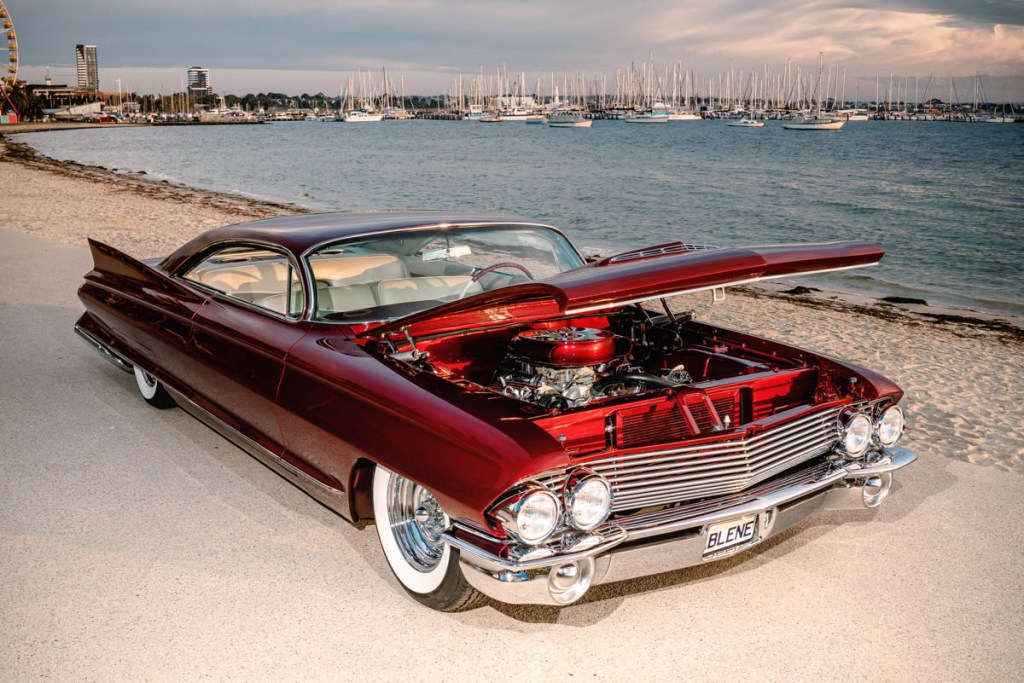
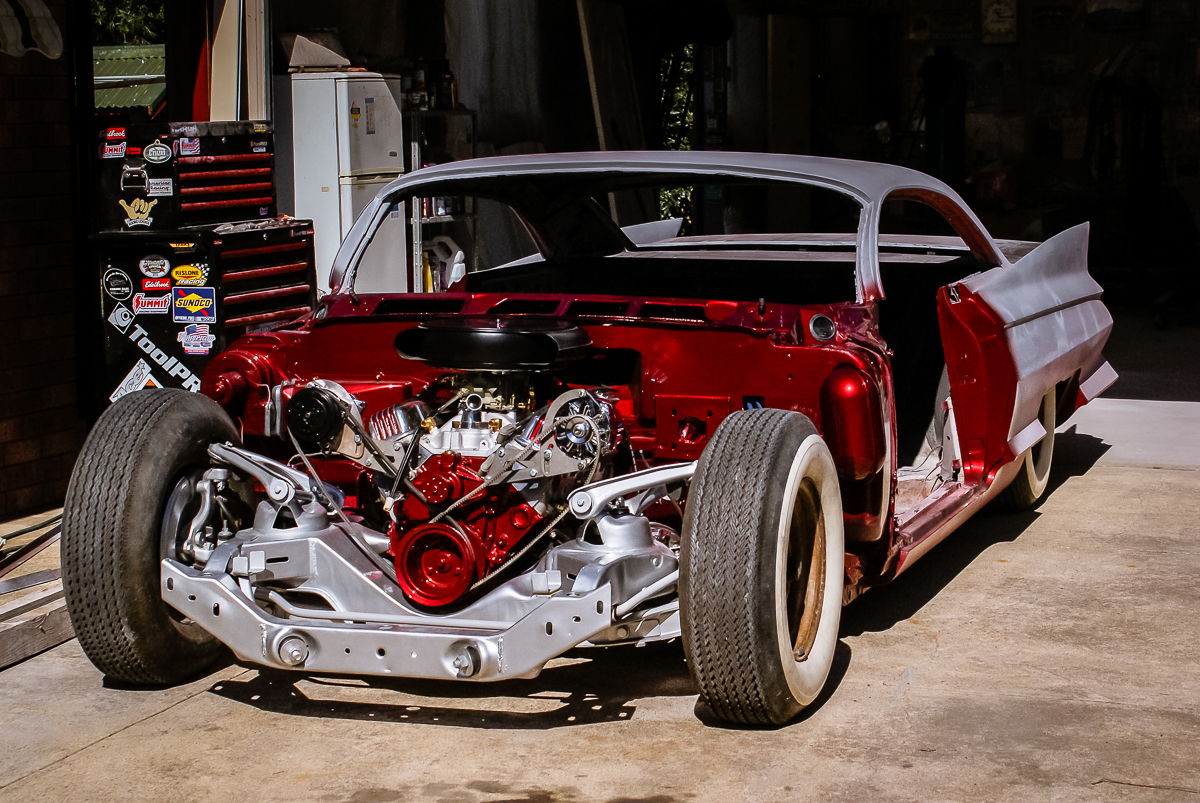
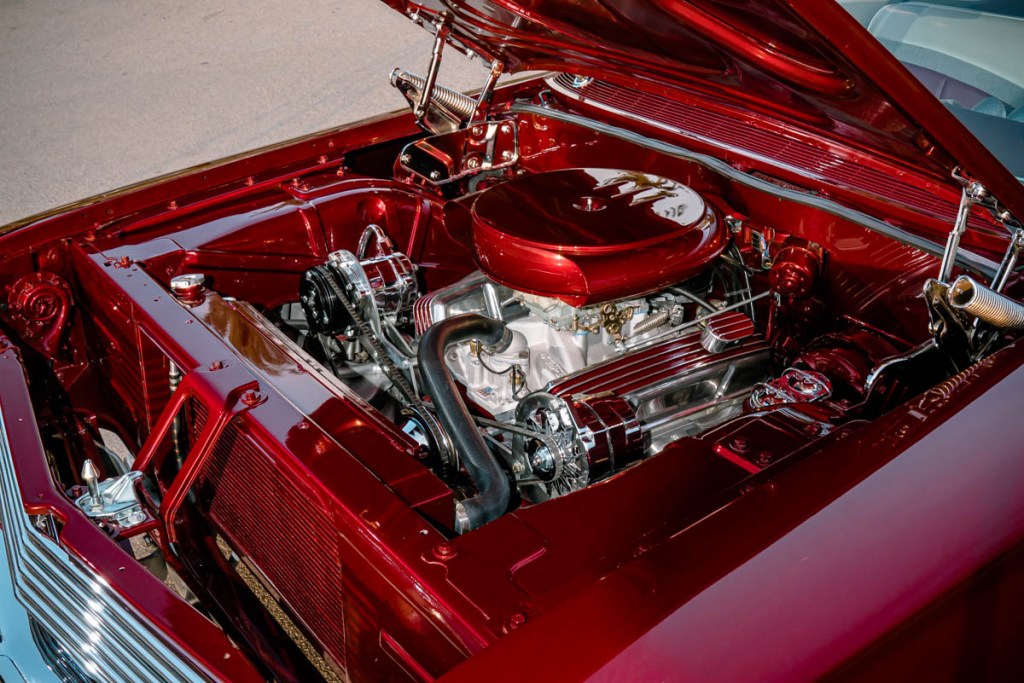
When it comes to creating your ideal engine bay and keeping it as period correct as you can, you’re met with numerous challenges along the way. To keep with the sixties kustom era, I knew all billet items were out and old school chrome was in. Previous cars I’ve gone very heavy on the chrome and polished alloy but, as kustoms go, they look better with their bonnet down than up, I took a big step back from the shiny bits and kept it to a minimum (Although this may change in future plans).
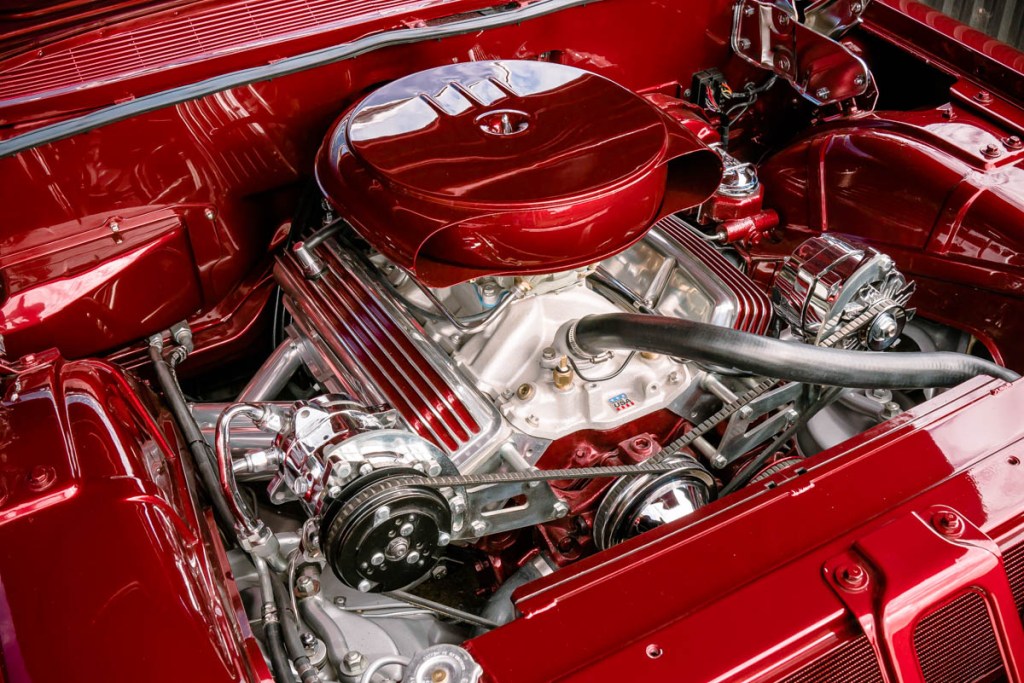
The motor itself was already in the car when I purchased it and, as it was a modified powerplant, I decided to keep it. The note out the Belflowers alone would be worth the fuel it’d drink.
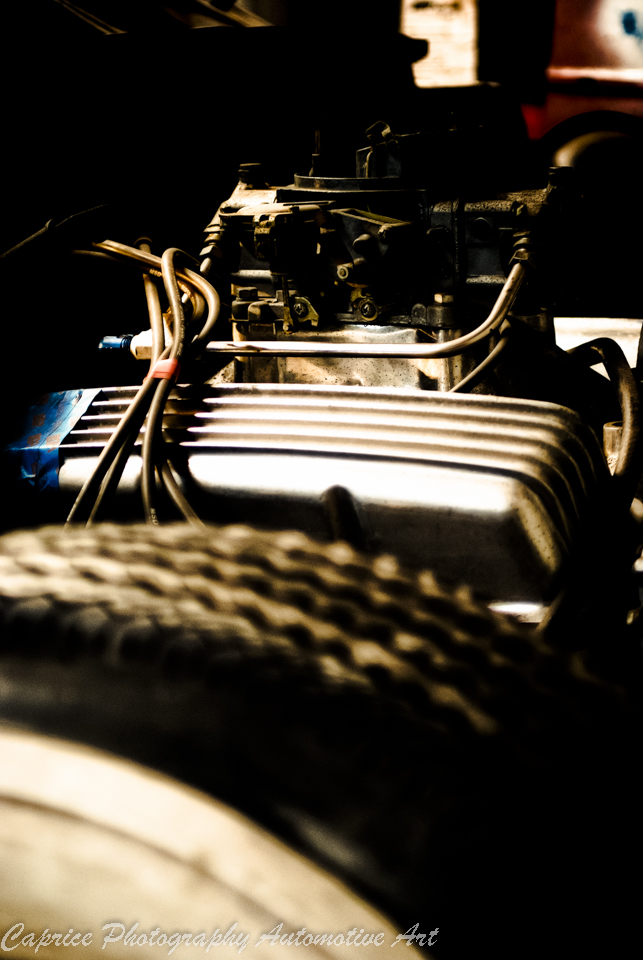
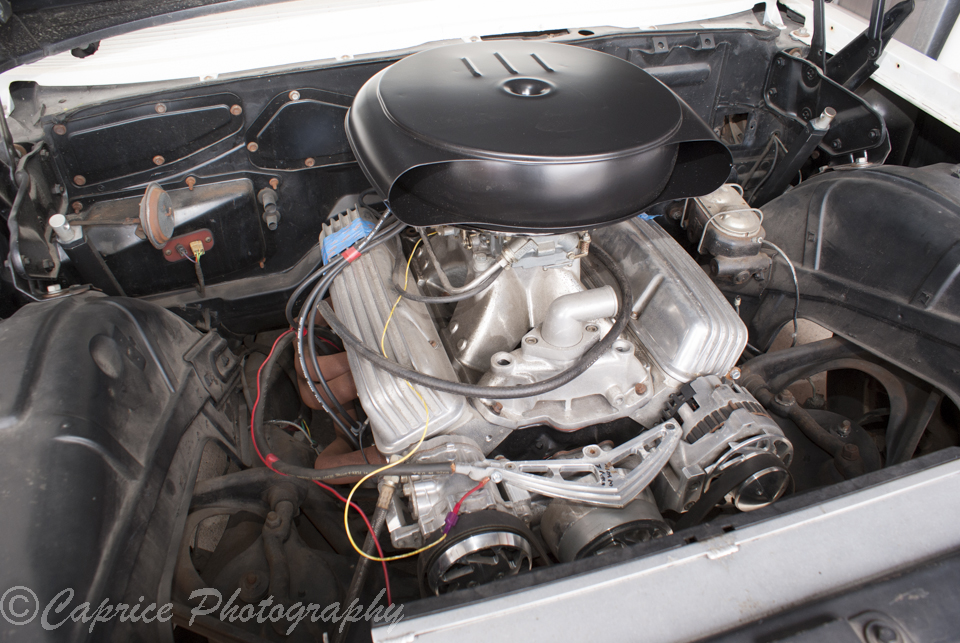
The motor is a 383 c.i. Chev with a decent sized cam and DART II alloy heads. Most of the build work on the engine bay is covered back in the December 2105 post so I won’t go over it again.
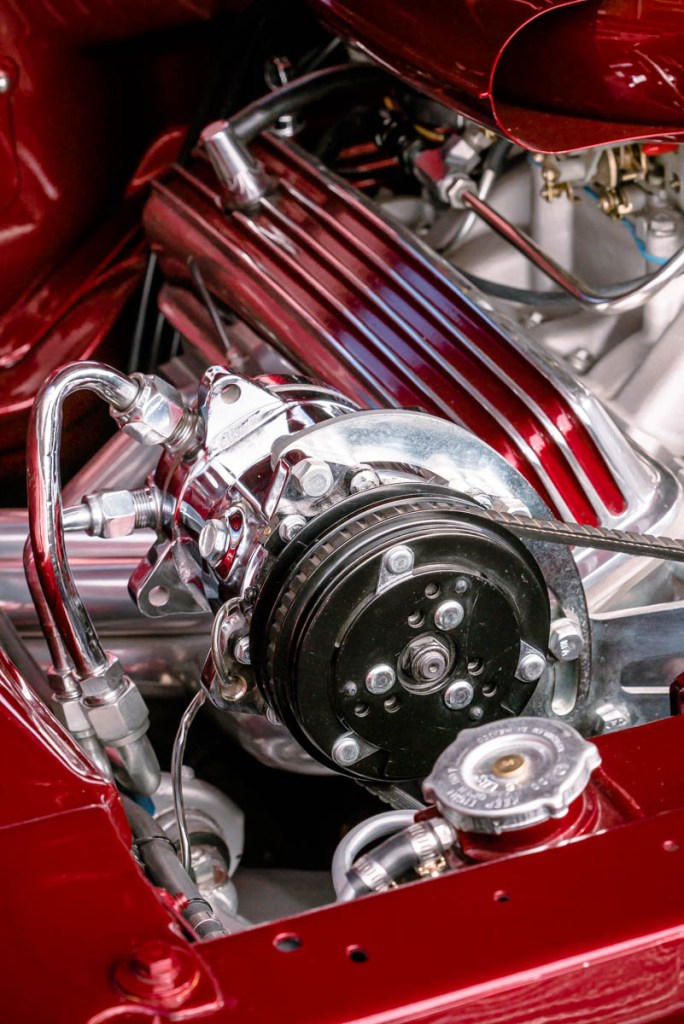
With the motor, I began by ditching the serpentine system for the old school multi-belt system. This meant sourcing all corresponding pumps, pulleys, alt and compressor. The power steering pump uses early Camaro bracketry while the other accessories use aftermarket brackets. I ditched the high volume sump for an original unit. The single plain high rise manifold was replaced with a lower dual plain item.
Dress parts are minimal. I smoothed the block before painting it the same colour as the car. Those fenderwell headers add the attention while a traditional bat wing air cleaner sits on top of the 780 cfm Holley carby flanked by finned rocker covers. Any wiring has had its coloured plastic terminal covers removed too.
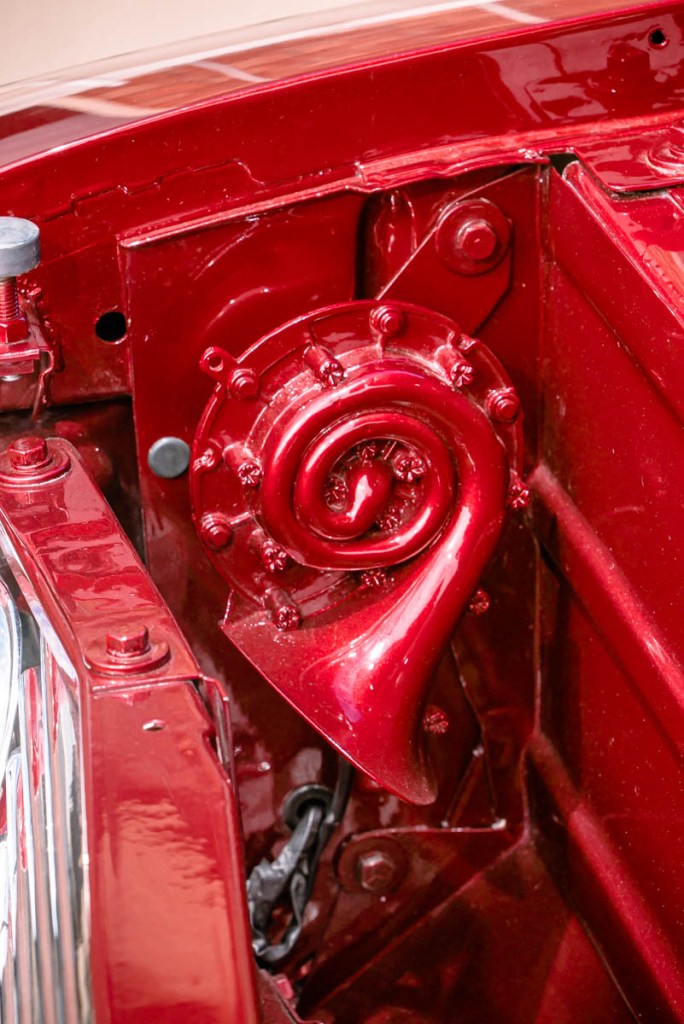
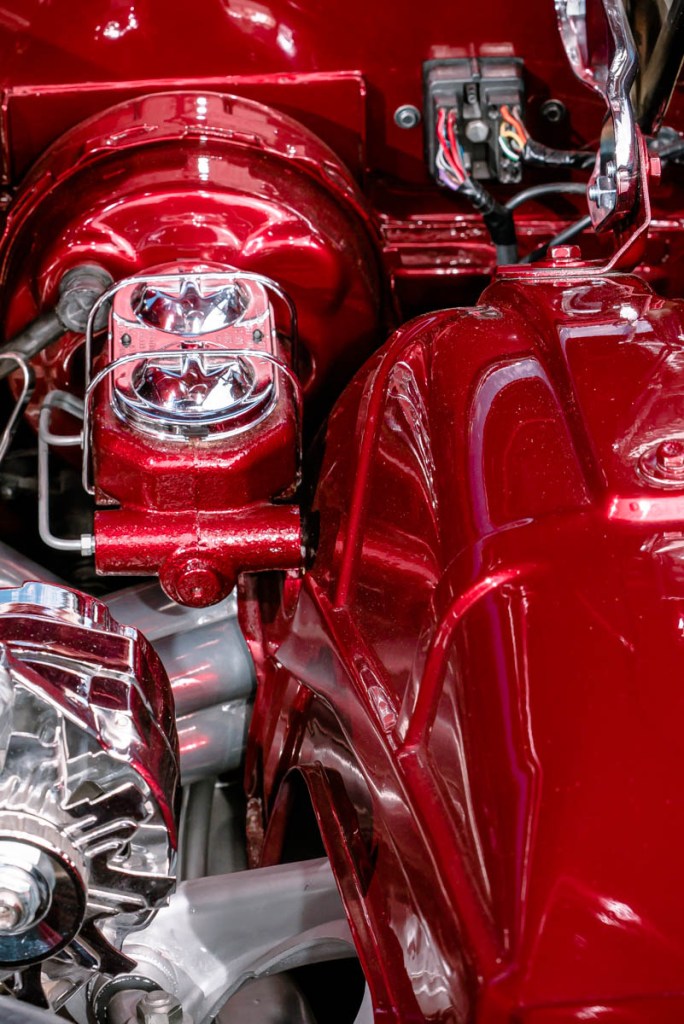
Most of the bolt on panels around the engine bay, especially on the radiator support panel have been welded into place for aesthetics. A pair of 59 Impala ram horns sit in place at the front while an electric heater unit has allowed the ability to delete the heater hoses. An electric vacuum unit from a later model car has since been also installed due to the lack of vacuum being produced from the high horsepower motor. It’s been tucked out of sight under the original vacuum tank. The windscreen washer bottle has been located in the boot for cleanliness. A pair of refurbished chrome bonnet hinges complete the nostalgic look.
Body mods


Good one Greg if this one turns out like your Chev it will be a winner
Thanks Gerry! We’ll give it a red hot go!
Awesome build like to see more of it
Shes coming along nicely Greg, lookin great.
I might need a few tips on the panel and paint work soon.
Cheers Wayne! Happy to help out for paint and panel! 🙂
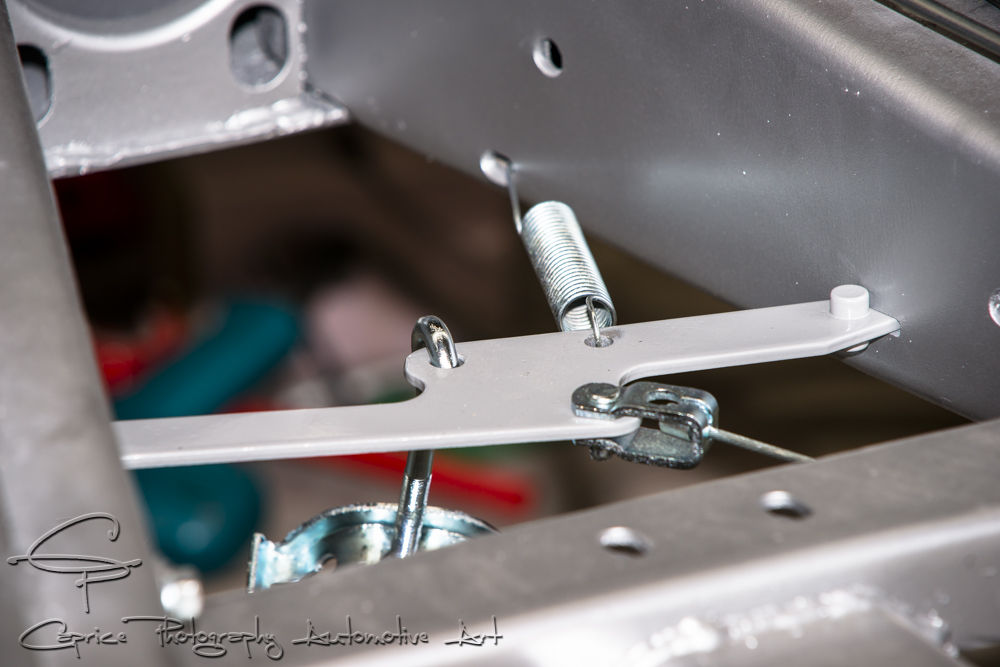
Did you install a mechanical release for the shaved doors? How and where, if you did?